- Overview
- Step 1: Import the project from Anypoint Exchange
- Step 2: Examine the different flows within the project
- Step 3: Update Shopping Cart confirmation Flow (Optional)
- Step 4: Test the application
- Summary
Lab 2: Download the complete Omni Channel project
Overview
Now that we’ve seen how APIKit helps developers import the designed REST API to enable MuleSoft flow development, we’ll download a fully implemented Omni Channel API project.
Step 1: Import the project from Anypoint Exchange
From Studio open exchange

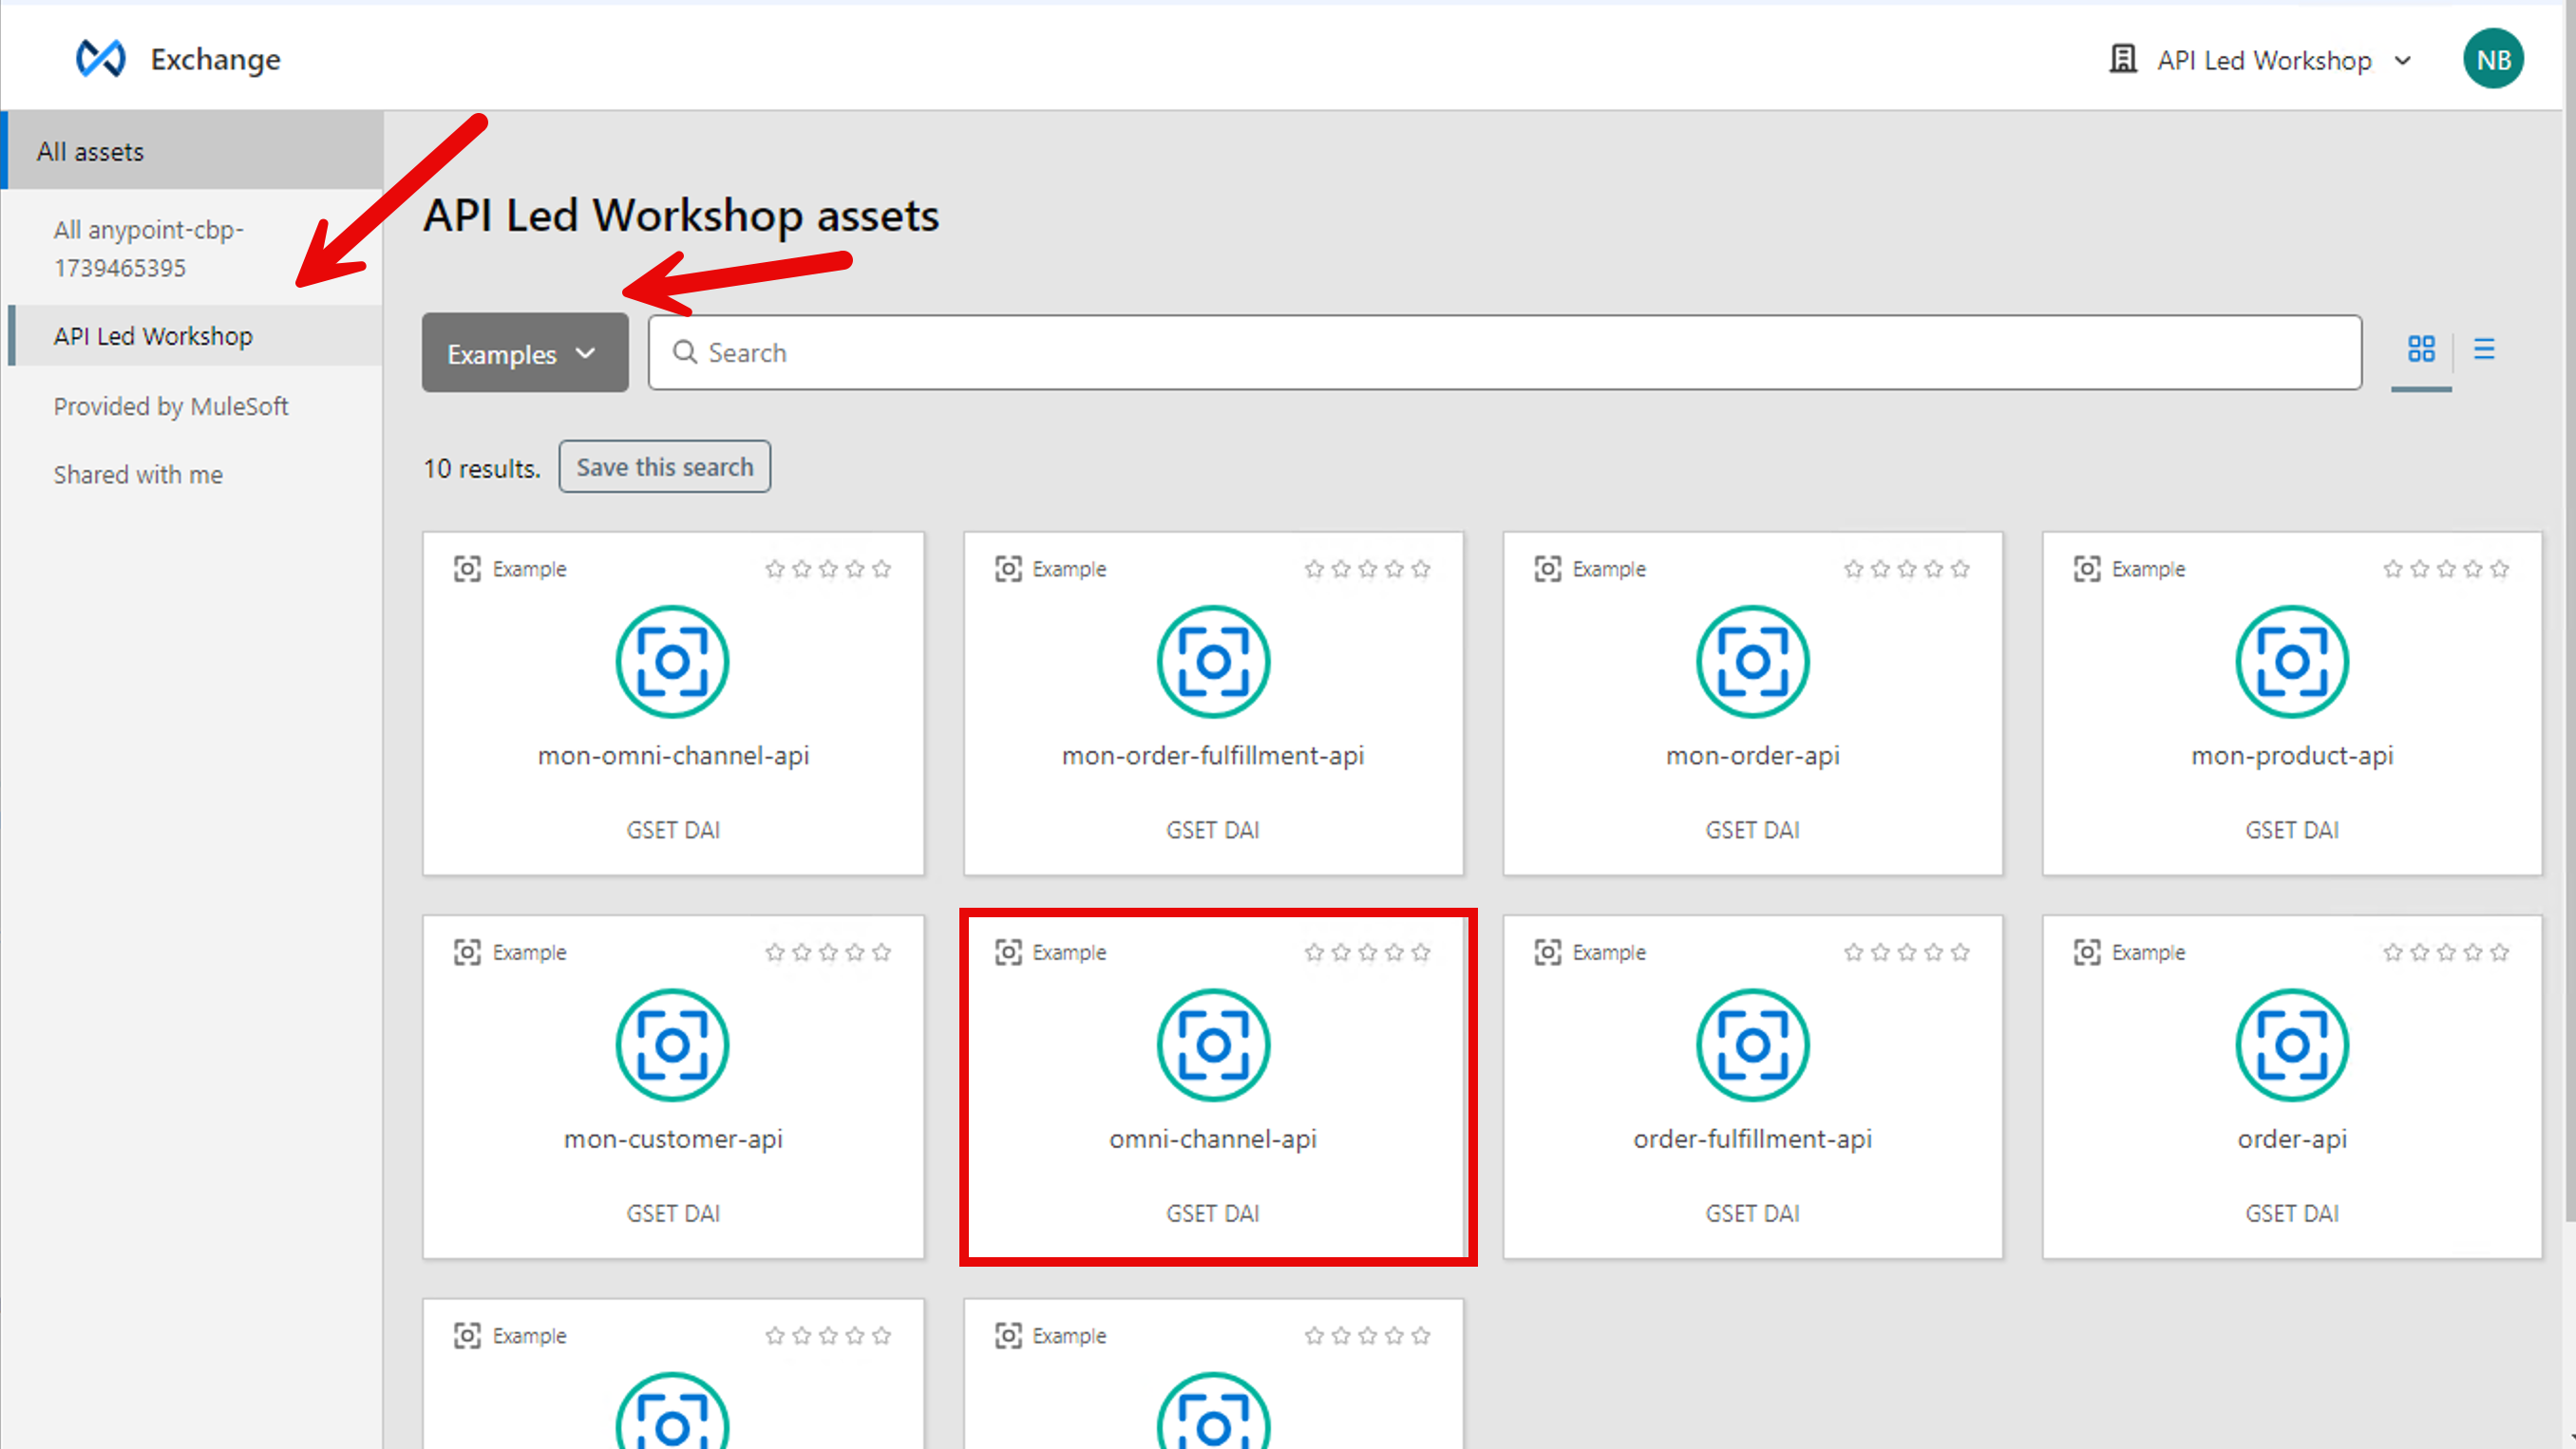
Filter by Examples
Select the sub organization
Click on the omni-channel-api
In the portal press Open
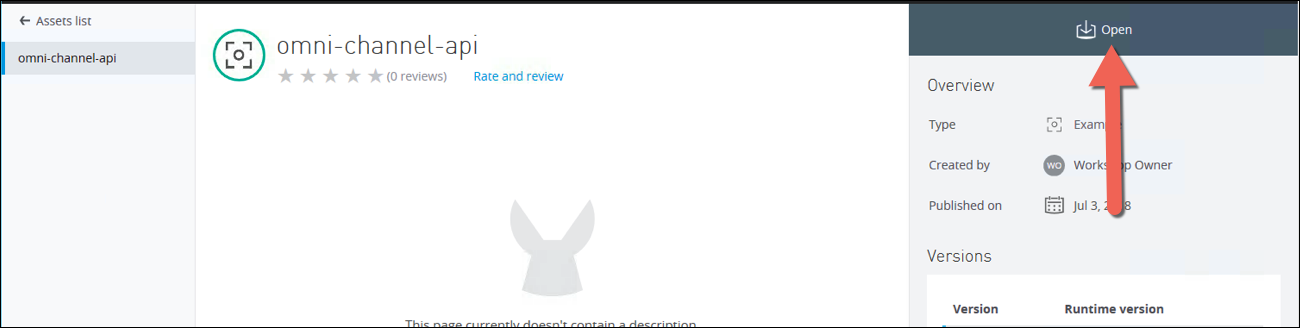
Once you open it, the project is going to be imported into Studio. (Perform any updates required)
Step 2: Examine the different flows within the project
The previous lab already introduced the APIKit, Error handling and Dataweave Transform Message processors. In the flows we’ll discuss in this section we introduce REST Connectors, Flow Control components and Scopes. So let’s first look at these in more detail.
REST Connector
A REST Connector is a component that can be used in Mule applications that’s been custom created via a specific framework. This framework allows you to create components entirely by using other existing Mule components. When an API Specification is published to exchange a REST Connector is automatically generated for it in Exchange by REST Connect Tool.
Flow Control
Flow Control Routers such as the Choice Router allows for controling the message flow within a Mule flow.
Scopes
Sometimes referred to as “wrappers”, the message processors known as Scopes appear as processing blocks when you first place them on the Message Flow canvas.
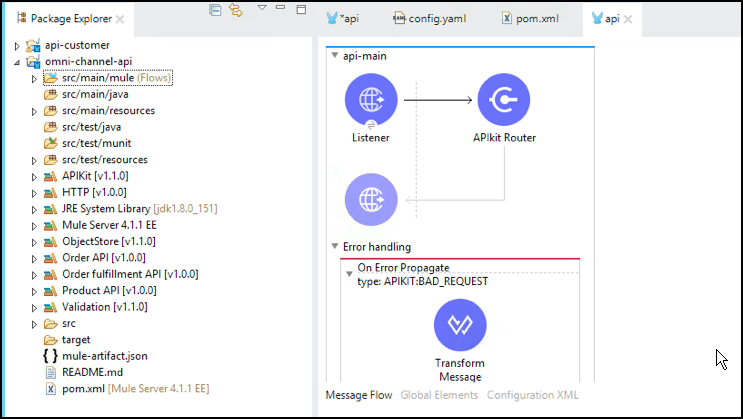
Now, lets look at all the flows within the project.
get:\orders\orders\{order_id}
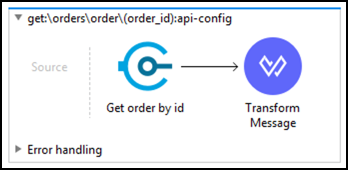
This flow calls the Process API Order to get an order from the database based on the order id
get:\orders\search
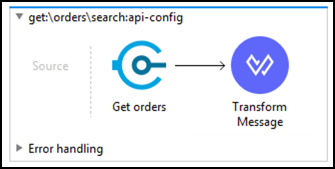
This flow calls the Process API Order to get orders from the database based on a search
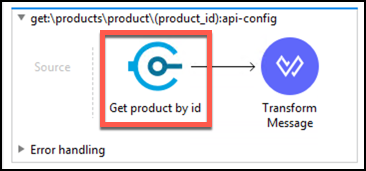
get:\products\product\{product_id}
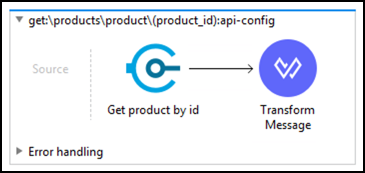
This flow calls the System API Product to get a product based on the product id
get:\products\search
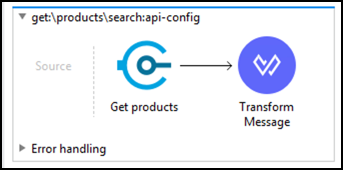
This flow returns products from the database by calling the System API Product
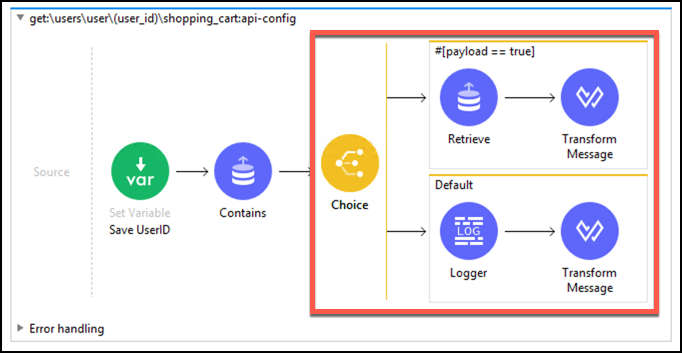
get:\users\user\{user_id}\shopping_cart
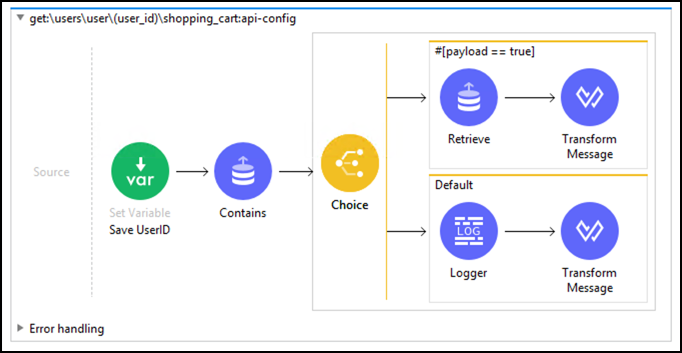
This flow returns all the items in a users shopping cart based on the user id
put:\users\user\{user_id}\shopping_cart

This flow puts an item into a users shopping cart based on the user id
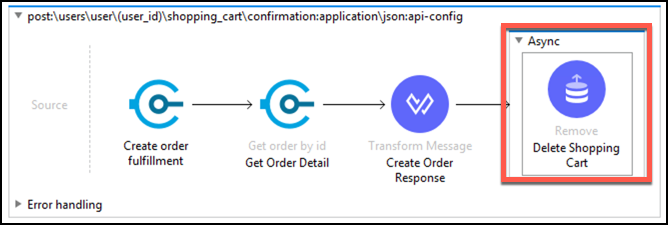
post:\users\user\{user_id}\shopping_cart\confirmation
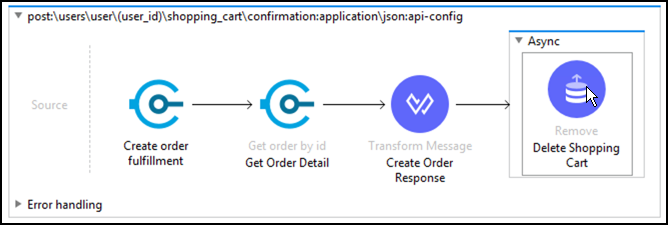
This flow confirms the items to purchase in a users shopping cart.
Step 3: Update Shopping Cart confirmation Flow (Optional)
In order to be able to confirm your order once it is placed, you might need to do some minor updates to the confirmation flow. You will be able to test this in the next lab once you have the application deployed.
In the Mule Palette on the right of your screen, search for “Set variable”.
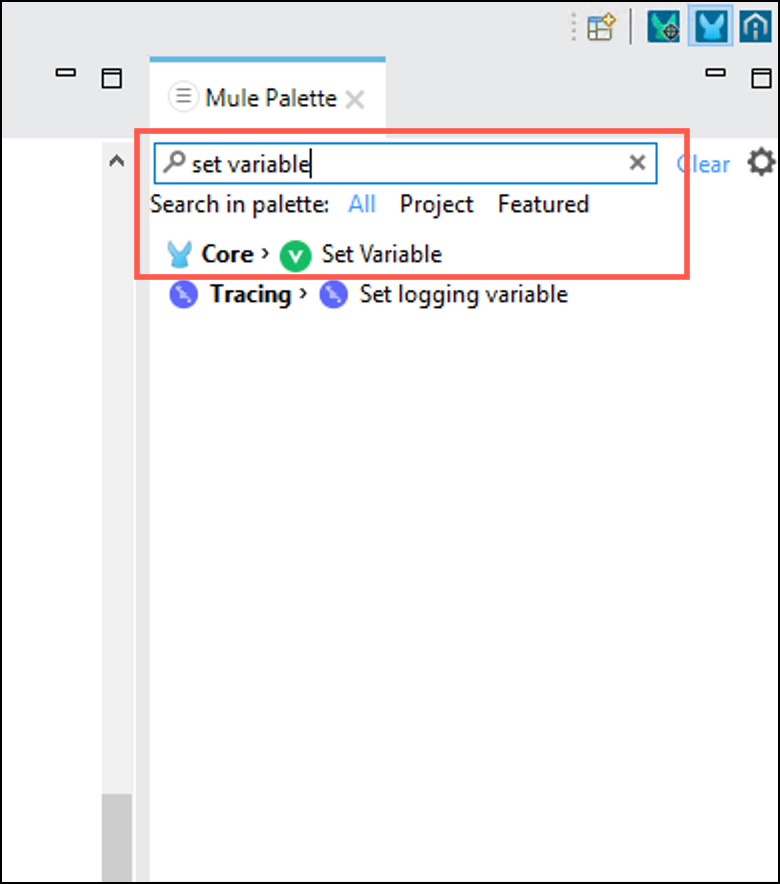
Add the Set variable at the beginning of the confirmation flow
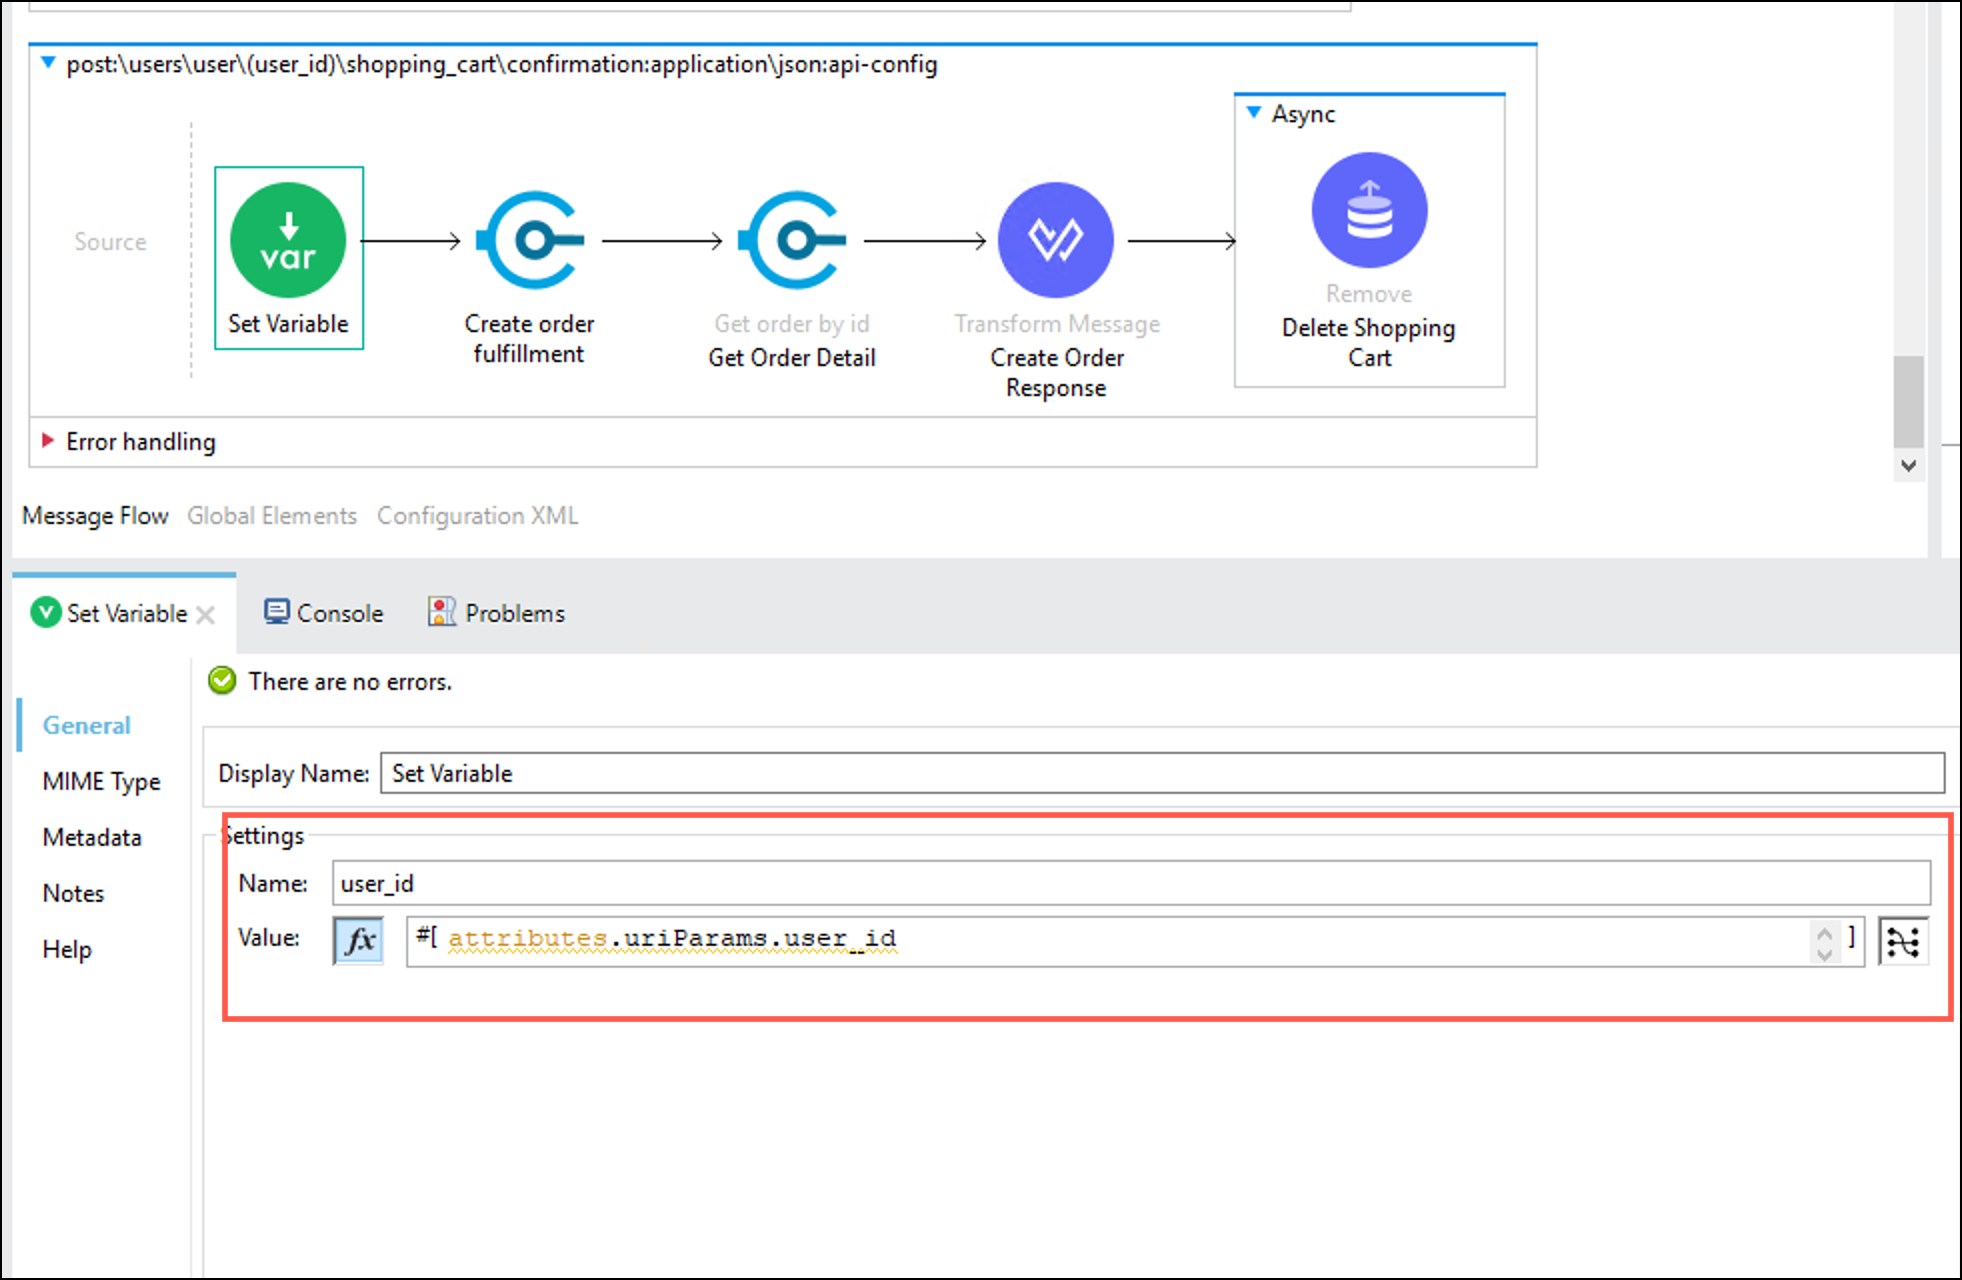
Click on the Set variable and configure it with the following:
a. Name:
user_idb. Value:
attributes.uriParams.user_id(remember to click the function button)Finally set a defaul value of 1 in the Create User Response transform. You do this by selecting the connector and updating the DataWeave expression for the quantity field. It should look like this:
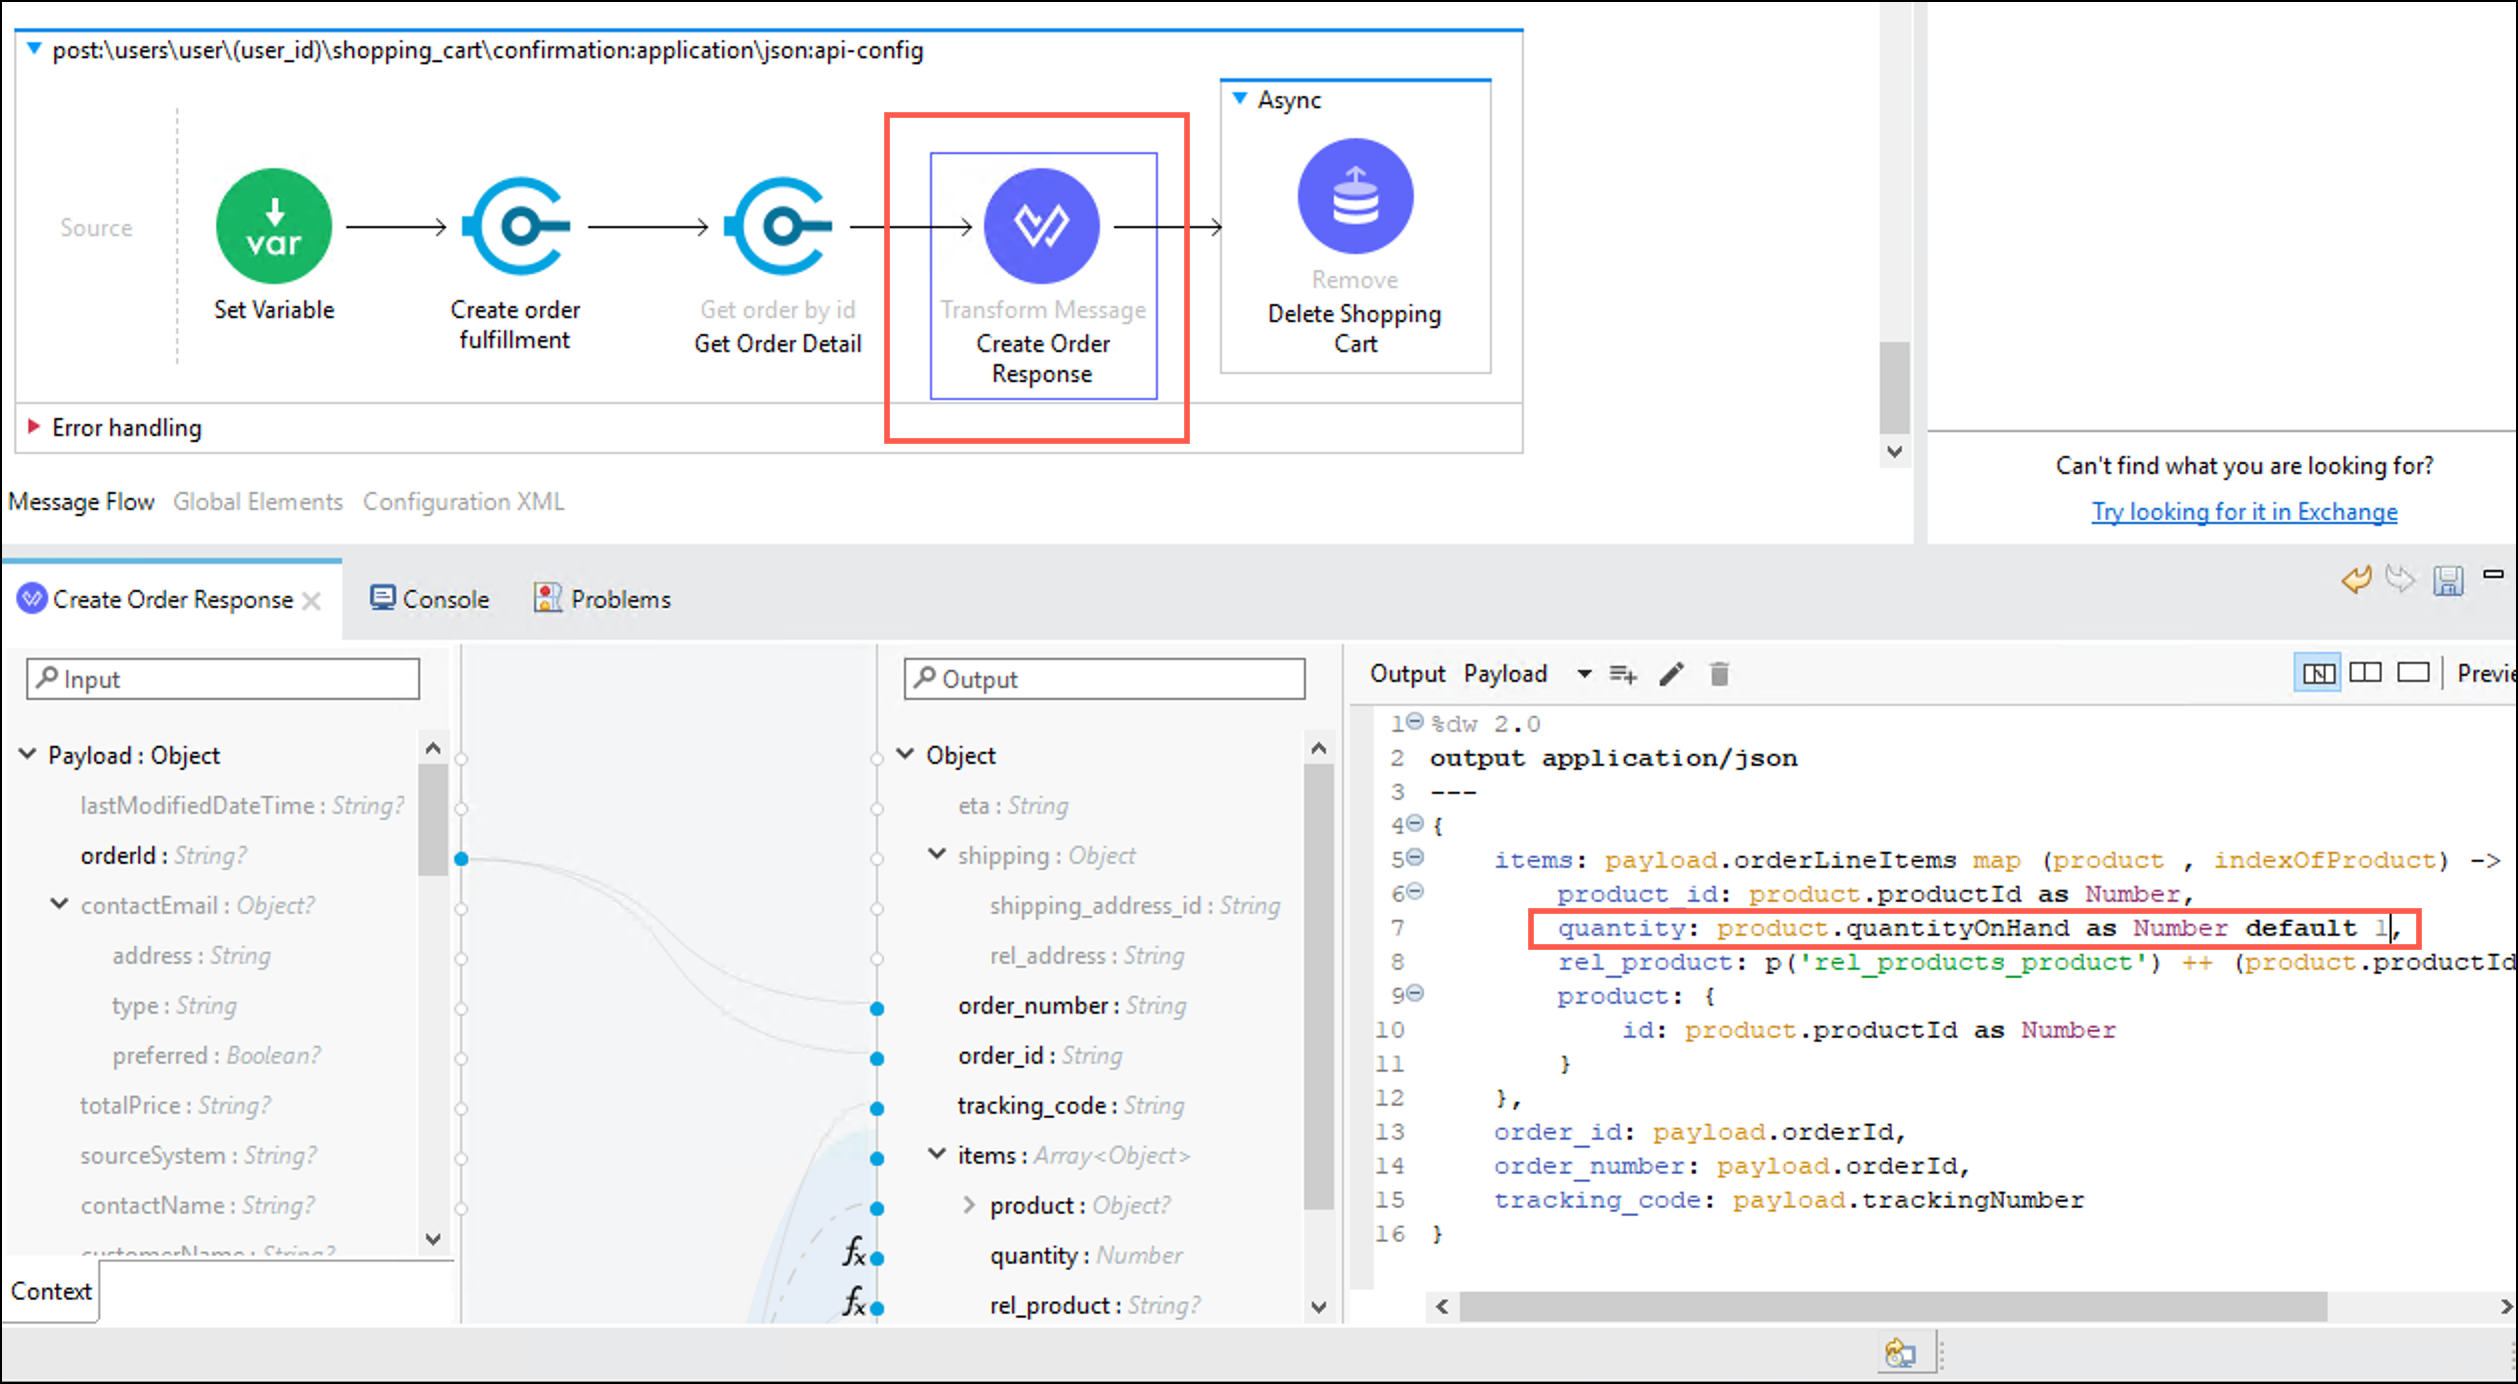
quantity: product.quantityOnHand as Number default 1,
Once you have done this step you will be able to complete the order placed in the next lab.
Save all your changes and proceed to the next step.
Step 4: Test the application
To test the API, let’s run it within Studio first.
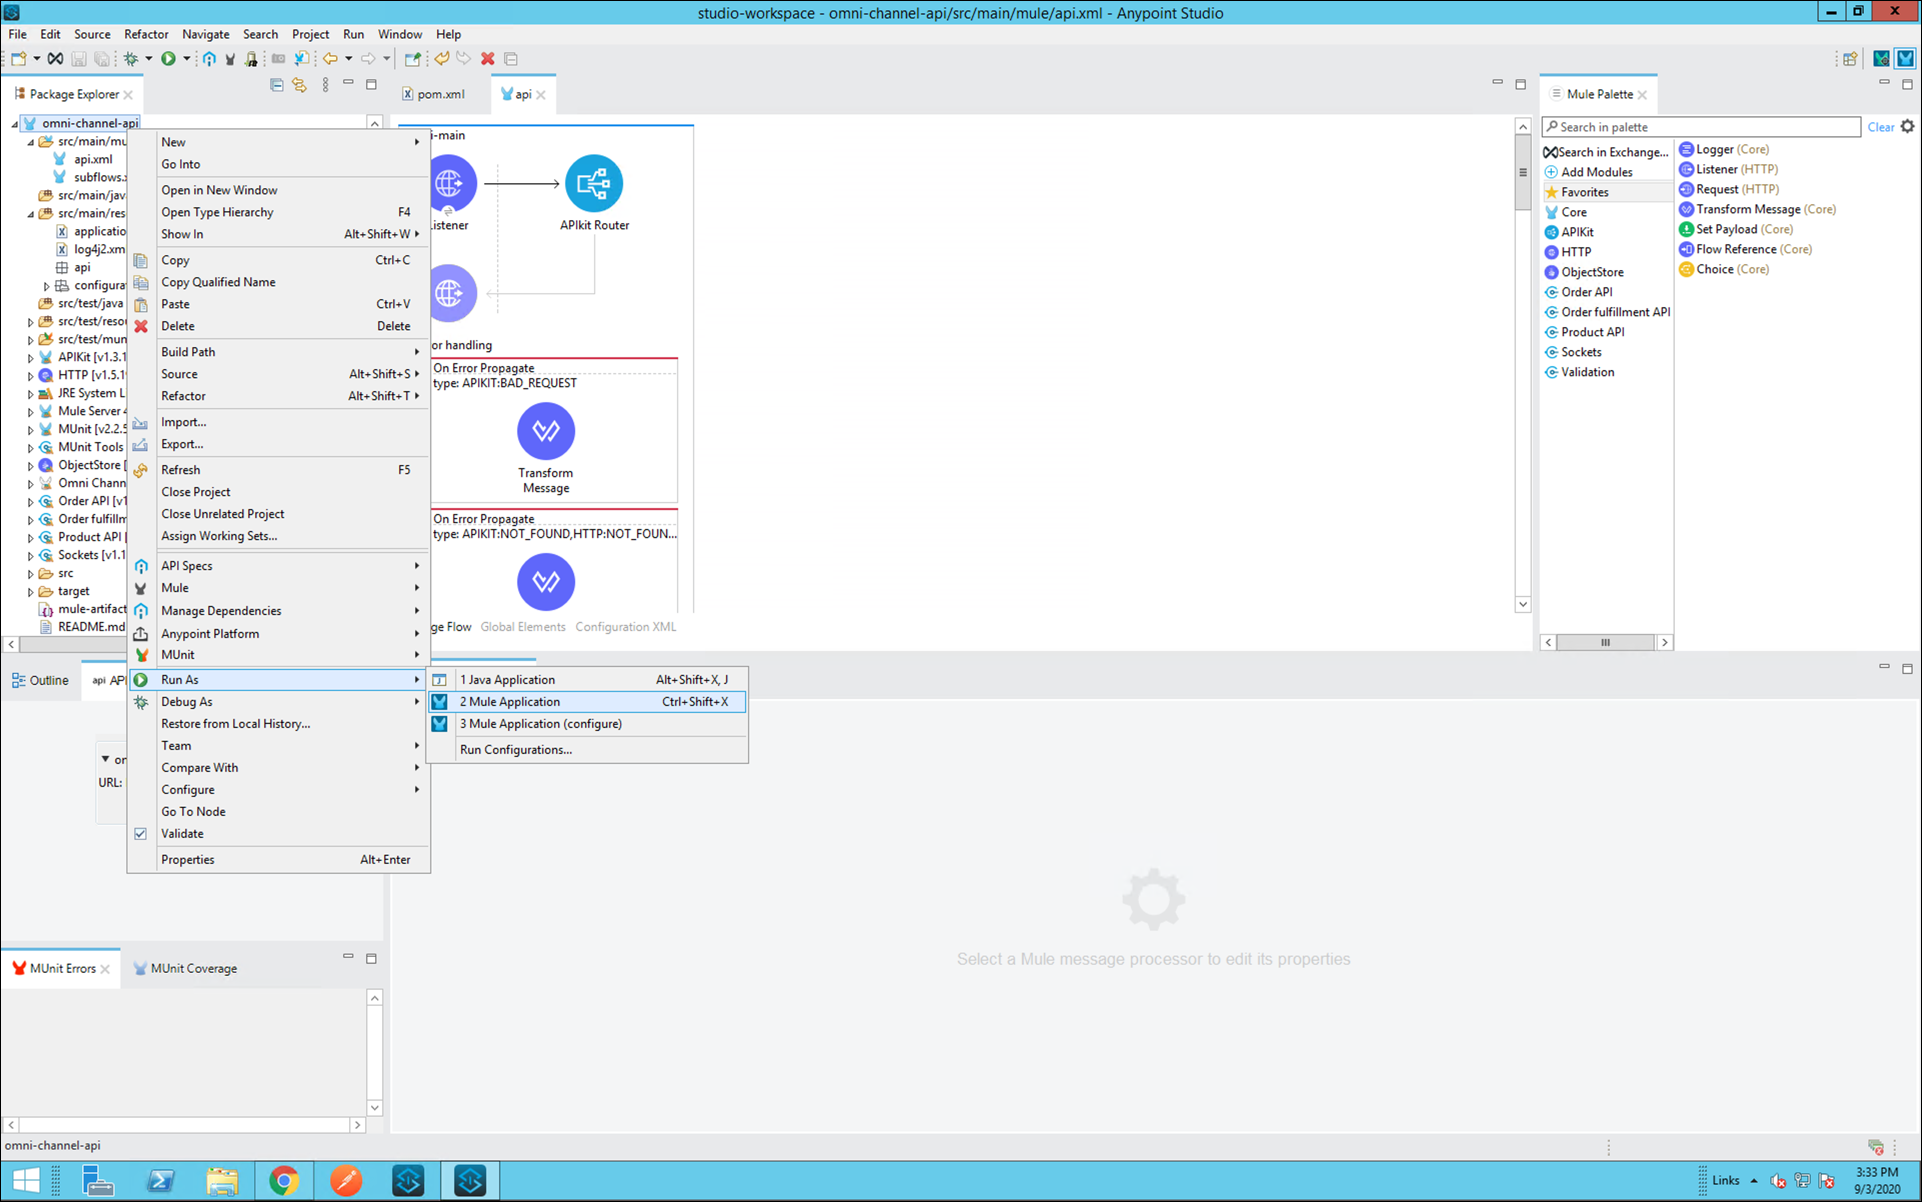
- Right click the application.
Select Run As > Mule Application.
The application will start running, and the console will show the Mule Runtime logs
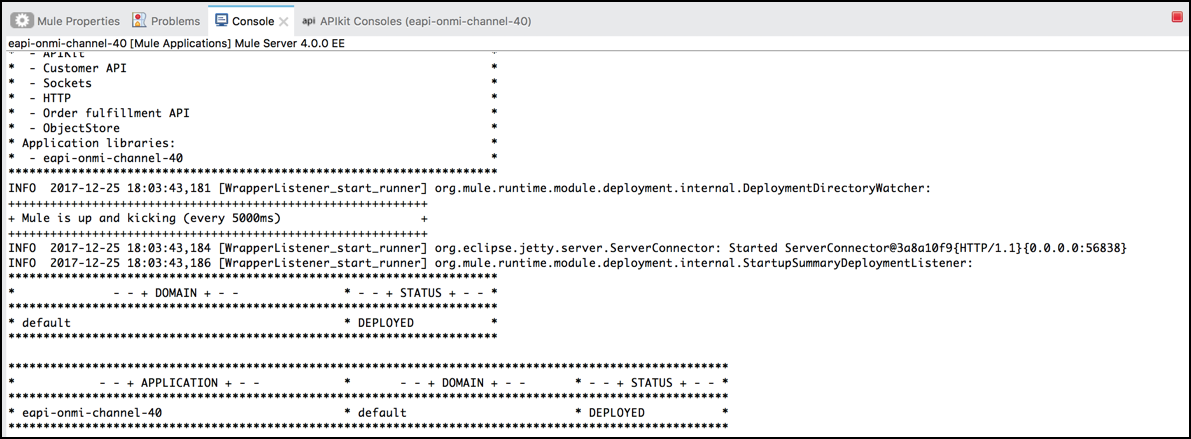
Anypoint Studio deployed this application to an embedded Mule Runtime. There is no need to deploy to a separate Mule server environment. The developer will be able to develop and test the application locally until it’s ready to be deployed to a shared development or QA environment.
Test the application using the console. Click the Open Console on the APIkit Console tab.

A browser window opens at: http://localhost:8081/console/.
Click open the /products/search resource on the left and click GET.
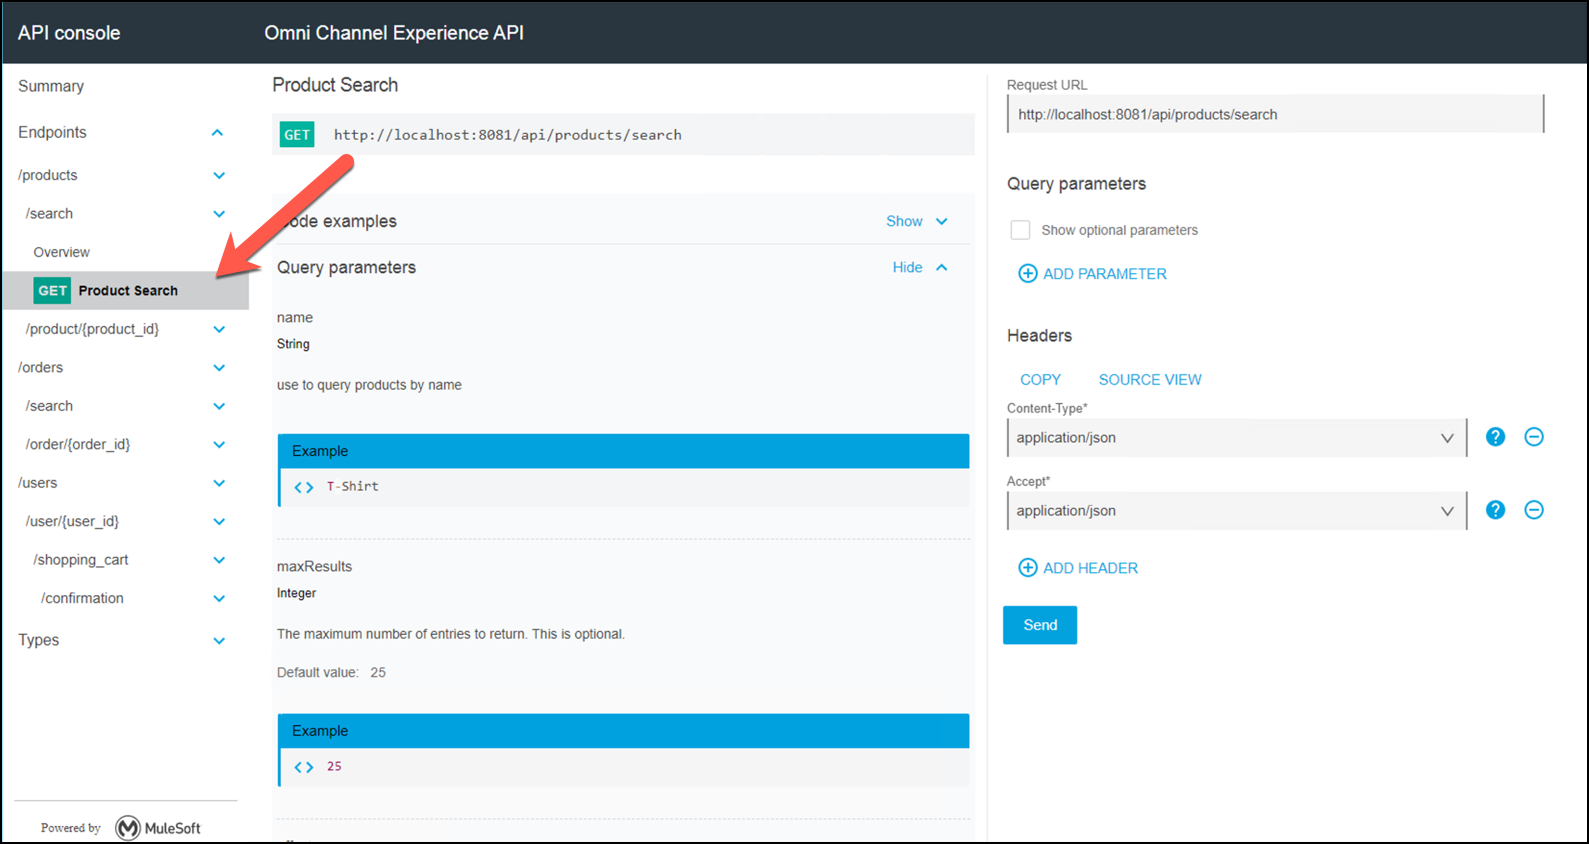
Then tick the Show optional parameters and fill them in as below and click SEND.
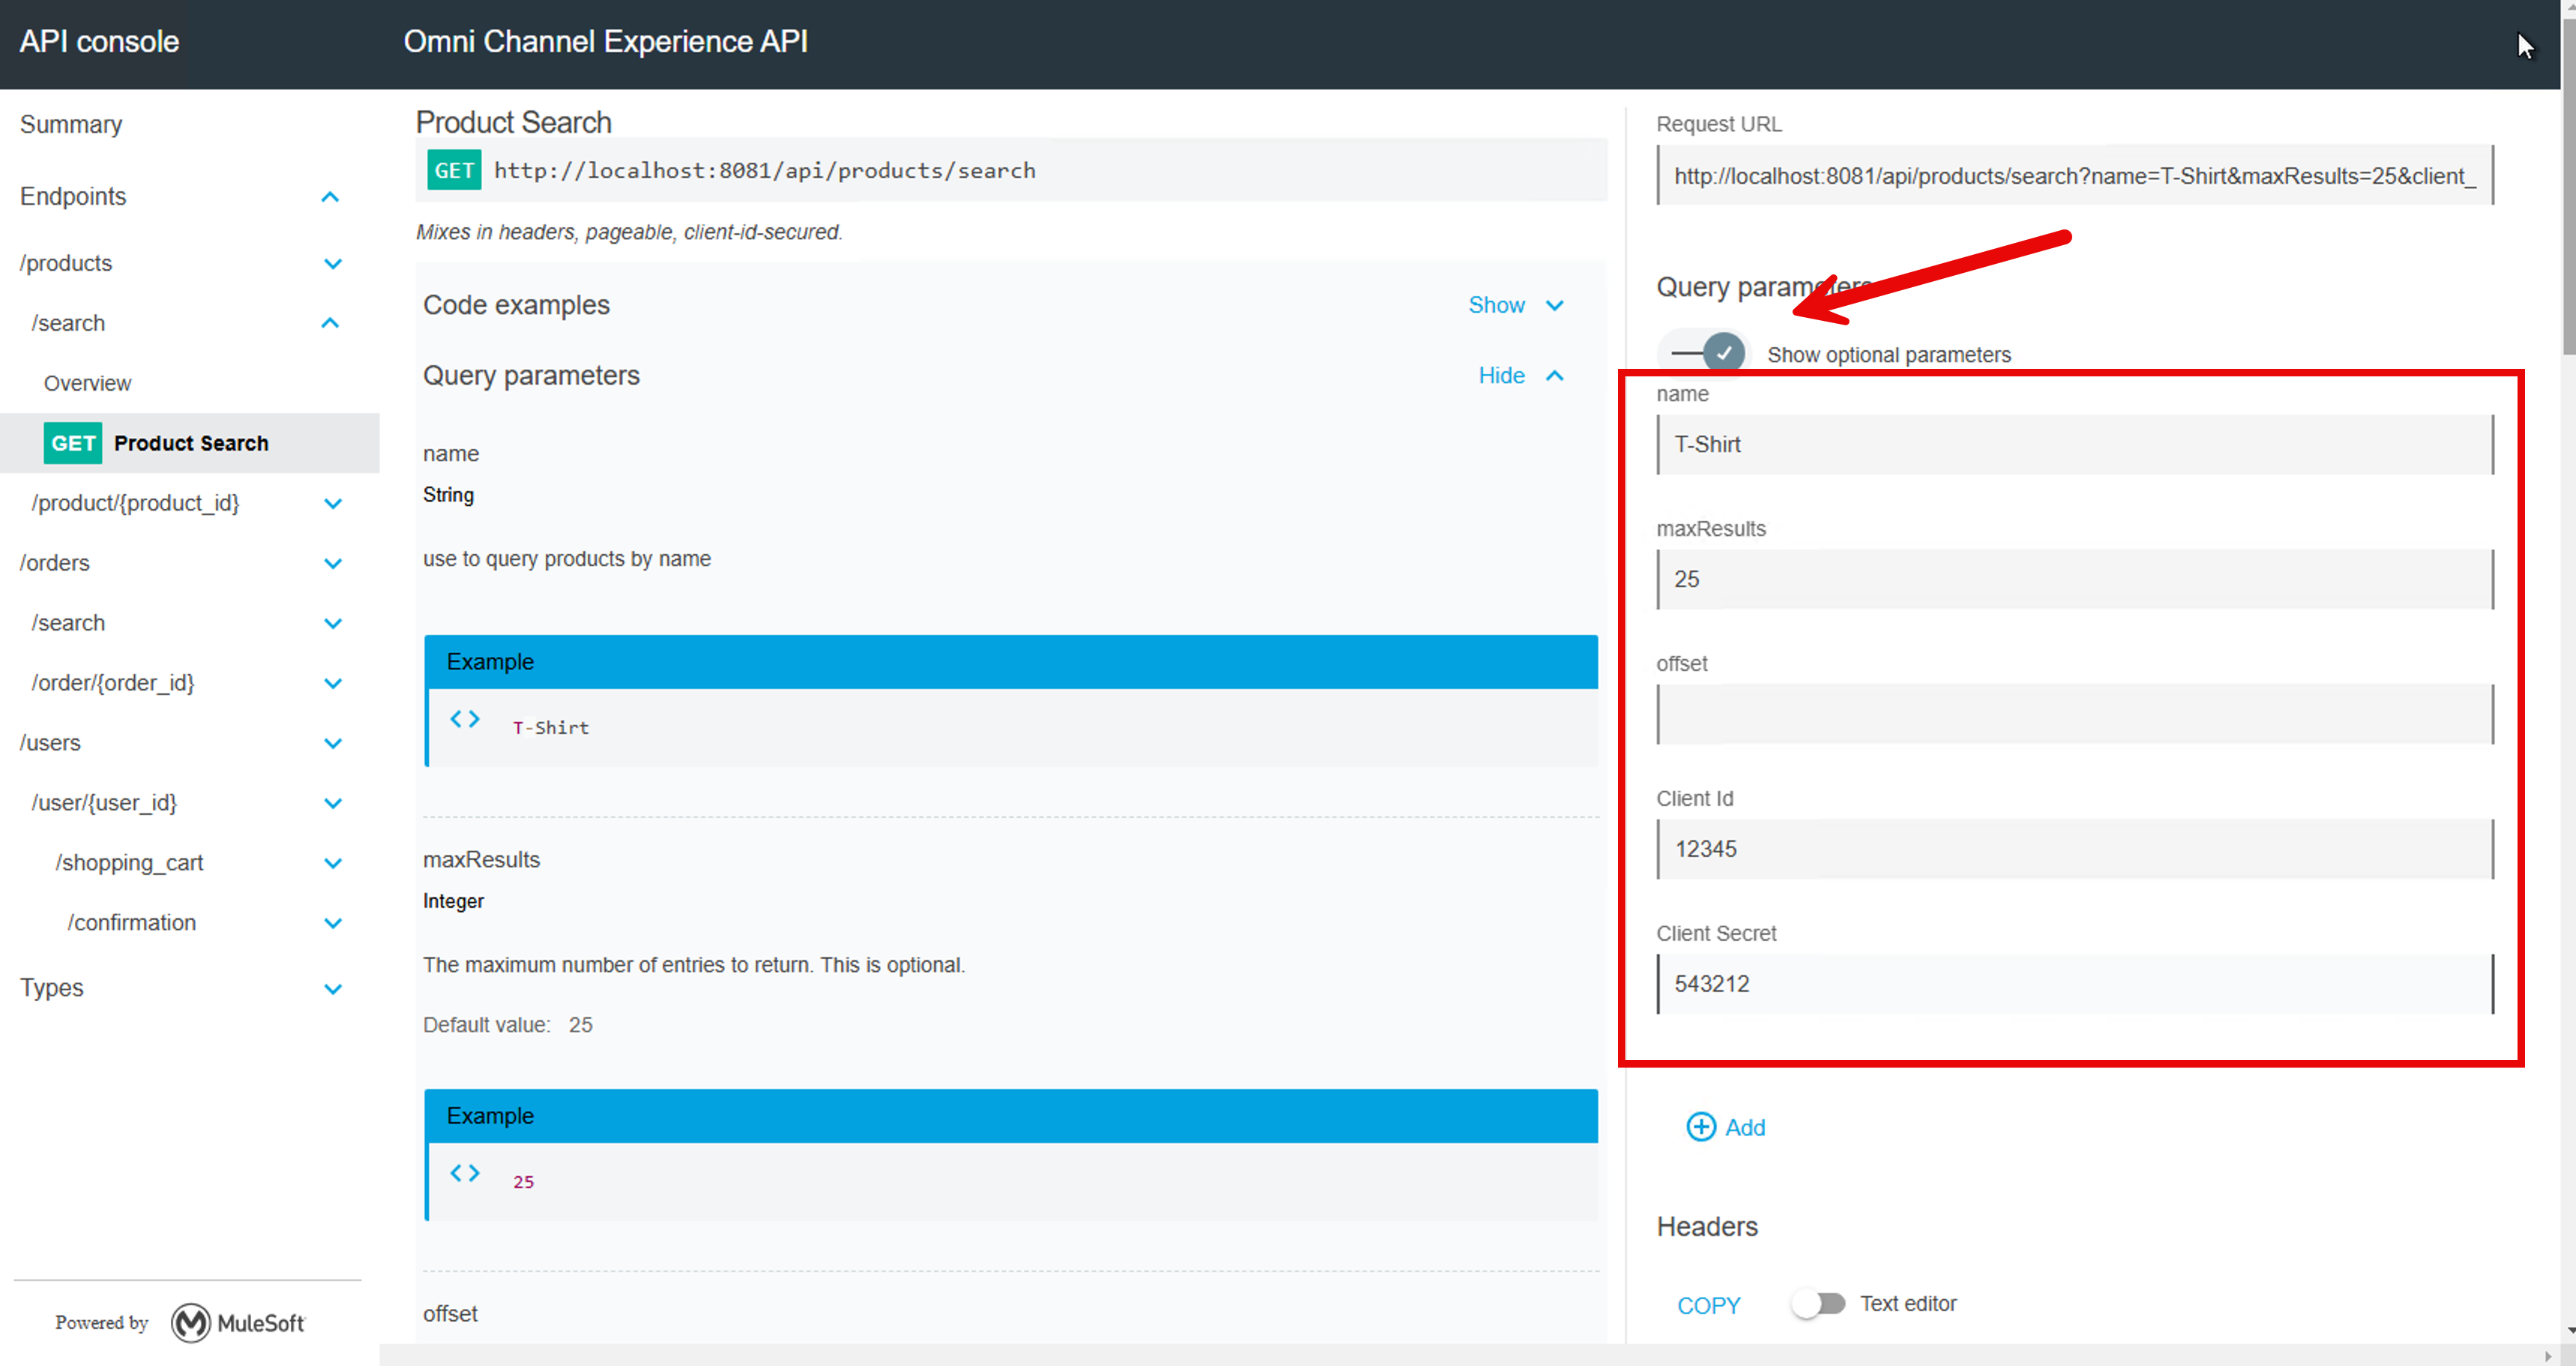
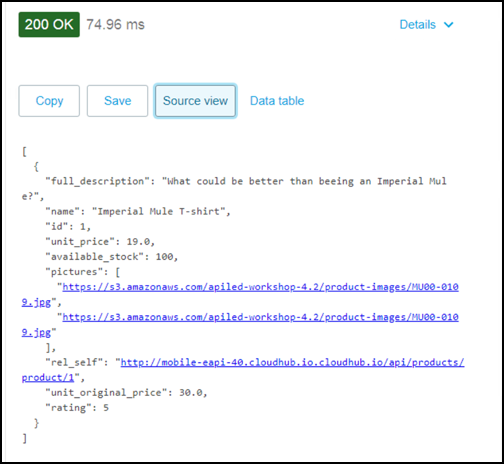
Unlike Lab 1, this project is a complete solution and is making calls to System and Process REST APIs. The response you see in the Console is coming from other sources.
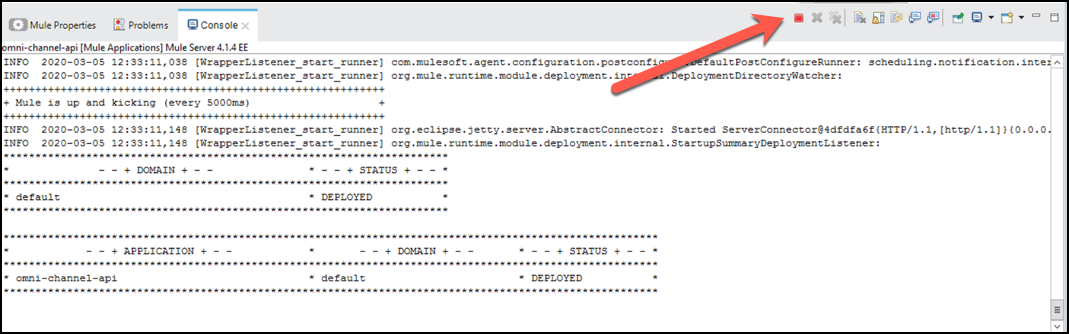
Let’s go ahead and stop the application to get ready for the next lab.
- Go to the console tab and press the red squared button to stop the Mule runtime server.
Summary
In this lab, we went trough all these steps:
- Step 1: Import the project from Anypoint Exchange
- Step 2: Examine the different flows within the project
- Step 4: Test the application
This lab shows how quick and easy it is to enable your teams to get up and running quickly with pre-built project templates.
- See the REST Connectors documentation for more information.
- See the Flow Control Routers documentation for more information.
- See the Scopes documentation for more information.
Congratulations! You have completed Lab 2.
You can now proceed to Lab 3