Lab 1: Import the RAML Definition into Studio
Overview
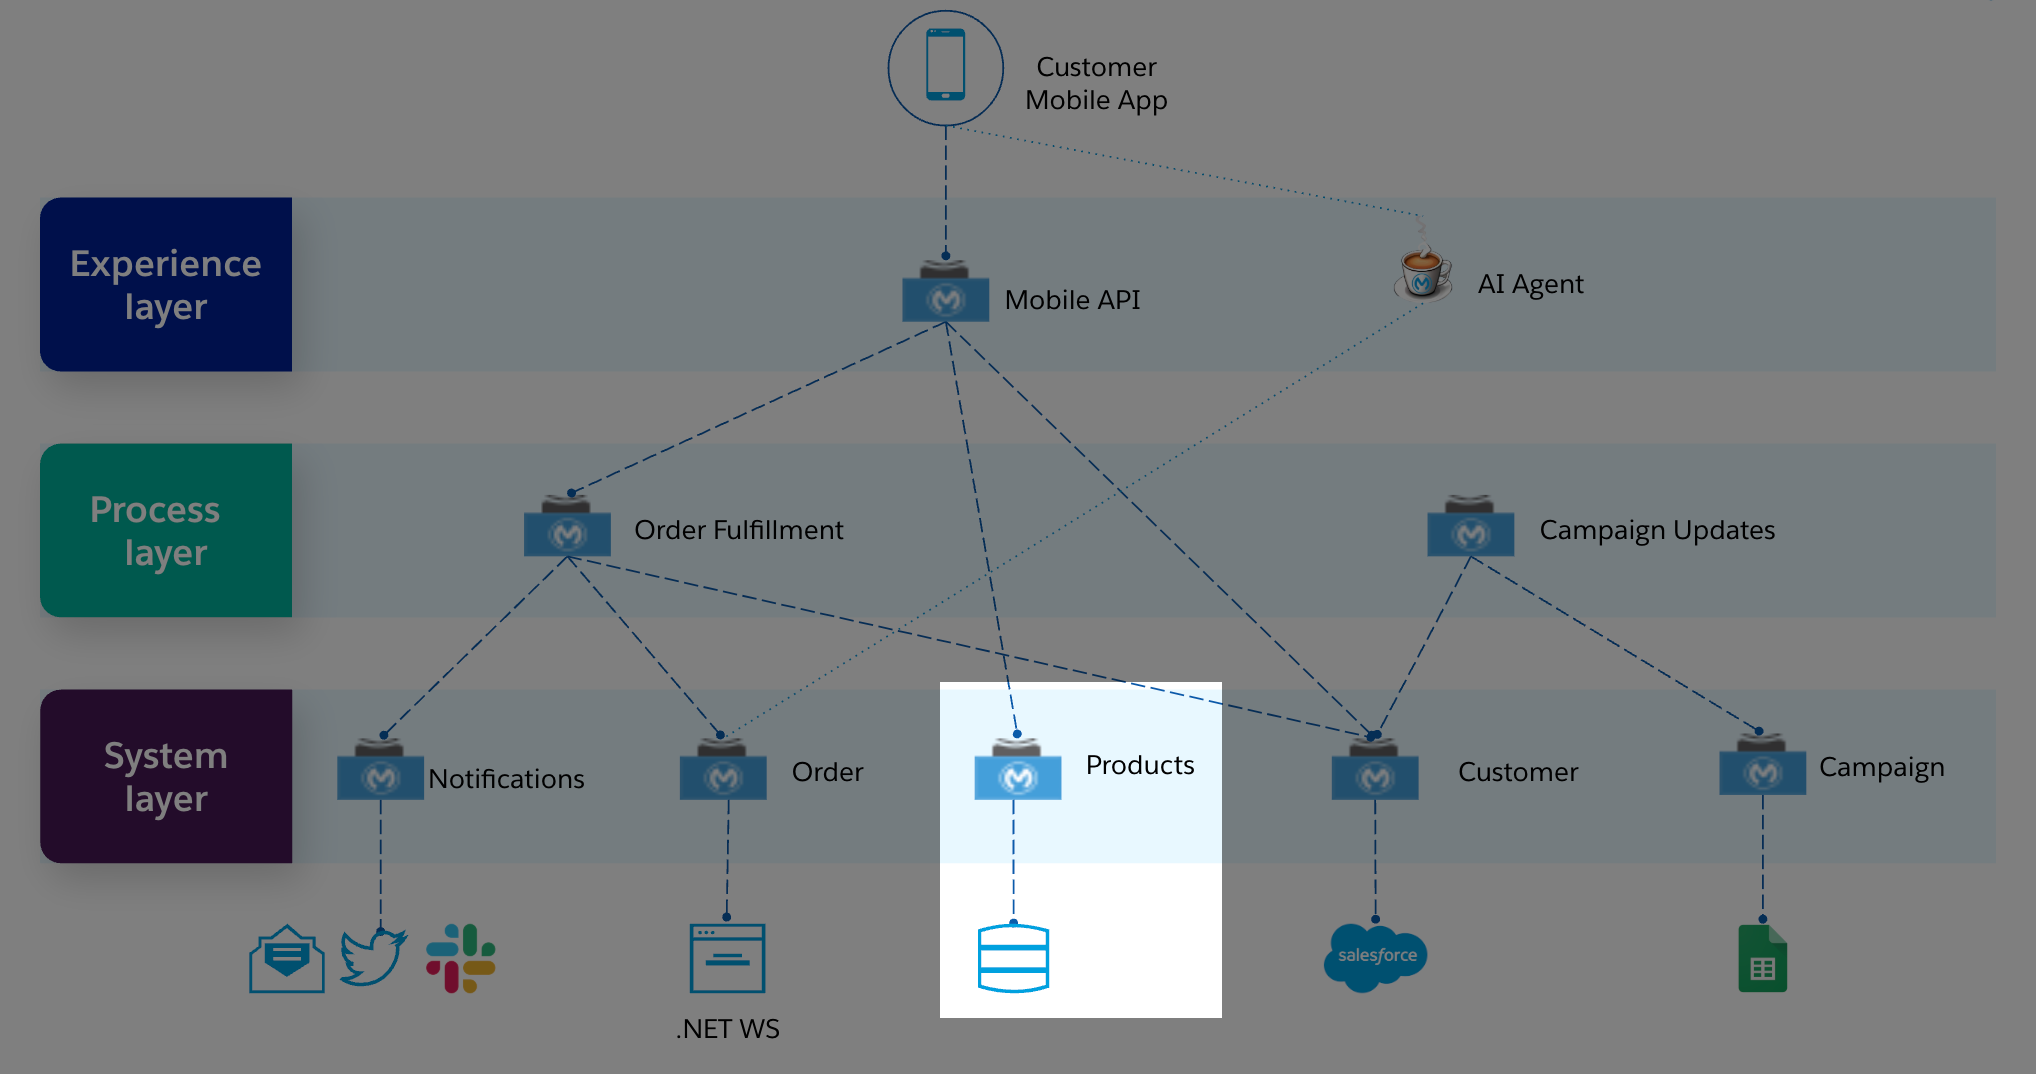
In this lab, we will create the skeleton implementation of our Product API that will process requests to a MySQL Database. You will use Anypoint Studio to create a Mule application where there will be one flow for each method of each resource (i.e. GET products). Additionally you will use APIKit (as part of your Mule application) to process REST requests, transform them to messages to be handled and processed by each flow.
Step 1: Create a new Mule Project and import RAML Definition
If it’s not already opened, start Anypoint Studio from the desktop icon and select the same workspace you’ve been working (example: C:\workspaces\myworkspace).
From Anypoint Studio’s menu, select File > New > Mule Project to create a New Mule project. A Window will pop-up to define the details of this new application.
Give the project the name product-api
Select the 4.7.2 EE (or latest version available).
Under Import a published API we are going to import the RAML Spec from Exchange. Click on
 and select from Exchange
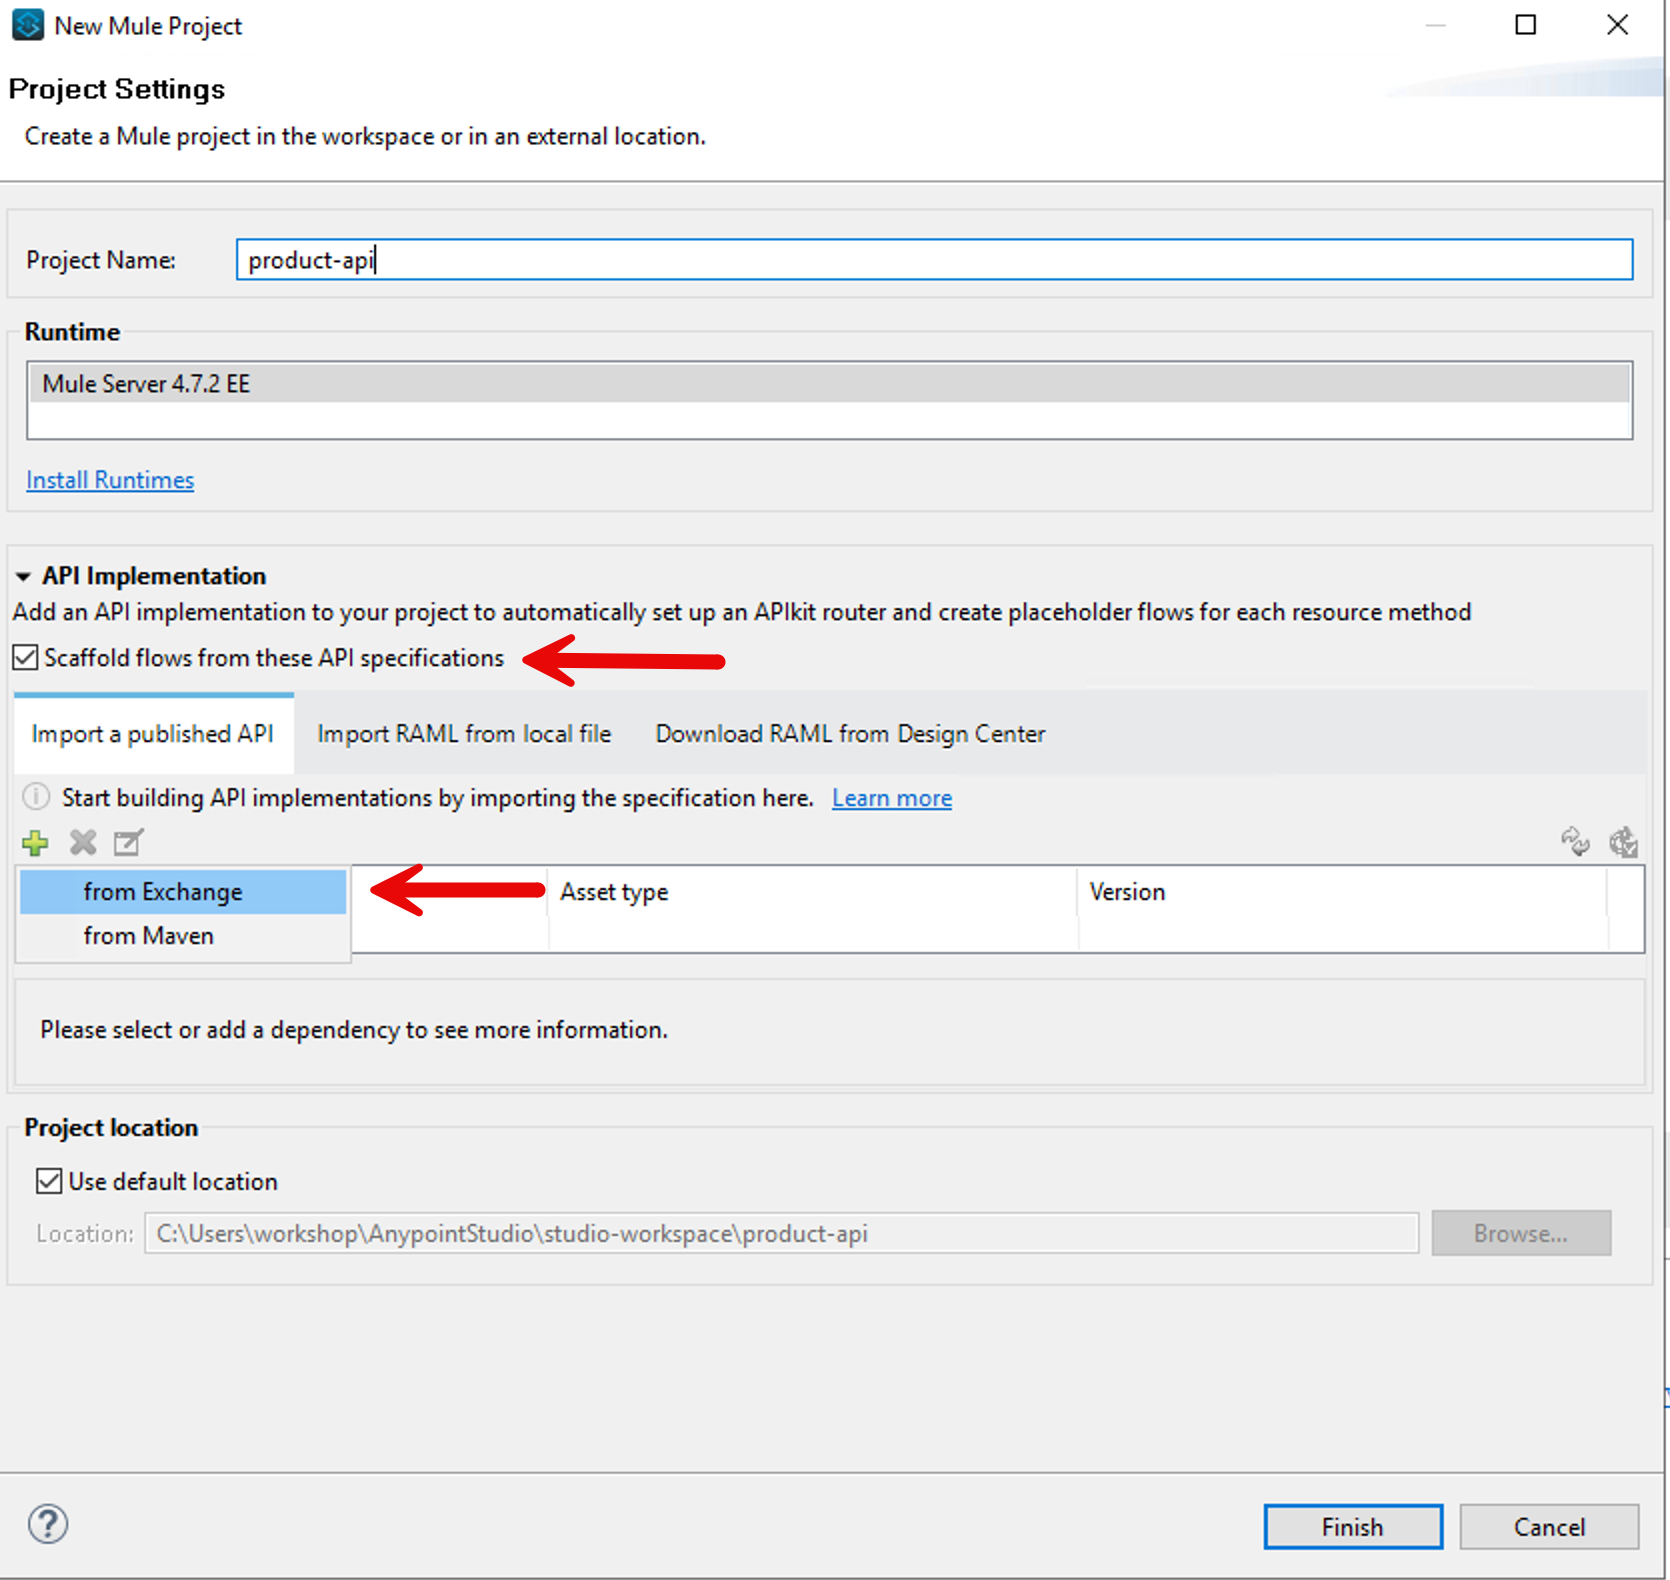
Once you clicked there, you will see a new window. If you don’t see any username. You need to login to the Anypoiint Platform. So click on the Add Account button. You will see a list with all the APIs
Search for and select the Product API whose Publisher is the name of the workshop business group, then press Add.
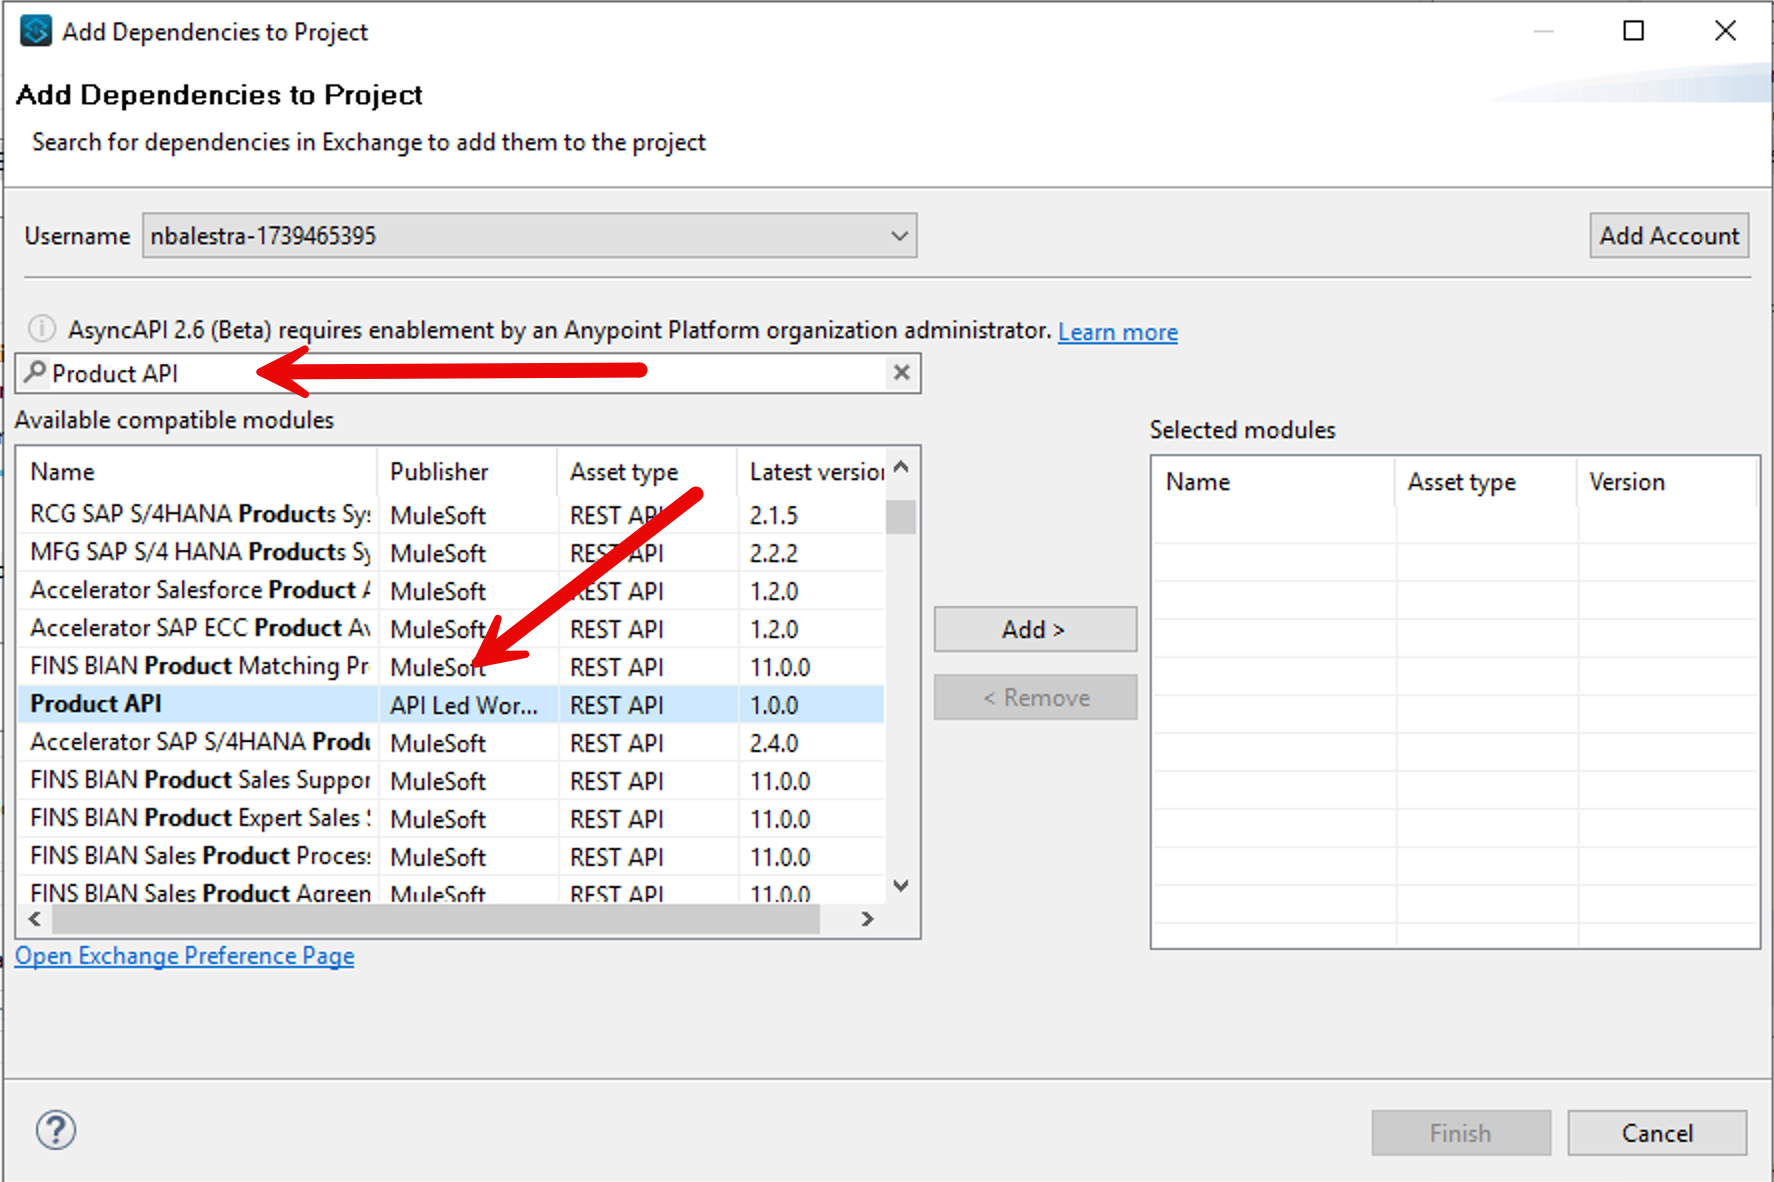
Be sure when you select the Product API. Validate that the Publisher has the name of the workshop business group.
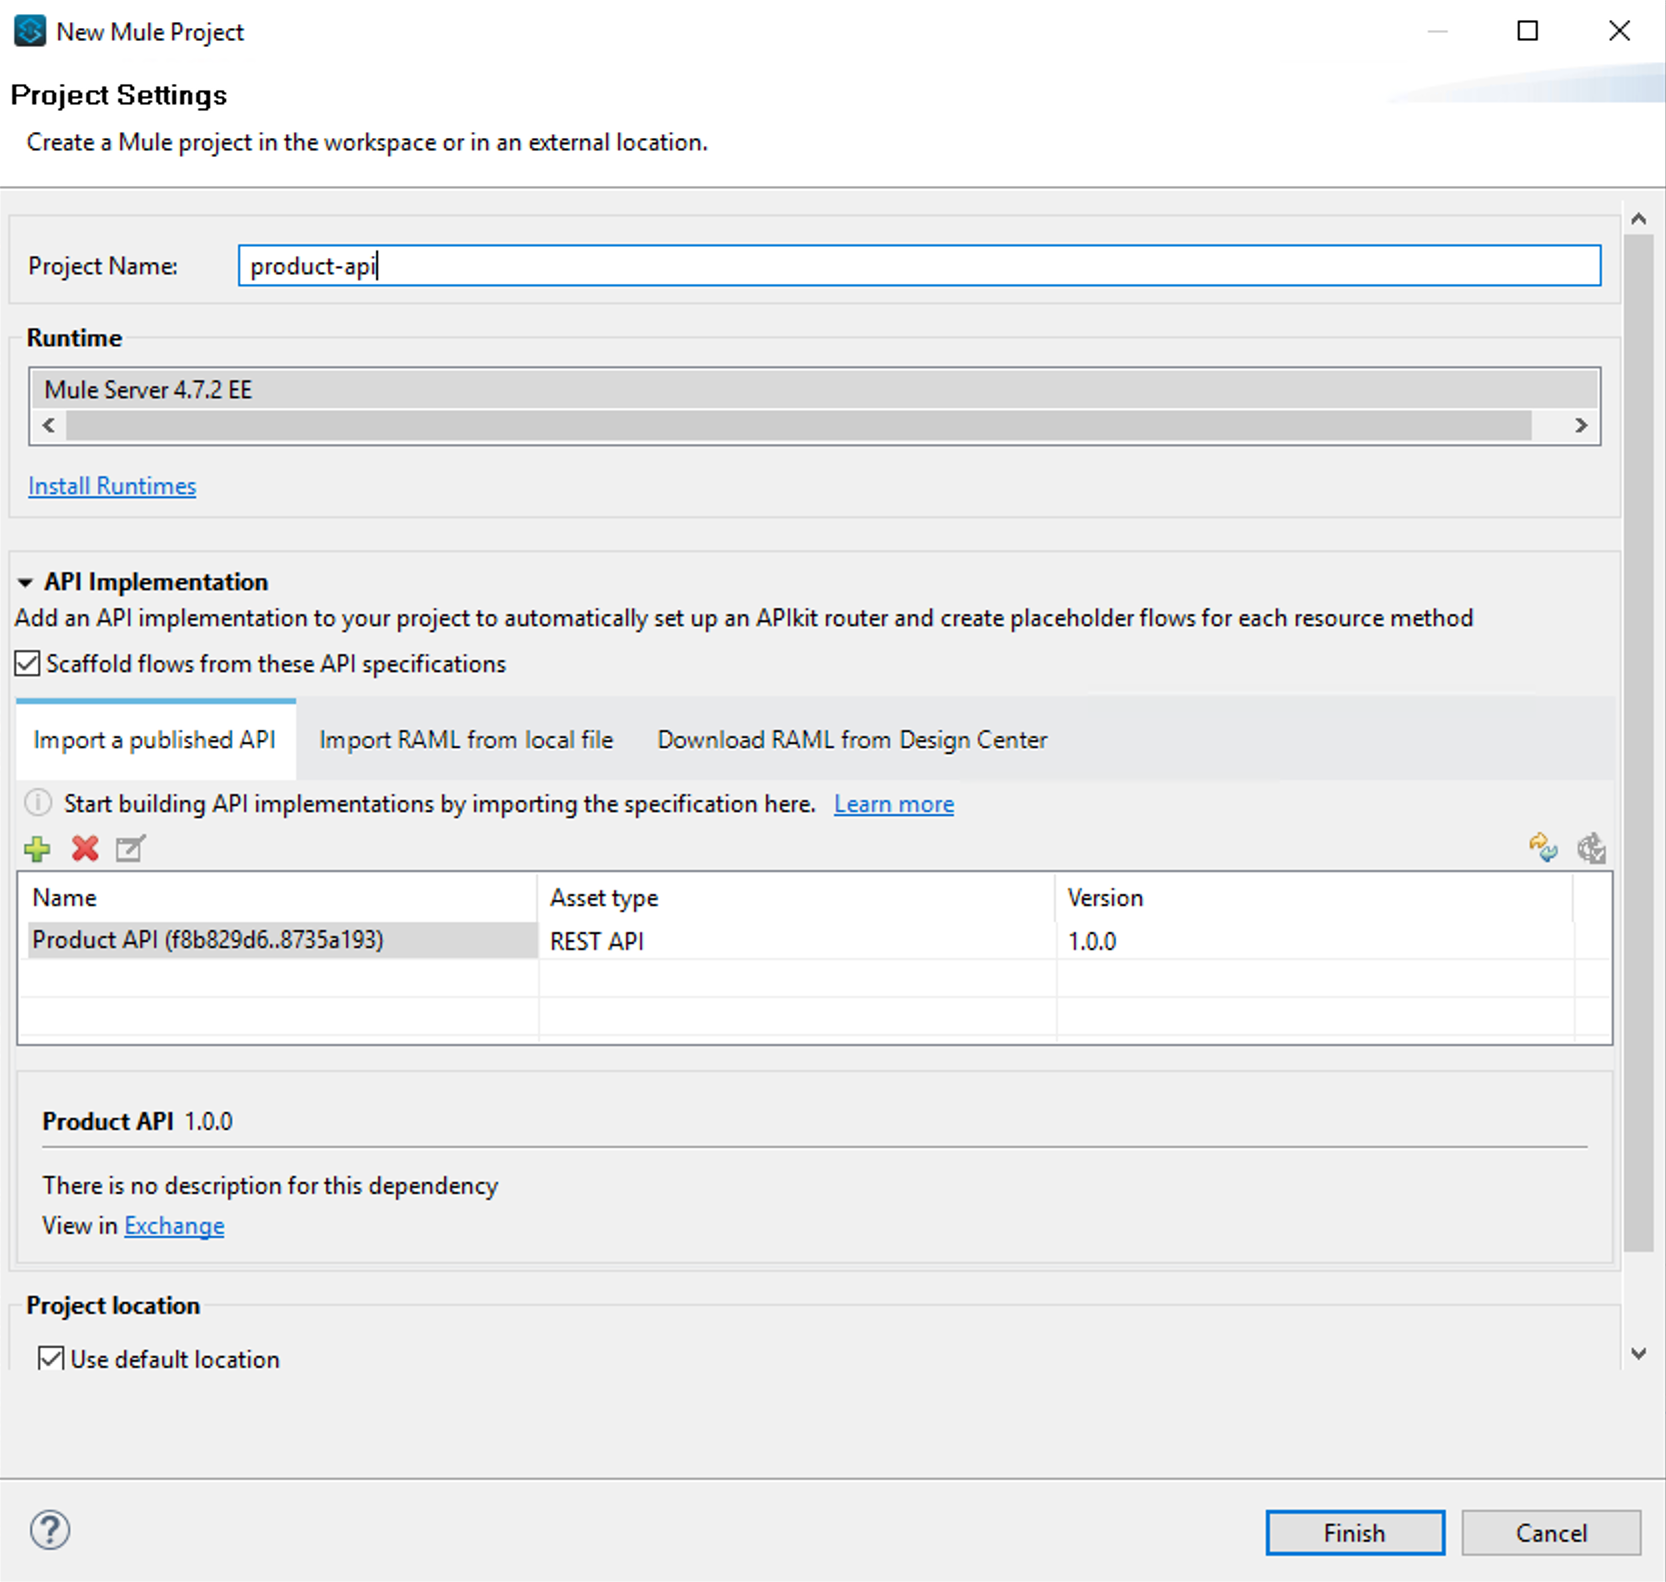
Press Finish
Check everything is fine. Be sure that the Scaffold flows from these API Specifications is checked and press Finish again.
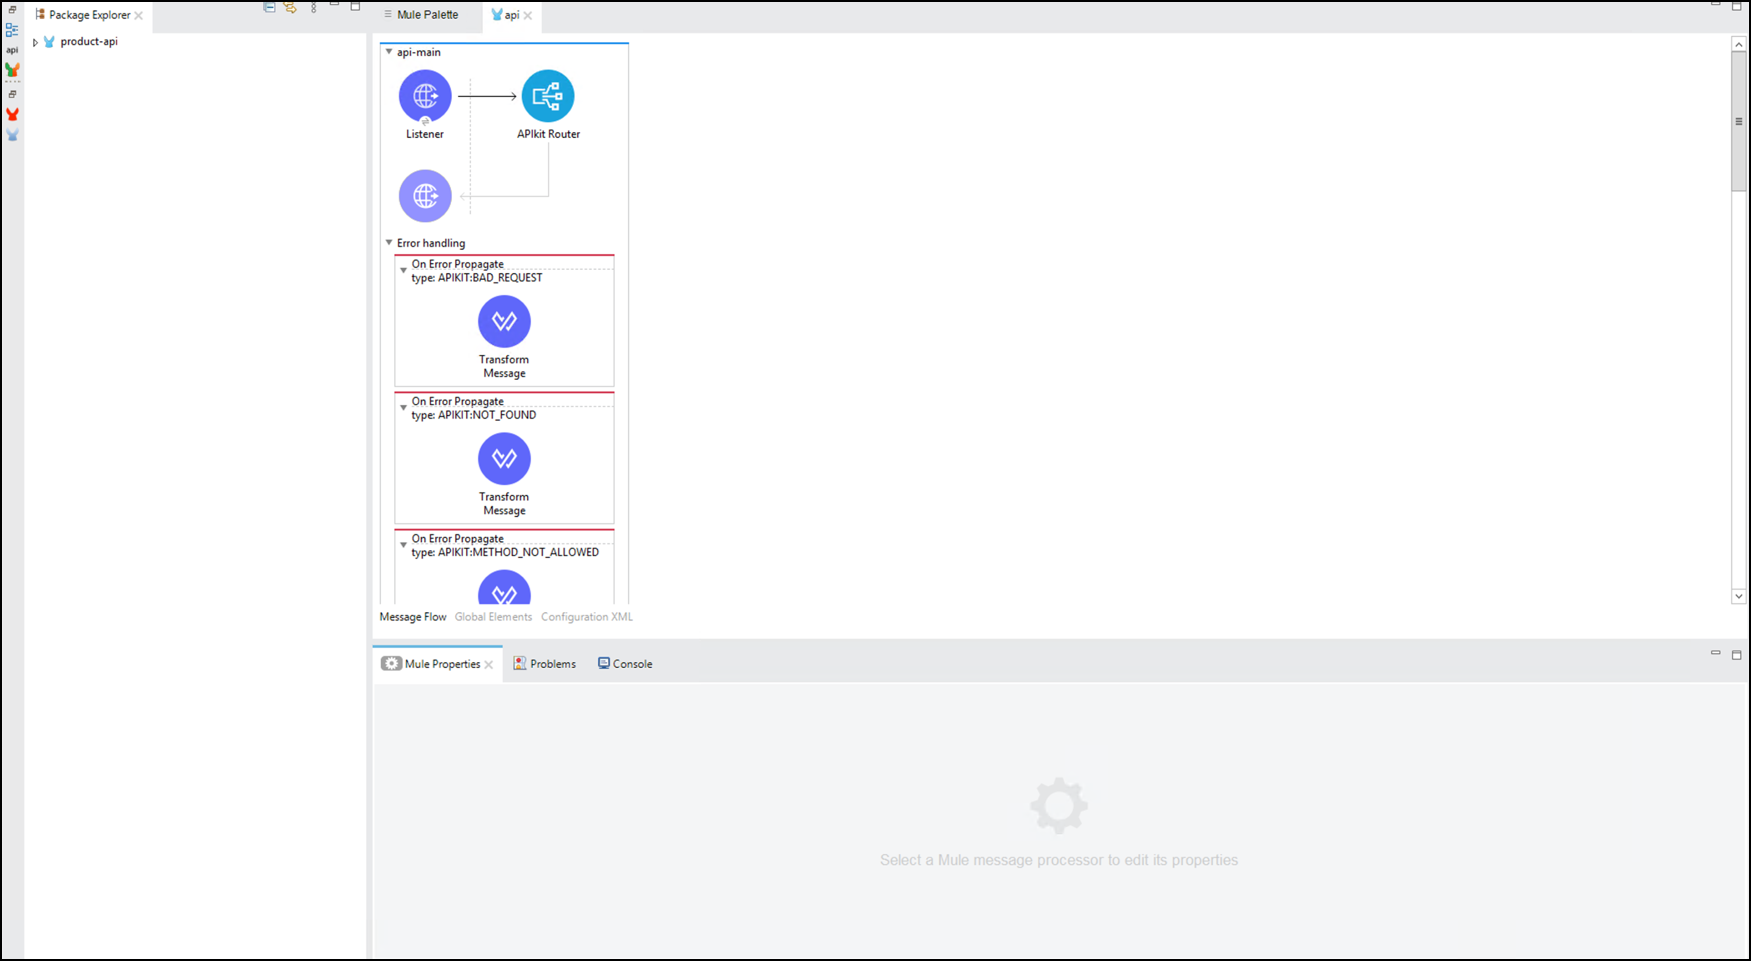
APIkit creates your new Anypoint Studio project with a generated implementation based on your API specification. The generated configuration implements the inbound HTTP listener, as well as, all the resources, request/response data type metadata, among other things.
Step2: Run the API
To check the API, let’s run it within Studio first.
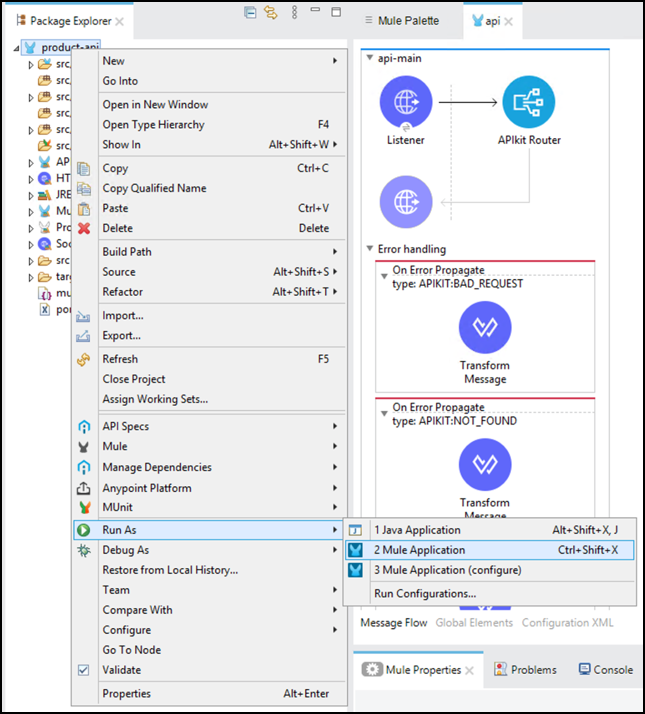
Right click on product-api in the Package Explorer view. Select Run As > Mule Application.
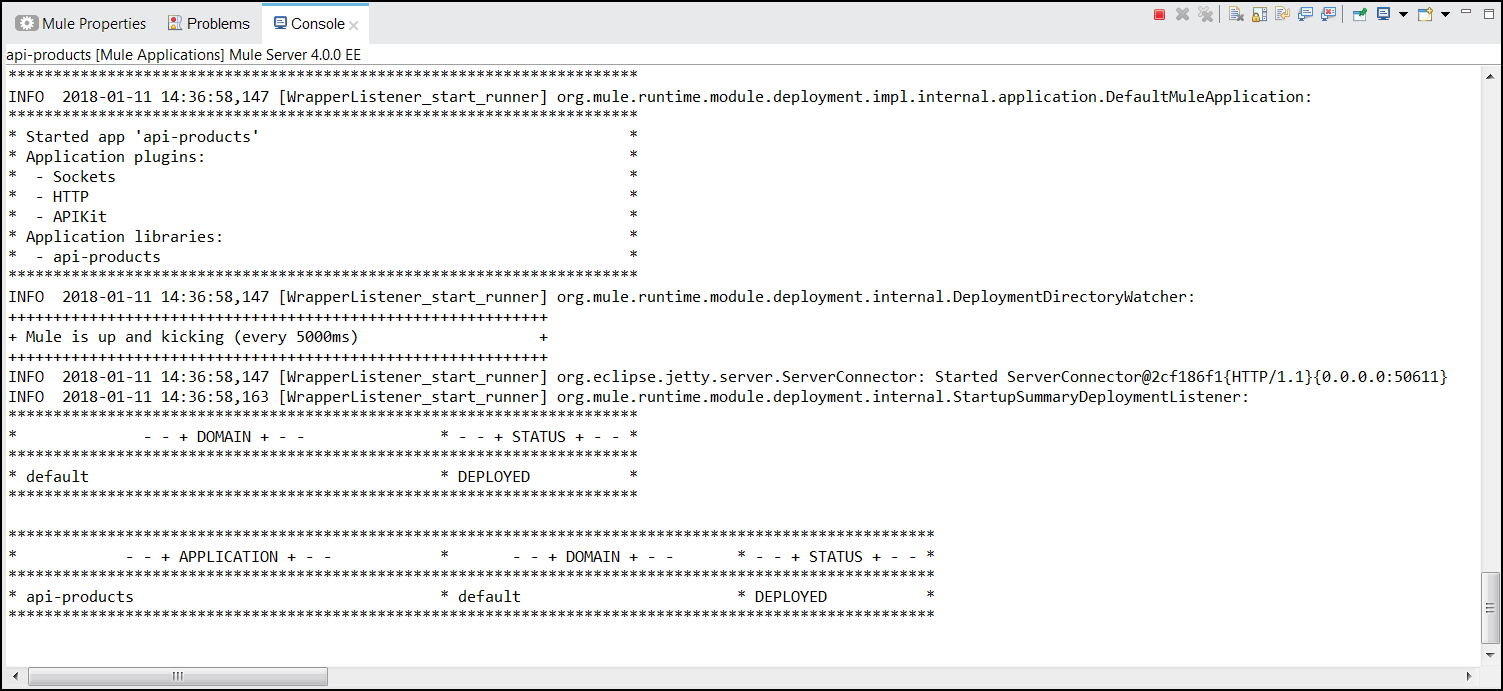
Every time we start the application, we need to make sure that it is started successfully. Check in the Console tab that the project appears as “DEPLOYED”.
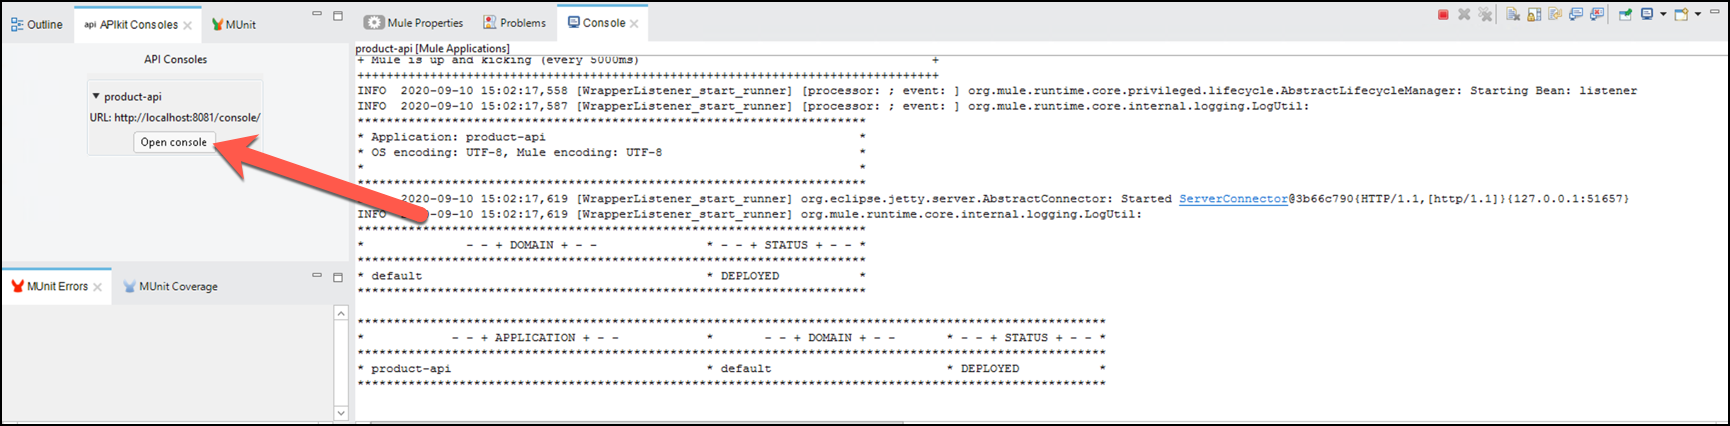
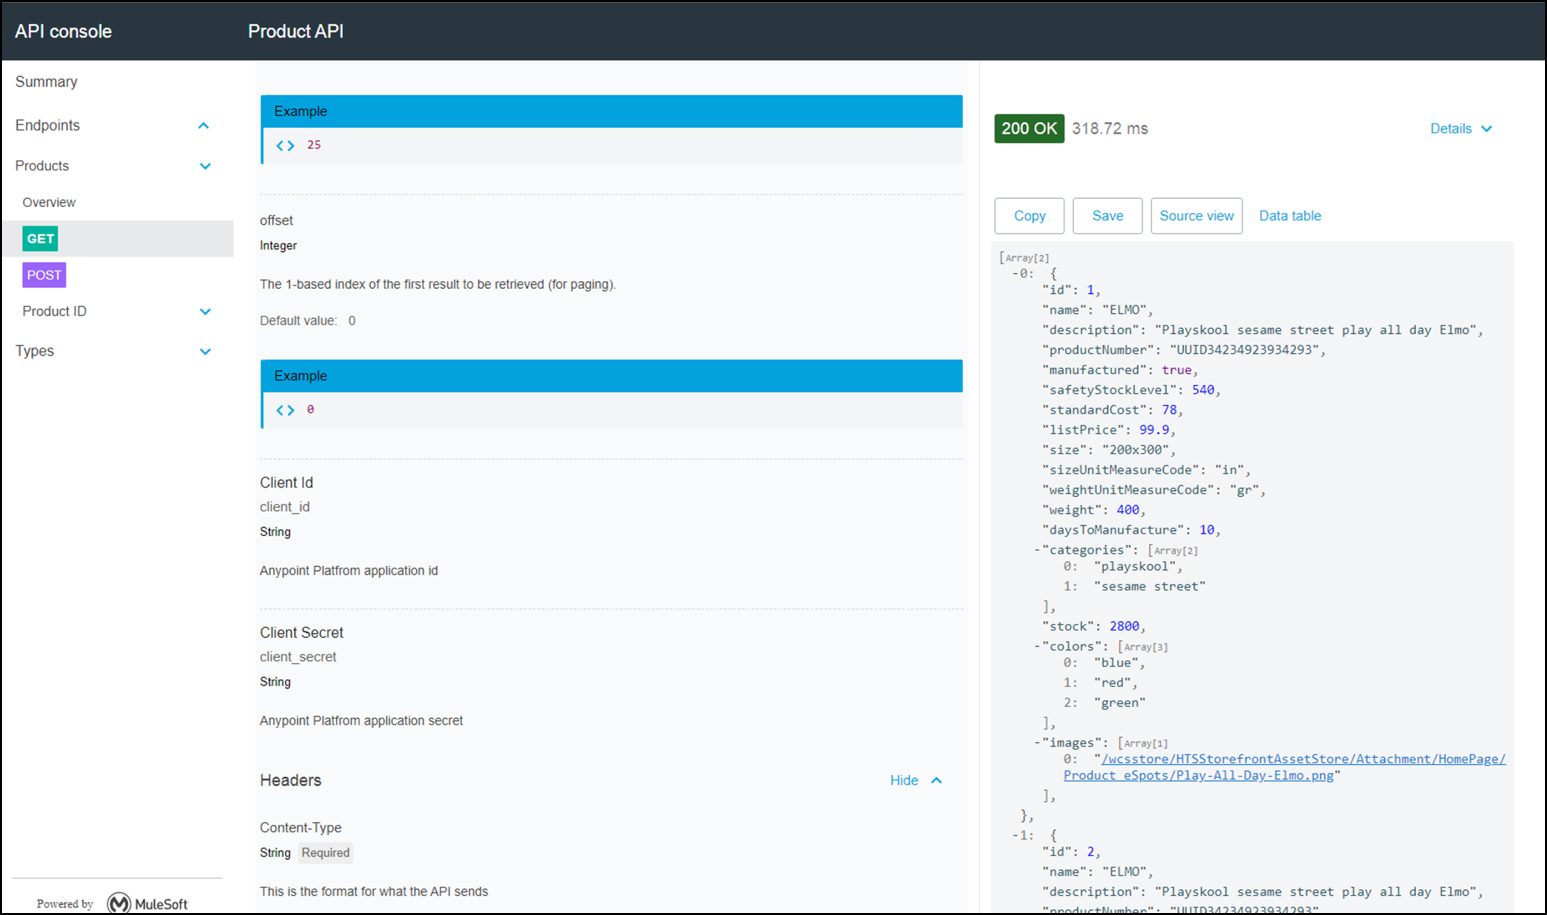
Once the application is deployed, Anypoint Studio will open a tab with the APIkit Consoles where we can test the application (to access the console, just click the link to open the Product API Console in a browser)
Click the
/productGET tab and test the get products method.In the Accept field complete with
application/jsonin case is needed.Press the Send Button

Scroll down the third panel and you will see the sample response defined in the API specification.
Go to the console tab and press the red button to stop the Mule runtime server.

In the next lab we will update the flows to connect to the database.
Summary
In this module lab we created a skeleton API from a RAML stored in Exchange using Anypoint Studio project creation with APIKit. We ran and tested the API on the local Mule runtime which comes embedded in Anypoint Studio.
We saw how easy it is to generate a skeleton implementation project from the API design (RAML) stored in Exchange using APIKit with Anypoint Studio. Any other RAML can also be referenced as part of the project creation process, and it is also possible to import a RAML later and generate the interface on demand.
See the APIKIT documentation for more information.
Please proceed to Lab 2: Connect the Product API to a MySQL Database