- Overview
- Step 1: Add Database Connector to the project
- Step 2: Create a Property File
- Step 3: Implement Get Products Flow
- Step 4: Implement Get Specific Product Flow
- Step 5: Implement Create Product Flow
- Step 6: Implement Update Product Flow
- Step 7: Implement Delete Product Flow
- Summary
Lab 2: Connect the Product API to a MySQL Database
Overview
In this lab, we will implement the generated subflows by connecting to a MySQL database. The operations are real simple so you are going to implement all the operations.
Step 1: Add Database Connector to the project
We need to add the Database connector to the project. To do that follow these steps.
Go to the Mule Palette
Click Add Module
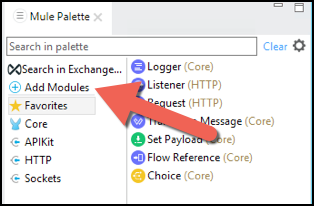
Select Database Connector.
Drag and Drop Icon to the light blue panel.

Going back to the Palette, you now will see the Database connector.

Step 2: Create a Property File
A good practice in Mule is to parameterize connectivity information. To configure the database connector we will leverage this best practice.
- Create a folder called
configinsrc/main/resources- Right click on the
/src/main/resourcesfolder and then select New -> Folder
- Right click on the
Create a file called
configuration.yamlin thesrc/main/resources/configby following the same approach as before (Right click onconfigthen New -> File)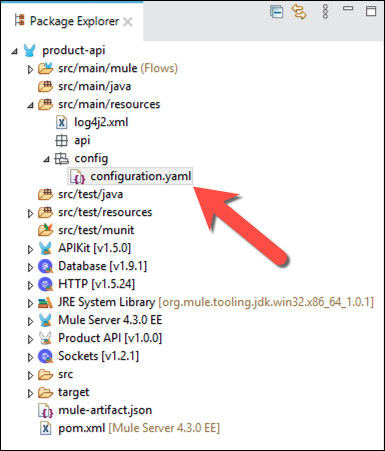
Insert the following text into configuration.yaml file.
 mysql:
   host: "mythicaldb.workshops.mulesoft.com"
   port: "6033"
   user: "product"
   password: "Mule1379"
   database: "products_test"
TIP
The password can be encrypted using the Mule Credential Vault. We will not cover this topic in this workshop.
Save the
configuration.yamlfileGo back to the api.xml file. Press the Global Elements tab.
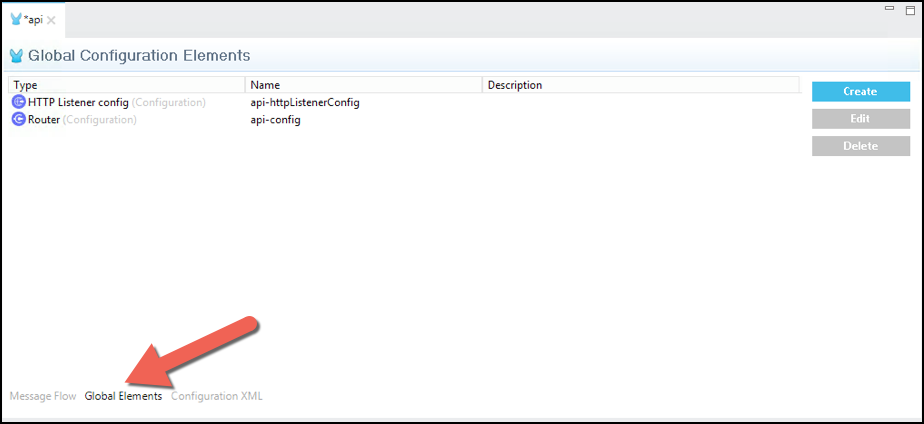
Press the Create button and search for Configuration Properties
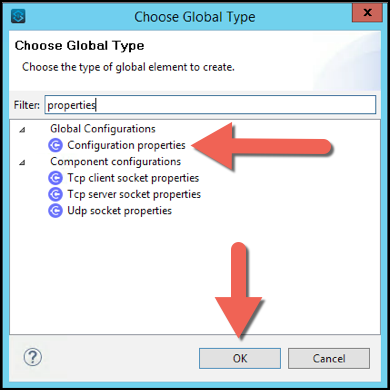
Press OK.
In the file text box write
config/configuration.yaml. You can also browse to the file.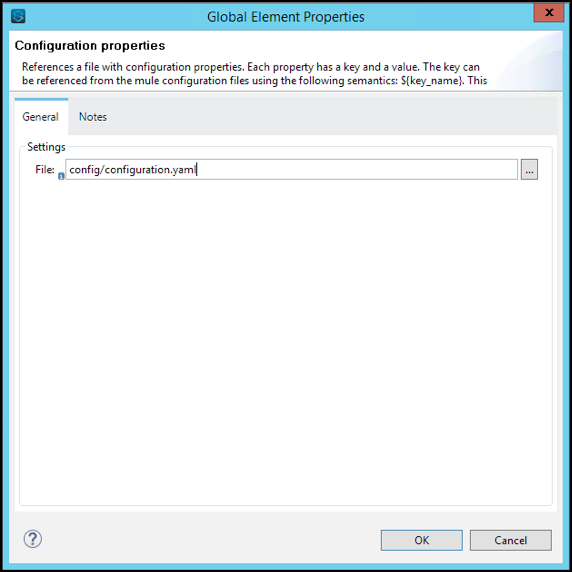
Step 3: Implement Get Products Flow
In this step, you will implement the get:/product flow. To get the products from the database, you will need to:
Retrieve the records from the database.
Transform the records to json format.
The following instructions will guide you through the process:
Click on the
Message Flowtab (remember, you clicked on Global Elements to configure Configuration Properties) and locate theget:\product:api-configflow.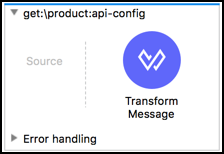
DOUBLE CHECK: Make sure you are working in the
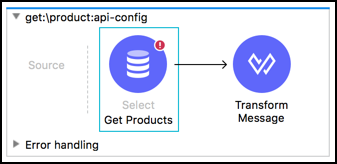
get:\product:api-configflowNow you will add the Database connector to the flow.
Click on the database connector, and drag and drop the Select icon before the transformation.
Drop the Database Connector in the Process section, not the Source section.
Double-Click on the Database icon and a configuration panel will be shown.
Change its name to Get Products.
Now that you have your properties defined, let’s add a new connector configuration.
Go back to the database connector you dropped, click to open properties and click on the
 button on the Connector Configuration.
In Name write
Products_Database_ConfigurationIn Connection select MySQL Connection.
When you select the database connection it asks you to add the JDBC Driver.
Press Configure… button. A new dropdown will show up.
Select Add Maven depenency
Complete with the following data:
Group id:
mysqlArtifact id:
mysql-connector-javaVersion:
8.0.20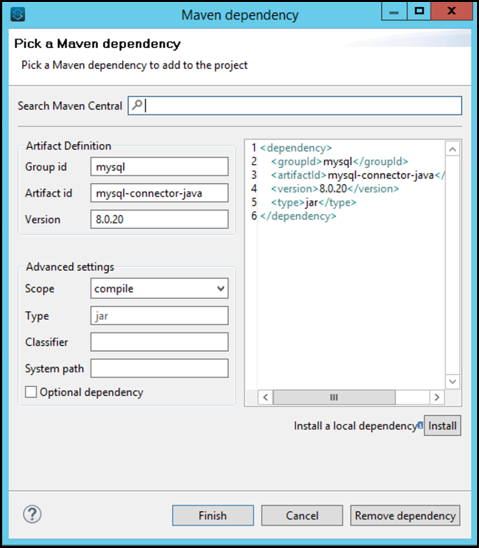
Click Finish.
Anypoint Studio will automatically download the dependency.
For our database configuration specify the following values for the properties:
Host:
${mysql.host}Port:
${mysql.port}User:
${mysql.user}Password:
${mysql.password}Database:
${mysql.database}
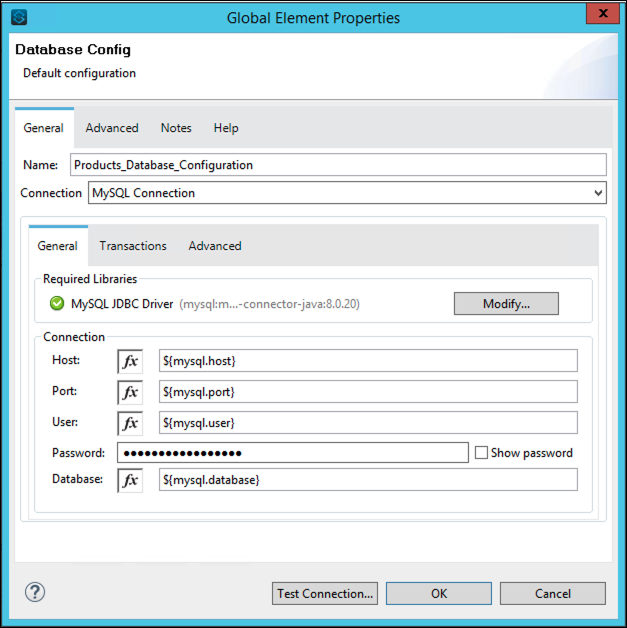
Mule resolves the
${key}to the configuration properties that we put in the configuration.yaml file by default without any extra configuration needed.Click Test Connection to verify the connectivity
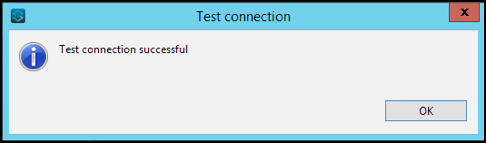
Click OK
Click OK again to close the Database Configuration.
Now that we have the Database configured, we will add the query. Copy and paste the following query in the
SQL Query Textarea:SELECT p.id, p.name, p.description, p.product_number, p.manufactured, p.colors, p.categories, p.stock, p.safety_stock_level, p.standard_cost, p.list_price, p.size, p.size_unit_measure_code, p.weight, p.weight_unit_measure_code, p.days_to_manufacture, p.images, p.modified_date, p.created_date FROM product p LIMIT 10We are limiting the query to retrieve only up to 10 items with the “LIMIT 10” parameter.

Many customers use their favorite query tool (SQL Query Analyzer, TOAD, DBVisualizer, …) to craft the query they want and then paste it into textbox in Studio.
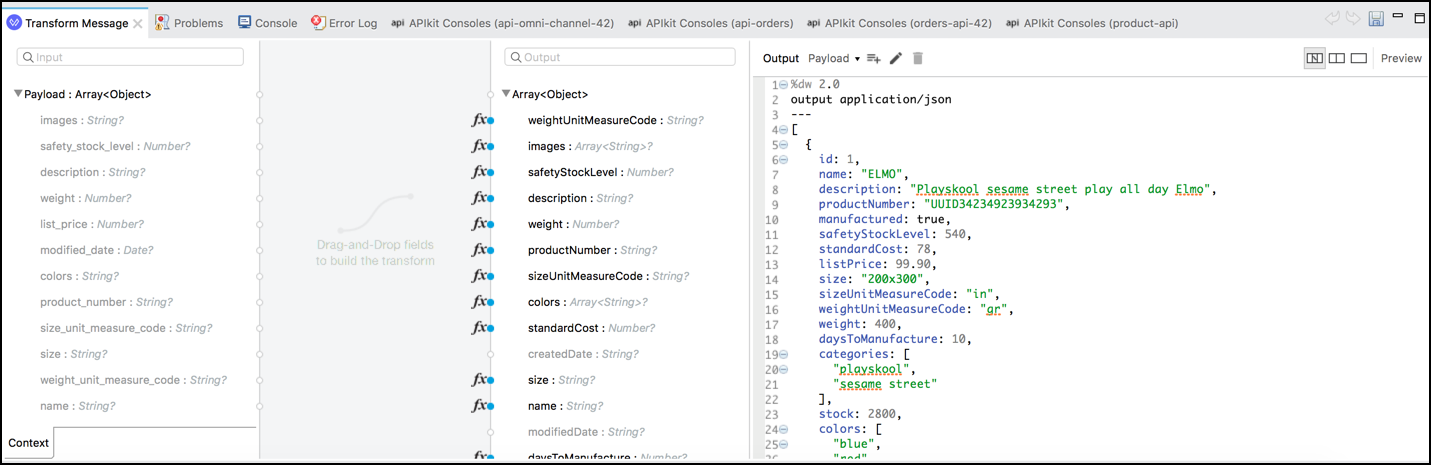
Now we need to transform the records from the database to JSON format.
Double-Click on the Transform Message icon. You will find the fields that come from the query on the left, and the fields that the API will return on the right. You can graphically map fields by dragging between fields.
This Transform Message component uses MuleSoft’s universal DataWeave transformation language for transforming data from what format to another. There is no need to use xpath/XSLT for XML, code for JSON, code for CSV, etc. Use DataWeave for all transformations. Dataweave is a simple, powerful tool to query and transform data inside of Mule.
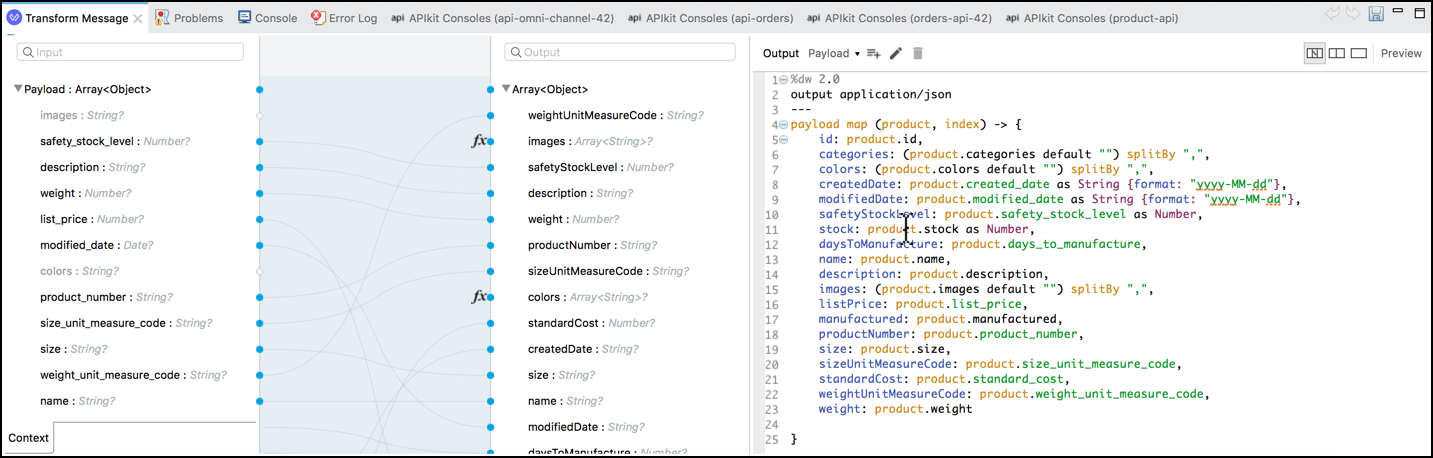
Remove the existing mapping and copy the mapping below into the text view of the dataweave transform.
%dw 2.0
output application/json
---
payload map (product, index) -> {
    id: product.id,
    categories: (product.categories default "") splitBy ",",
    colors: (product.colors default "") splitBy ",",
    createdDate: product.created_date as String {format: "yyyy-MM-dd"},
    modifiedDate: product.modified_date as String {format: "yyyy-MM-dd"},
    safetyStockLevel: product.safety_stock_level as Number,
    stock: product.stock as Number,
    daysToManufacture: product.days_to_manufacture,
    name: product.name,
    description: product.description,
    images: (product.images default "") splitBy ",",
    listPrice: product.list_price,
    manufactured: product.manufactured,
    productNumber: product.product_number,
    size: product.size,
    sizeUnitMeasureCode: product.size_unit_measure_code,
    standardCost: product.standard_cost,
    weightUnitMeasureCode: product.weight_unit_measure_code,
    weight: product.weight

    }
Since colours, categories and images are arrays and in the database they are saved as comma-separated Strings, we added to add a function called Split By to the mapping that splits the single record into a list of them separated by “,”. There are a number of functions available within Dataweave to support more complex mapping requirements. See Dataweave documentation for more information.
This concludes this step. Click save in the transform message window.
Now we are ready to test our API implementation.
Follow the same steps from Lab 1.
Start the application.
Check the logs to make sure it is deployed successfully.
Test the Get Products using the GET method on the Product using the console, or Postman. You may need to set
Content-TypeandAcceptheaders toapplication/json. Ask your instructor for assistance if you receive error responses.
Now you get the response from the API, the product list is being retrieved from the MySQL database and you can check that the information is different from the one you saw in Lab 1.
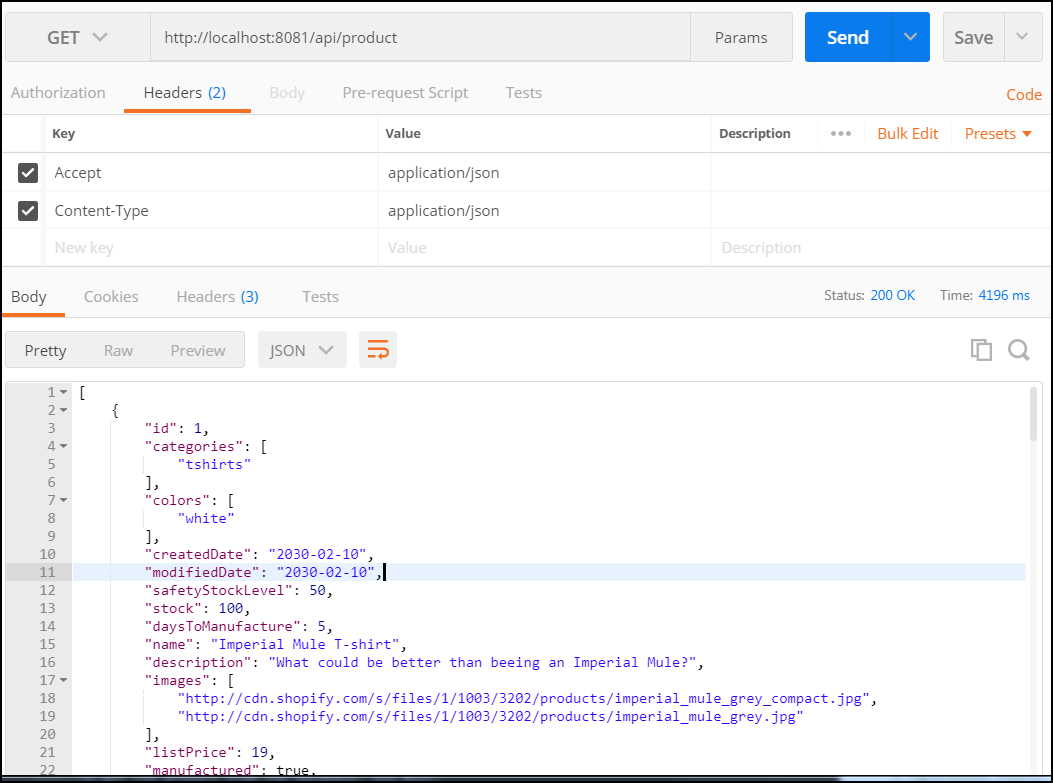
(Example result. Results may differ.)
Now that you have confirmed this flow is working, move onto the next implementation. If you have any problems, call over the instructor before continuing.
Step 4: Implement Get Specific Product Flow
In this step, you are going to implement the get:/product/{id} flow.
To get the product from the database, you must:
Retrieve the records from the database.
Check if it was found.
If it was found, transform the record to json format.
If it was not found, create a “Not found” response.
The following instructions will guide you through the process:
Remove all the Transform icons from the
get:/product/{id}flow. To do that you just right-click on the icon and select Delete. Or select it and hit Delete key.Drag & Drop a Select component from the database connector.
Double Click on the icon to open the Configuration tab.
Complete with the following parameters:
Display Name:
Get Product By IDConnector configuration: Select
Products_Database_ConfigurationSQL Query Text:
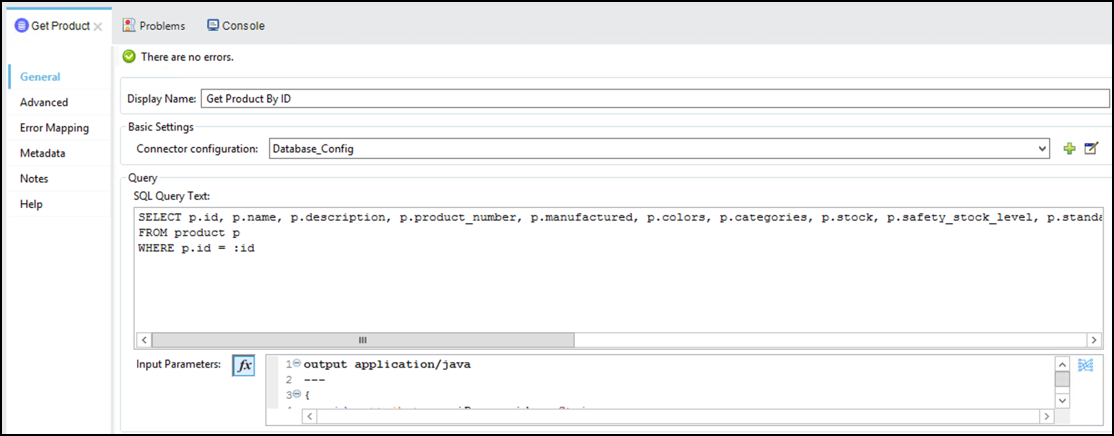
 SELECT p.id, p.name, p.description, p.product_number, p.manufactured, p.colors, p.categories, p.stock, p.safety_stock_level, p.standard_cost, p.list_price, p.size, p.size_unit_measure_code, p.weight, p.weight_unit_measure_code, p.days_to_manufacture, p.images,  p.modified_date, p.created_date
 FROM product p
 WHERE p.id = :id
Let’s add the Input Parameters. Click on the fx button.
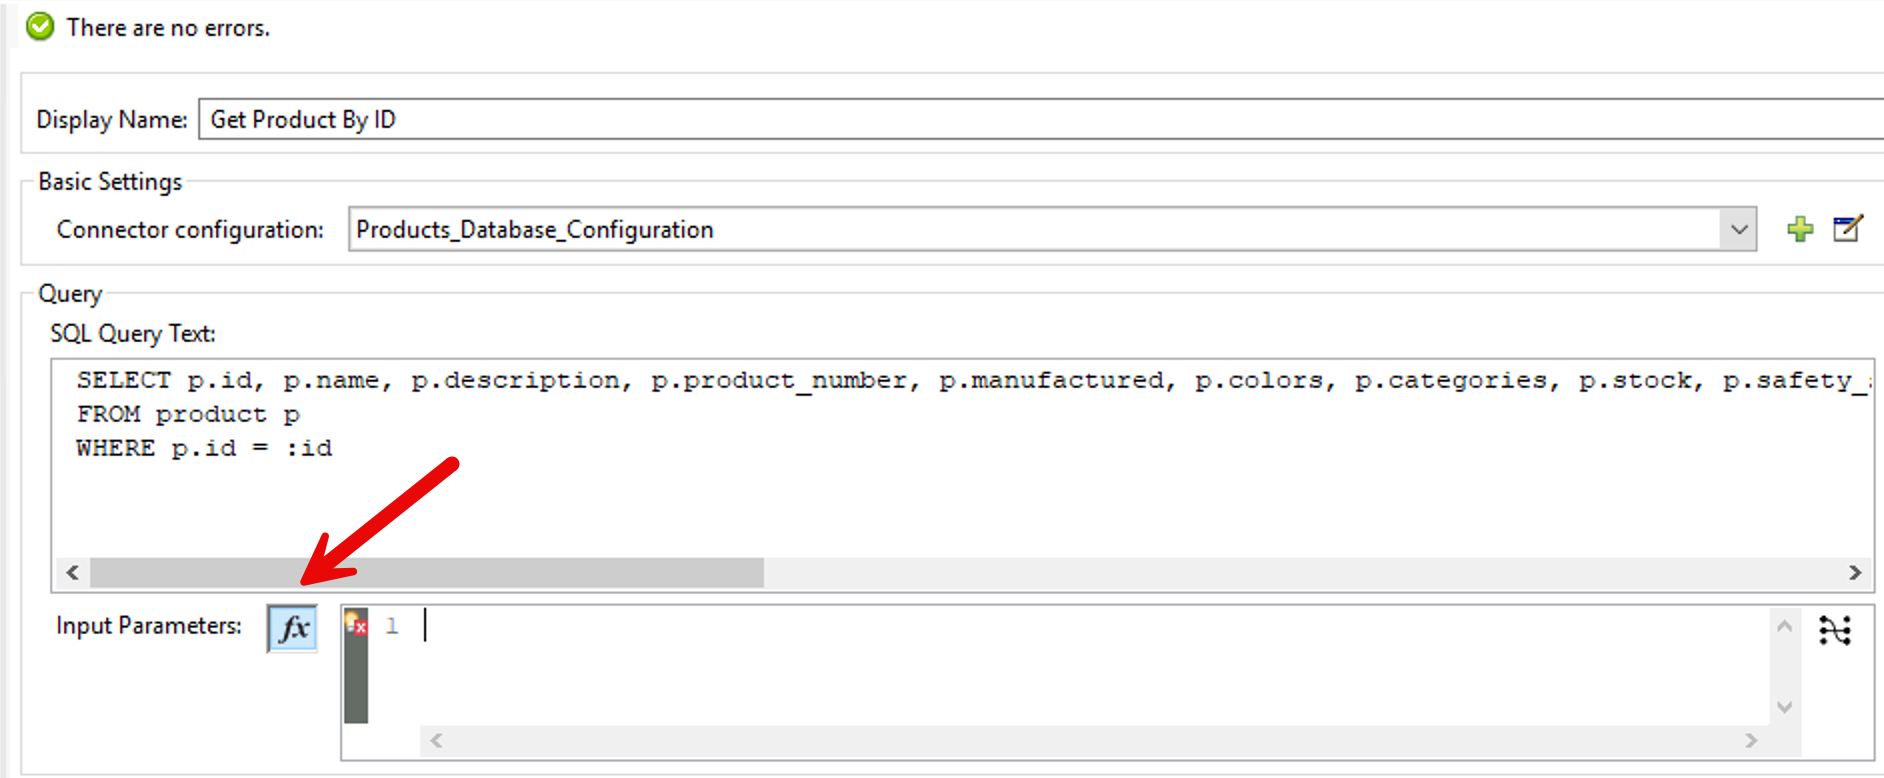
Paste the following DataWeave script in the Input Parameters text area:
 %dw 2.0
 output application/java
 ---
 {
     id: attributes.uriParams.id
 }
Here we are using a parametrized query. You define the variable in the query and then you complete with the parameters on the other text box.
We are going to validate if the product was found. In case it doesn’t exist we are going to throw an exception. To do that we need to add the Validations Module
Go to the Mule Palette, click on Add Modules and add the Validation Module (Select latest version).
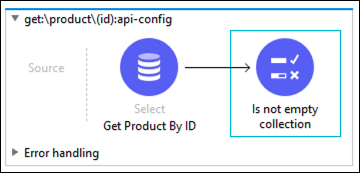
Select the Validation connector and drag & drop Is not empty collection.
The Flow should look similar to this:
This validator component is going to throw an Exception of type
VALIDATION:EMPTY_COLLECTIONif the query does not return any result. We will catch that Exception and send a 404 (Not Found) response.To do that go to the Error Handling section in the APIKit component that is defined in the api-main flow.
Find the component On Error Propagate type: APIKIT:NOT_FOUND
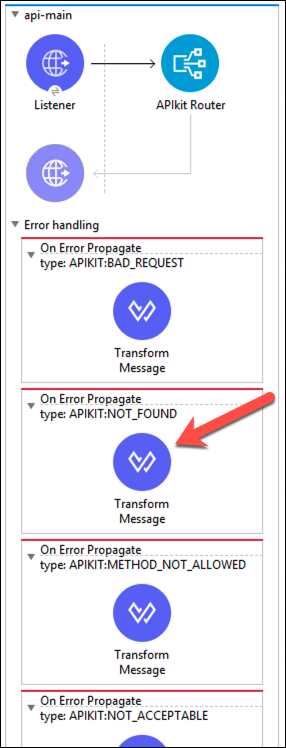
Click on it (on the error component, not on the Transform Message component).
You will see the configuration properties.
Click on the Type textbox.

A checkbox list will open with all the possible errors that can be catched.
Select VALIDATION:EMPTY_COLLECTION
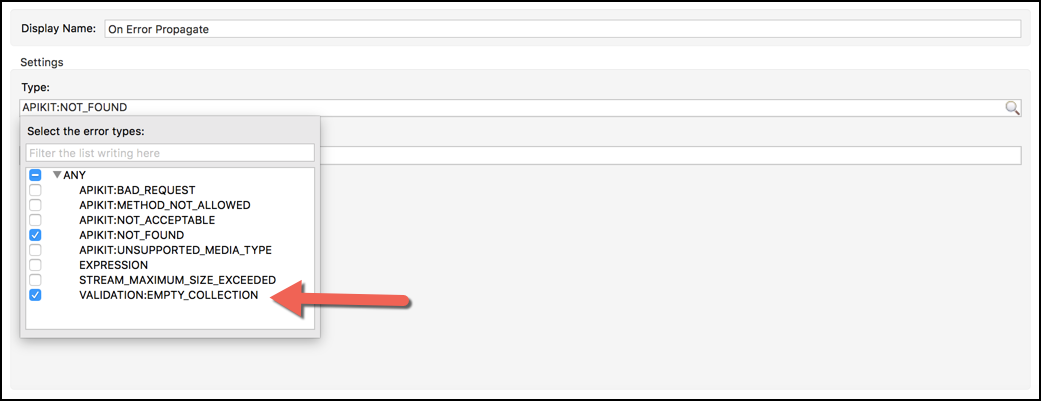
If the Error is not listed write the error name manually after the
APIKIT:NOT_FOUNDtext, separated by a comma. The final string should beAPIKIT:NOT_FOUND,VALIDATION:EMPTY_COLLECTION.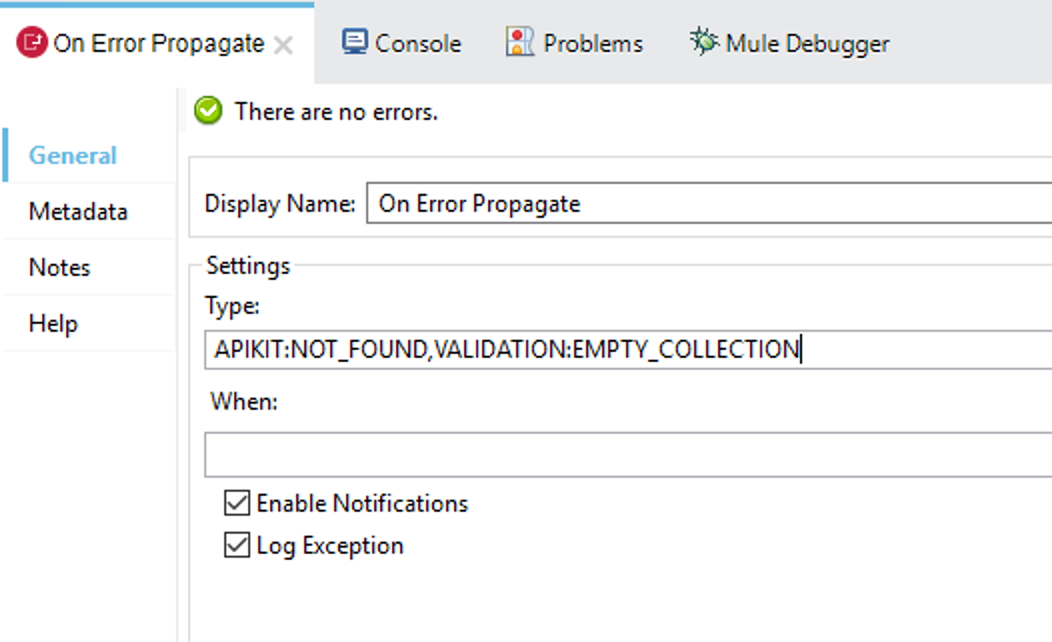
Press Save icon on the top right side of the panel.
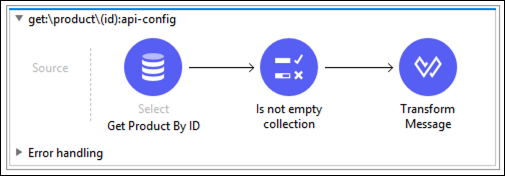
Now we go back to the
get:\product\(id):api-configflow that we were working on before and we will add a Transform component afte the Is not empty collection connector.Copy this script into the text view of the DataWeave transform:
%dw 2.0
output application/json
var product = payload[0]
---
{
    id: product.id,
    name: product.name,
    description: product.description,
    manufactured: product.manufactured,
    productNumber: product.product_number,
    colors: (product.colors default "") splitBy "," ,
    categories:(product.categories default "") splitBy "," ,
    safetyStockLevel: product.safety_stock_level,
    standardCost: (product.standard_cost default "0.0") as String {format: "##.##"} as Number,
    listPrice: (product.list_price default "0.0") as String {format: "##.##"} as Number,
    stock: product.stock,
    safetyStockLevel: product.safety_stock_level,
    daysToManufacture: product.days_to_manufacture,
    size: product.size,
    sizeUnitMeasureCode: product.size_unit_measure_code,
    weight: product.weight,
    weightUnitMeasureCode: product.weight_unit_measure_code,
    daysToManufacture: product.days_to_manufacture,
    images: (product.images default "") splitBy ",",
    modifiedDate: (product.modified_date default "") as Date {format: "yyyy-MM-dd"},
    createdDate: (product.created_date default "") as Date {format: "yyyy-MM-dd"}
}
Transform Message will transform the DB structure to the JSON format defined for the response. Database selects always return a list of rows, so one method to obtain a single result is to take the first one, hence why we have declared the variable product with the statement
var product = payload[0]. This means that regardless of how many records are returned by theSELECTstatement we pasted in the Database connector, we would only return the first record.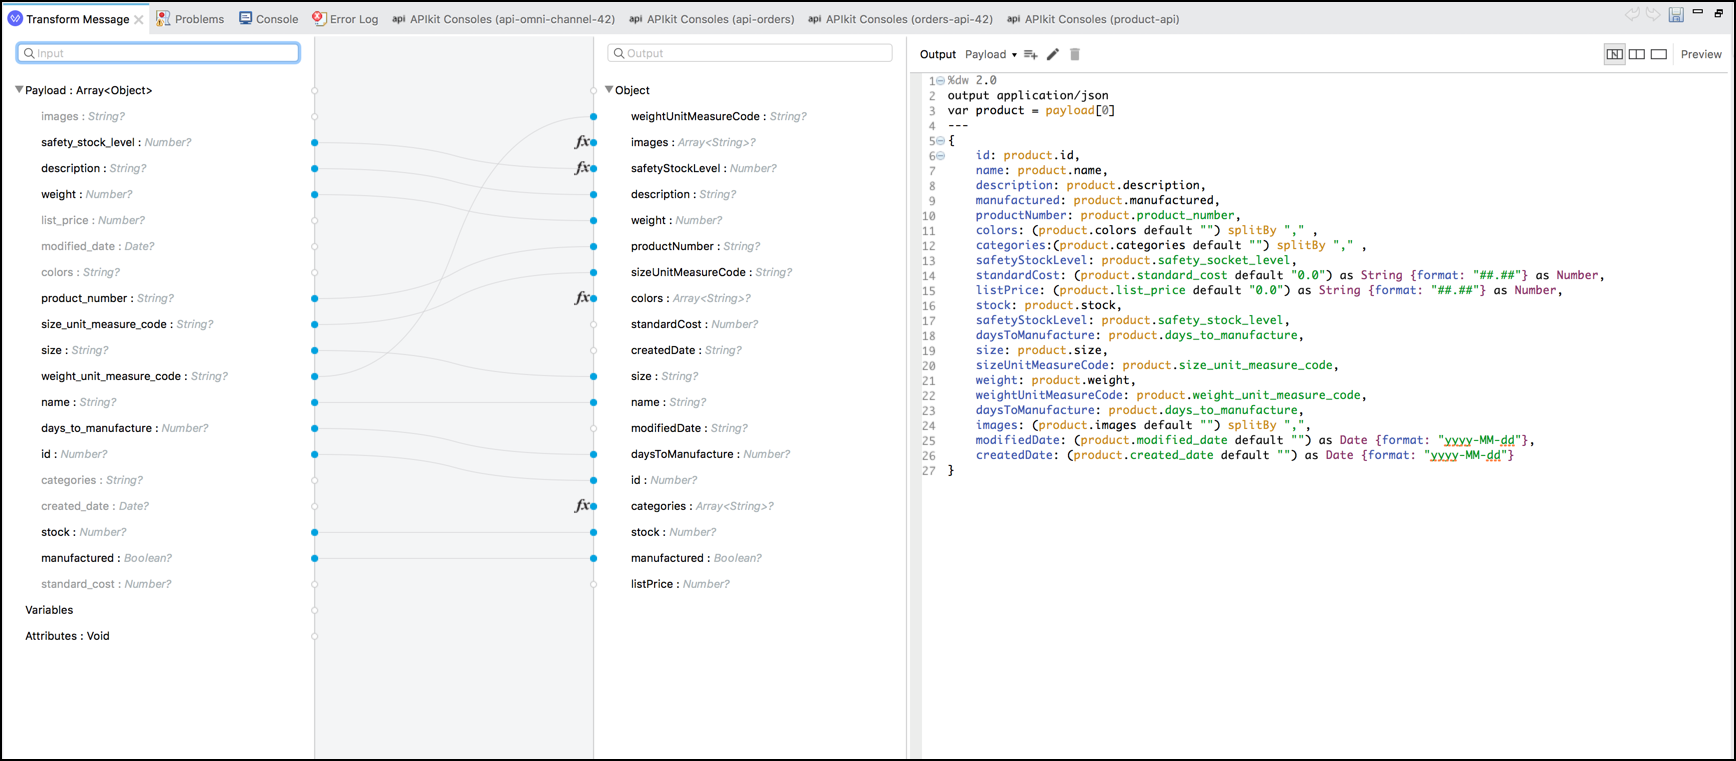
Now you can run the API as in the preceding step, and check calling GET on “product/{id}” using an existing and a non-existing ID (call the
GET /prouctsto get a list of products to extract an ID to test with).Stop the Mule Runtime using the console view after the test.
The final flow should look similar to this.
Now that you have confirmed this flow is working, move onto the next implementation. If you have any problems, call over the instructor before continuing.
Step 5: Implement Create Product Flow
In this step, you will implement the post:/product flow. To create the product in the database, you must:
Insert the product in the DB
Return the product plus the
idreturned by the Database connector as a response.
The following instructions will guide you through the process:
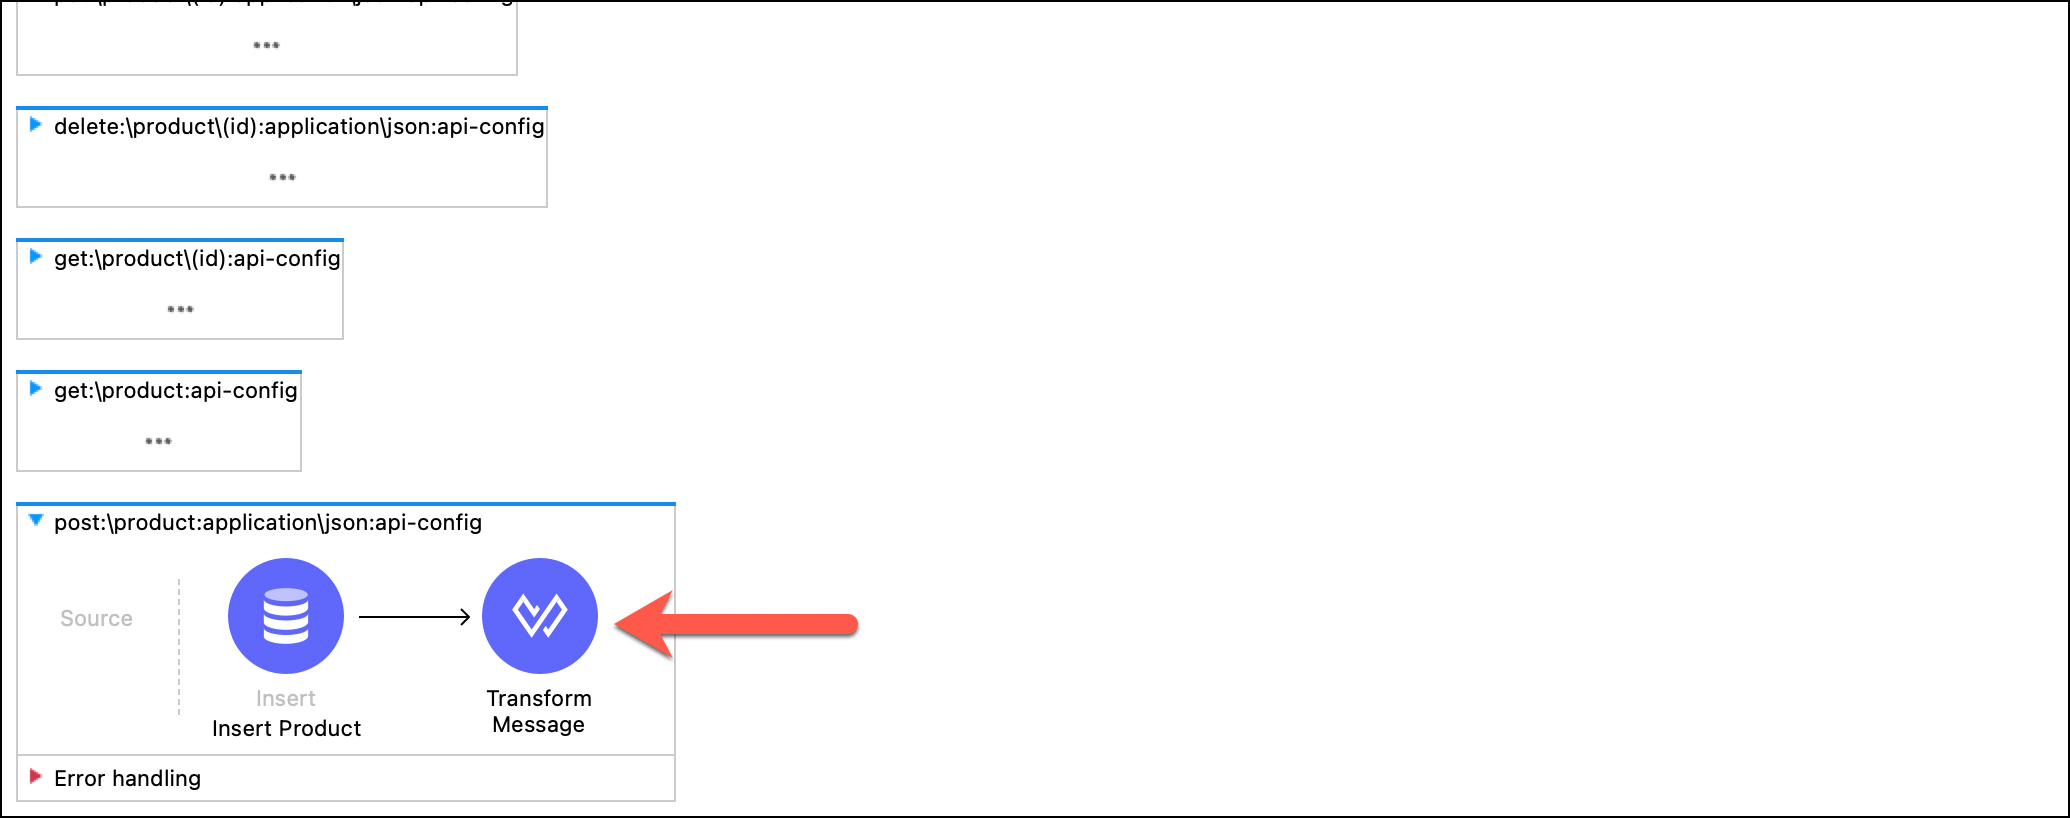
Remove the Transform component from the
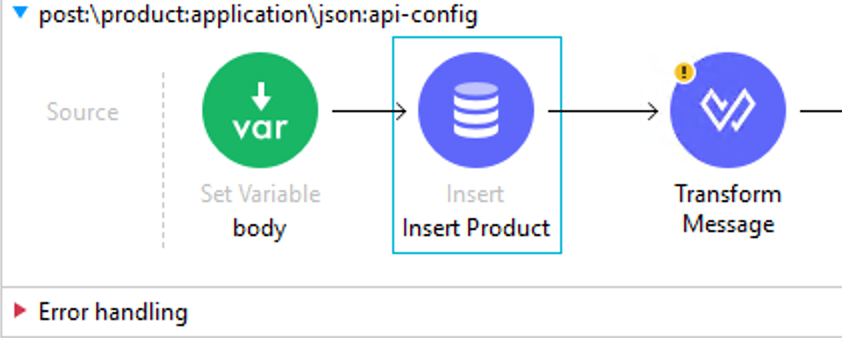
post:\product:application\json:api-configflow. To do that you just right-click on it and select Delete or select it and hit the Delete key.Now we’ll save the input Payload that will eventually be retured by this API. Using the palette, drag & drop the Set Variable connector that you will find in the Core category (or just search set):

Set the following values:
Field Name Value payload bodyName bodyValue payload(making sure “fx” is enabled)Now, drag & drop the Database and Transform Message connectors to create a flow like this:
Start by configure the Insert component. Set the parameters as follows to save the product into the database:
Display Name:
Insert ProductConnector configuration:
Products_Database_ConfigurationSQL Query Text:
 INSERT INTO product(name, description, product_number, manufactured, colors, categories, stock, safety_stock_level, standard_cost, list_price, size, size_unit_measure_code, weight, weight_unit_measure_code, days_to_manufacture, images, modified_date, created_date)
 VALUES(:name, :description, :productNumber, :manufactured, :colors,  :categories, :stock, :safetyStockLevel, :standardCost, :listPrice, :size, :sizeUnitMeasureCode, :weight, :weightUnitMeasureCode, :daysToManufacture, :images,CURDATE(), CURDATE() );
Click the function button next to Input Parameters.
Paste the following snippet in the Input Parameters text area:
     %dw 2.0
     output application/json
     fun getManufacturedCode(value) = if (value == true) 1 else 0
     ---
     {
             categories: (payload.categories default []) joinBy ",",
             colors: (payload.colors  default []) joinBy ",",
             daysToManufacture: payload.daysToManufacture,
             description: payload.description,
             images: (payload.images  default []) joinBy ",",
             listPrice: payload.listPrice,
             manufactured: getManufacturedCode(payload.manufactured),
             name: payload.name,
             productNumber: payload.productNumber,
             safetyStockLevel: payload.safetyStockLevel,
             size: payload.size,
             sizeUnitMeasureCode: payload.sizeUnitMeasureCode,
             standardCost: payload.standardCost,
             stock: payload.stock,
             weight: payload.weight,
             weightUnitMeasureCode: payload.weightUnitMeasureCode
     }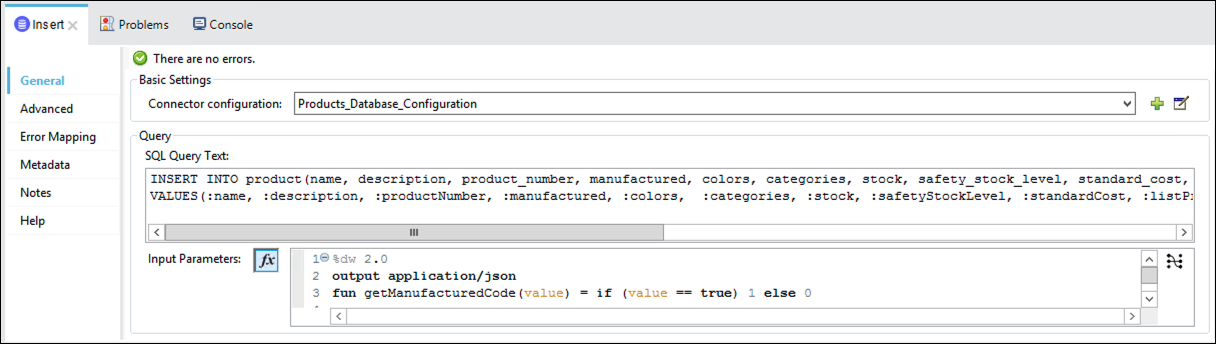
The previous script shows how in Dataweave you can declare functions and use if else structures. This is used to transform the
manufacturedfield from boolean to integer.As this operation creates a new product, you will need to obtain the newly generated id. How this is implemented can vary with different database engines’ drivers.
In the case of MySQL, go to “Advanced” in the “Insert Product” block.
Find Auto Generated Keys section.
Set Auto generate keys to
TrueIn the Auto generated keys columns names select Edit inline.
- Add value
idin the table below.
The configuration should look like this:
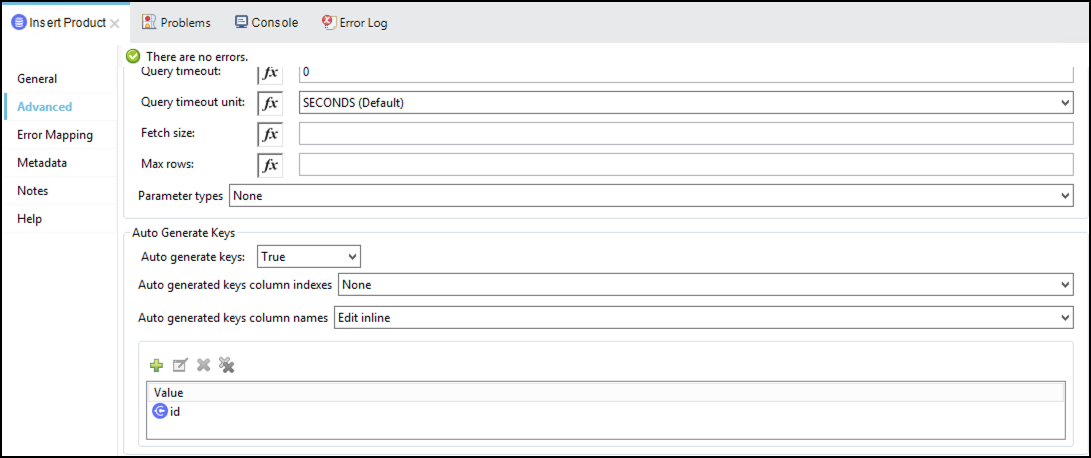
- Add value
Now we are going to configure the response Transform Message. In this step we need to merge the original request payload with the returned ID from the database. The next script will do the trick. We are getting the original request payload and adding a field called “id”.
Add the following transformation:
%dw 2.0
output application/json
---
vars.body ++ id: payload.generatedKeys.GENERATED_KEY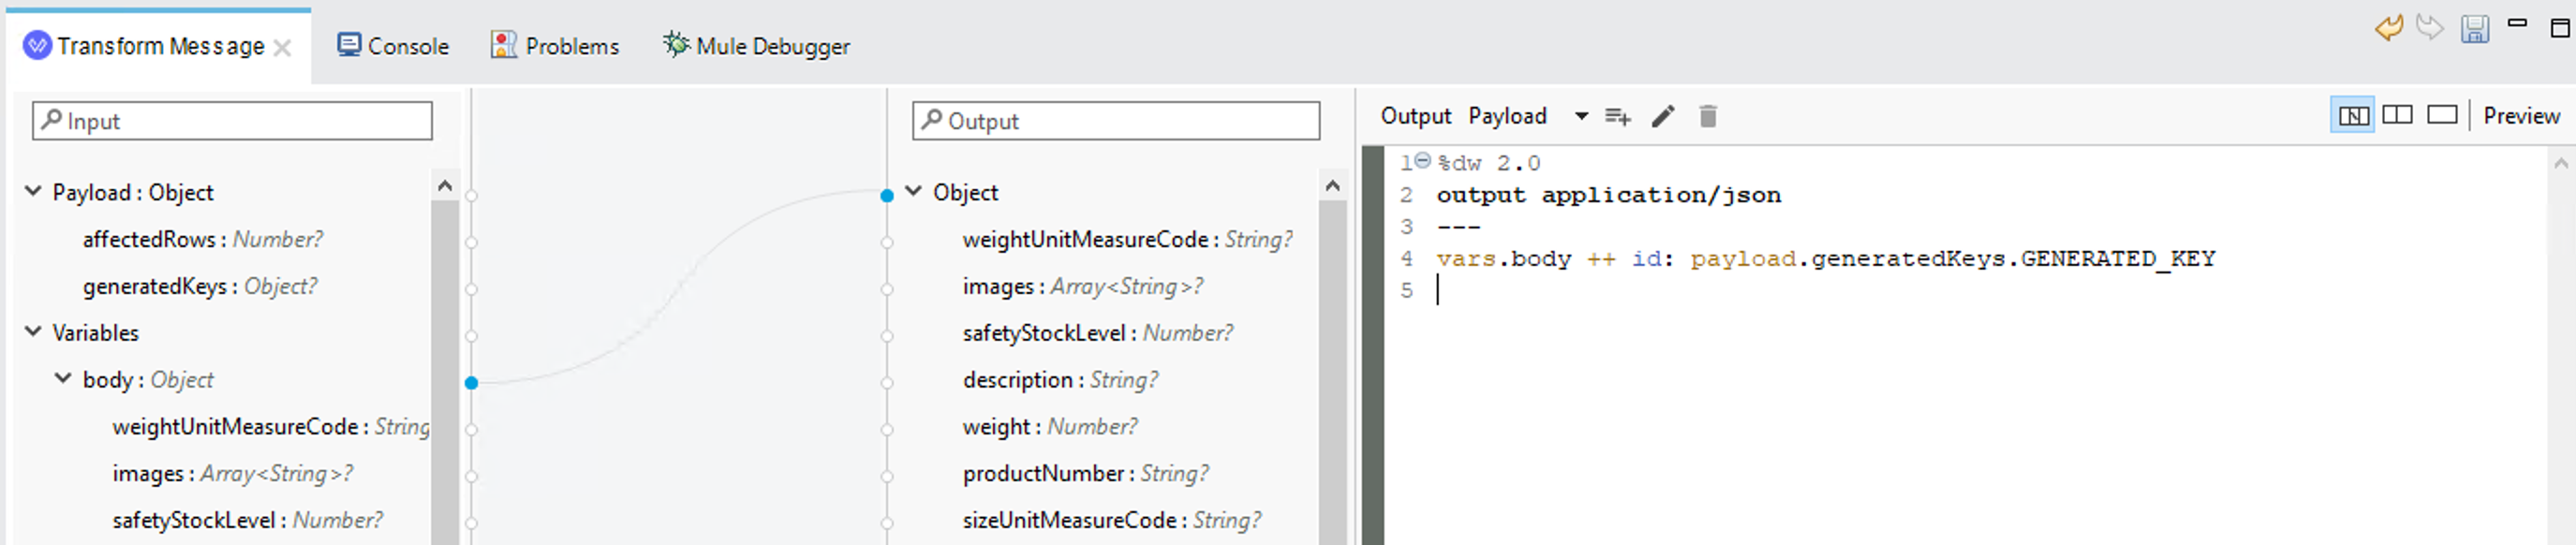
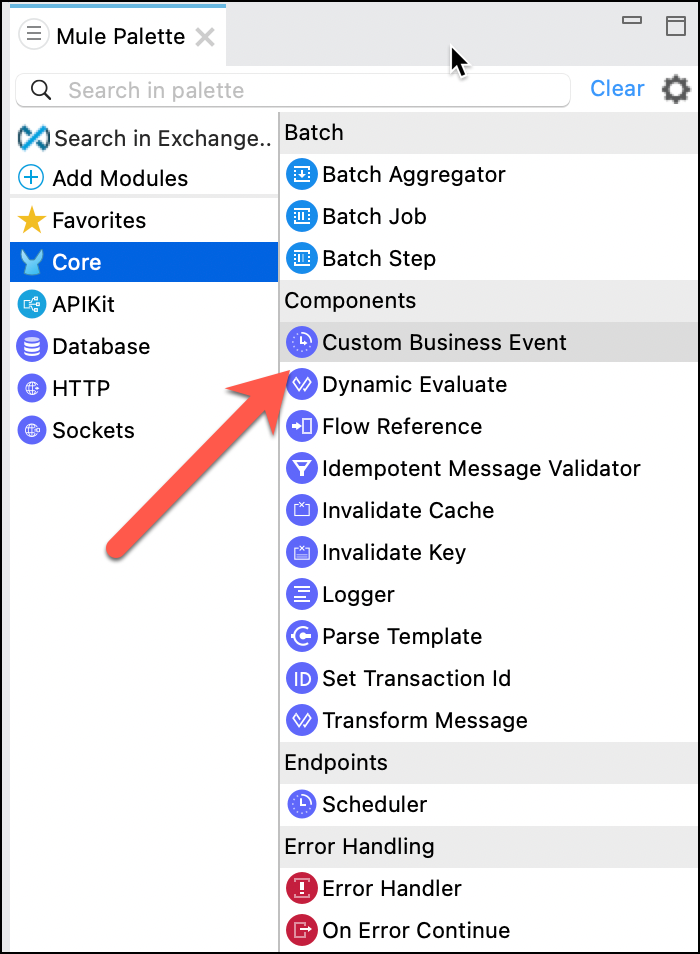
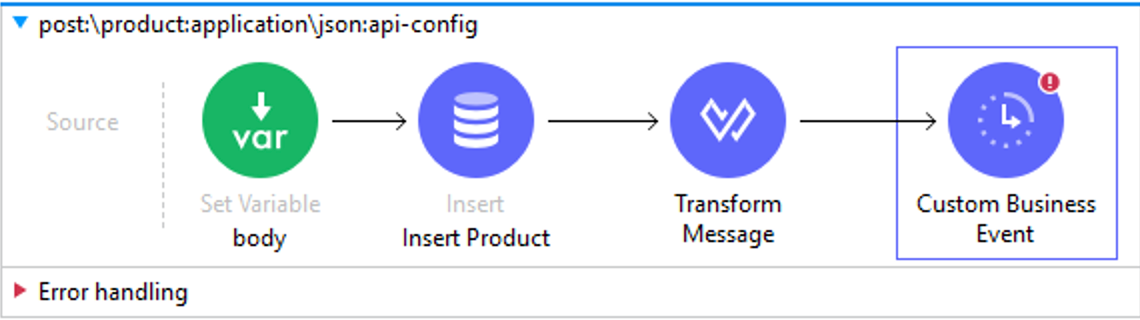
Finally let’s configure a Custom Business Event. Set the parameters to record the created product’s information for future business analysis:
a. Display Name:
New Product Created Eventb. Event Name:
New Product Created Eventc. In the Key Performance Indicators table, add these two attributes:
Name Expression/Value Product ID #[payload.id]Product Name #[payload.name]
Now you can run the API as in the preceding steps, and check it is working by calling POST on “
products” and check that the response payload contains anidattribute.The
productNumbermust be unique, you need to change theproductNumberwith a random value. If you have problems with this, ask your instructor to provide a value by querying the database directly to check for existing recordsStop the Mule Runtime using the console view after the test.
Now that you have confirmed this flow is working, move onto the next implementation. If you have any problems, call over the instructor before continuing.
Step 6: Implement Update Product Flow
In this step, we are going to implement the put:\product{id} flow. To update the product in the database, we just need to call the database.
The following instructions will guide you through the process:
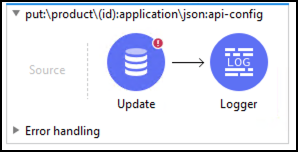
Remove the components from the
put:\product{id}flow. To do that you just right-click on each and select Delete or select it and hit Delete key.Using the Palette, drag & drop the Database - Update and Logger components to create a flow like this:
Configure the Database with this parameters:
Display Name:
Update ProductConnector configuration:
Products_Database_ConfigurationSQL Query Text:
 update product
 set name = :name, description = :description, product_number = :productNumber, manufactured = :manufactured, colors = :colors,
 categories= :categories, stock = :stock, safety_stock_level = :safetyStockLevel, standard_cost = :standardCost, list_price = :listPrice, size = :size,
 size_unit_measure_code = :sizeUnitMeasureCode, weight = :weight, weight_unit_measure_code = :weightUnitMeasureCode, days_to_manufacture = :daysToManufacture,
 images = :images,  modified_date = CURDATE()
 where id = :id
Click on
 paste the following content into the Input Parameters panel:
Complete with the following script”
 %dw 2.0
 output application/java
 fun getManufacturedCode(value) = if (value == true) 1 else 0
 ---
 {
         id: attributes.uriParams.id,
         categories: (payload.categories default []) joinBy ",",
         colors: (payload.colors default []) joinBy ",",
         daysToManufacture: payload.daysToManufacture,
         description: payload.description,
         images: (payload.images default []) joinBy ",",
         listPrice: payload.listPrice,
         manufactured: getManufacturedCode(payload.manufactured),
         name: payload.name,
         productNumber: payload.productNumber,
         safetyStockLevel: payload.safetyStockLevel,
         size: payload.size,
         sizeUnitMeasureCode: payload.sizeUnitMeasureCode,
         standardCost: payload.standardCost,
         stock: payload.stock,
         weight: payload.weight,
         weightUnitMeasureCode: payload.weightUnitMeasureCode
 }
Like we did in the previous step we are going to log the number of records updated
Click on the Logger component
Press the
button next to the Messagefield and add the following dataweave expression.Add the following dataweave expression:
"Number of affected rows: " ++ ((payload.affectedRows default -1 )as String)
Test the API as you did before and stop the Mule Runtime using the console view after the test (red button).
Now that you have confirmed this flow is working, move onto the next implementation. If you have any problems, call over the instructor before continuing.
Step 7: Implement Delete Product Flow
In this step, we are going to implement the delete:\product{id} flow. To delete the product in the database, we just need to call the database.
The following instructions will guide you through the process:
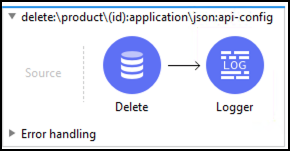
Remove all the components from the
delete:\product{id}flow. To do that you just right-click on each component and select Delete or select a component and hit the Delete key.Using the Palette, drag & drop the Database - Delete and Logger components to create a flow like this:
Configure the Database component as follows:
Display Name:
Delete ProductConnector configuration:
Products_Database_Configuration- SQL Query Text :
delete from product where id=:id - Input Parameters (press the fx button):
 {
 id:attributes.uriParams.id
 }
We will add a logger to see how many records where deleted.
Click on the logger component
Press the
button next to Message to add a dataweave expression.Add the following dataweave expression:
"Number of records deleted: " ++ (payload as String)
We are returning a
204, so there will be no message response.Now you can run the API as in the preceding steps, and check it is working by calling
DELETEon “products/{id}” for an id you know exists (such as the one created in the previous step).Note that if you have more time you can extend the implementation as in the
GET /products/{id}flow to respond with a not found response if the record does not exist.Stop the Mule Runtime using the console view after the test.
If you have any problems, call over the instructor before continuing.
Now that we have a working implementation, in the next lab we will test it end to end and add unit tests.
Summary
You completed the following steps:
In this module we implemented the System API against the MySQL database. We ran and tested the API on the local Mule Runtime which comes embedded in Anypoint Studio.
You were introduced to the use of Dataweave, a powerful tool to transform messages from a database record to json format in this case. You also saw how simple accessing a database can be using the Database Connector.
It is important to note that the implementation of an API is a real Mule application. Building integration applications and exposing APIs do not require additional knowledge, making it easy for Mule developers to work on both integrations and APIs.
See the Dataweave documentation for more information.
See the Database Connector documentation for more information.
See the Configuration Properties documentation for more information.
See the Secure Configuration Properties documentation for more information.
Please proceed to Lab 3: Run and Debug the API