- Overview
- Step 1 - Design the AI Agent API
- Step 2 - Implement the API
- Step 3 - Test your agent locally
- Summary
Lab 1: Design the AI Agent API
Overview
In this module you will build and deploy a new API that will power a chatbot that we have built for you and you can find it here: https://tinyurl.com/alc-ai-agent Imagine for a second this is an Agent embedded into your new Mobile Application!
Step 1 - Design the AI Agent API
In order for our agent UI to work, we need to deploy an API that exposes an endpoint /chat and send a payload like the following:
{
    "prompt": "What are my orders?"
}
Create a new API in Deisgn Center as you learned in module 1:
As usual, name your API using your full name initials “
AI Agent API" to avoid opening someone else's specification 
Once you are in API Designer, copy and paste this RAML API Specification:
#%RAML 1.0
title: AI Agent
mediaType:
    - application/json
version: v.1
protocols:
  - HTTPS
/chat:
   post:
     body:
       description: Query the customer will ask about your products or their order status.
       properties:
         prompt:
           example: What are my orders? My Customer ID is aaabbb1234
           type: string
     responses:
        "200":
          description: Response returned by the AI Agent
          body:
            description: The response returned by your AI Agent
            properties:
              response:
                example: These are your orders
                type: string
You can now publish the API to Exchange, as shown in the animation above.
Step 2 - Implement the API
In this module you will be using the Mule AI Chain connector to allow your API to converse with Azure OpenAI about your customer’s orders!
Similarly to what you have already done in Module 2, we will create an API scaffolding using the specification you published to Exchange in the previous step.
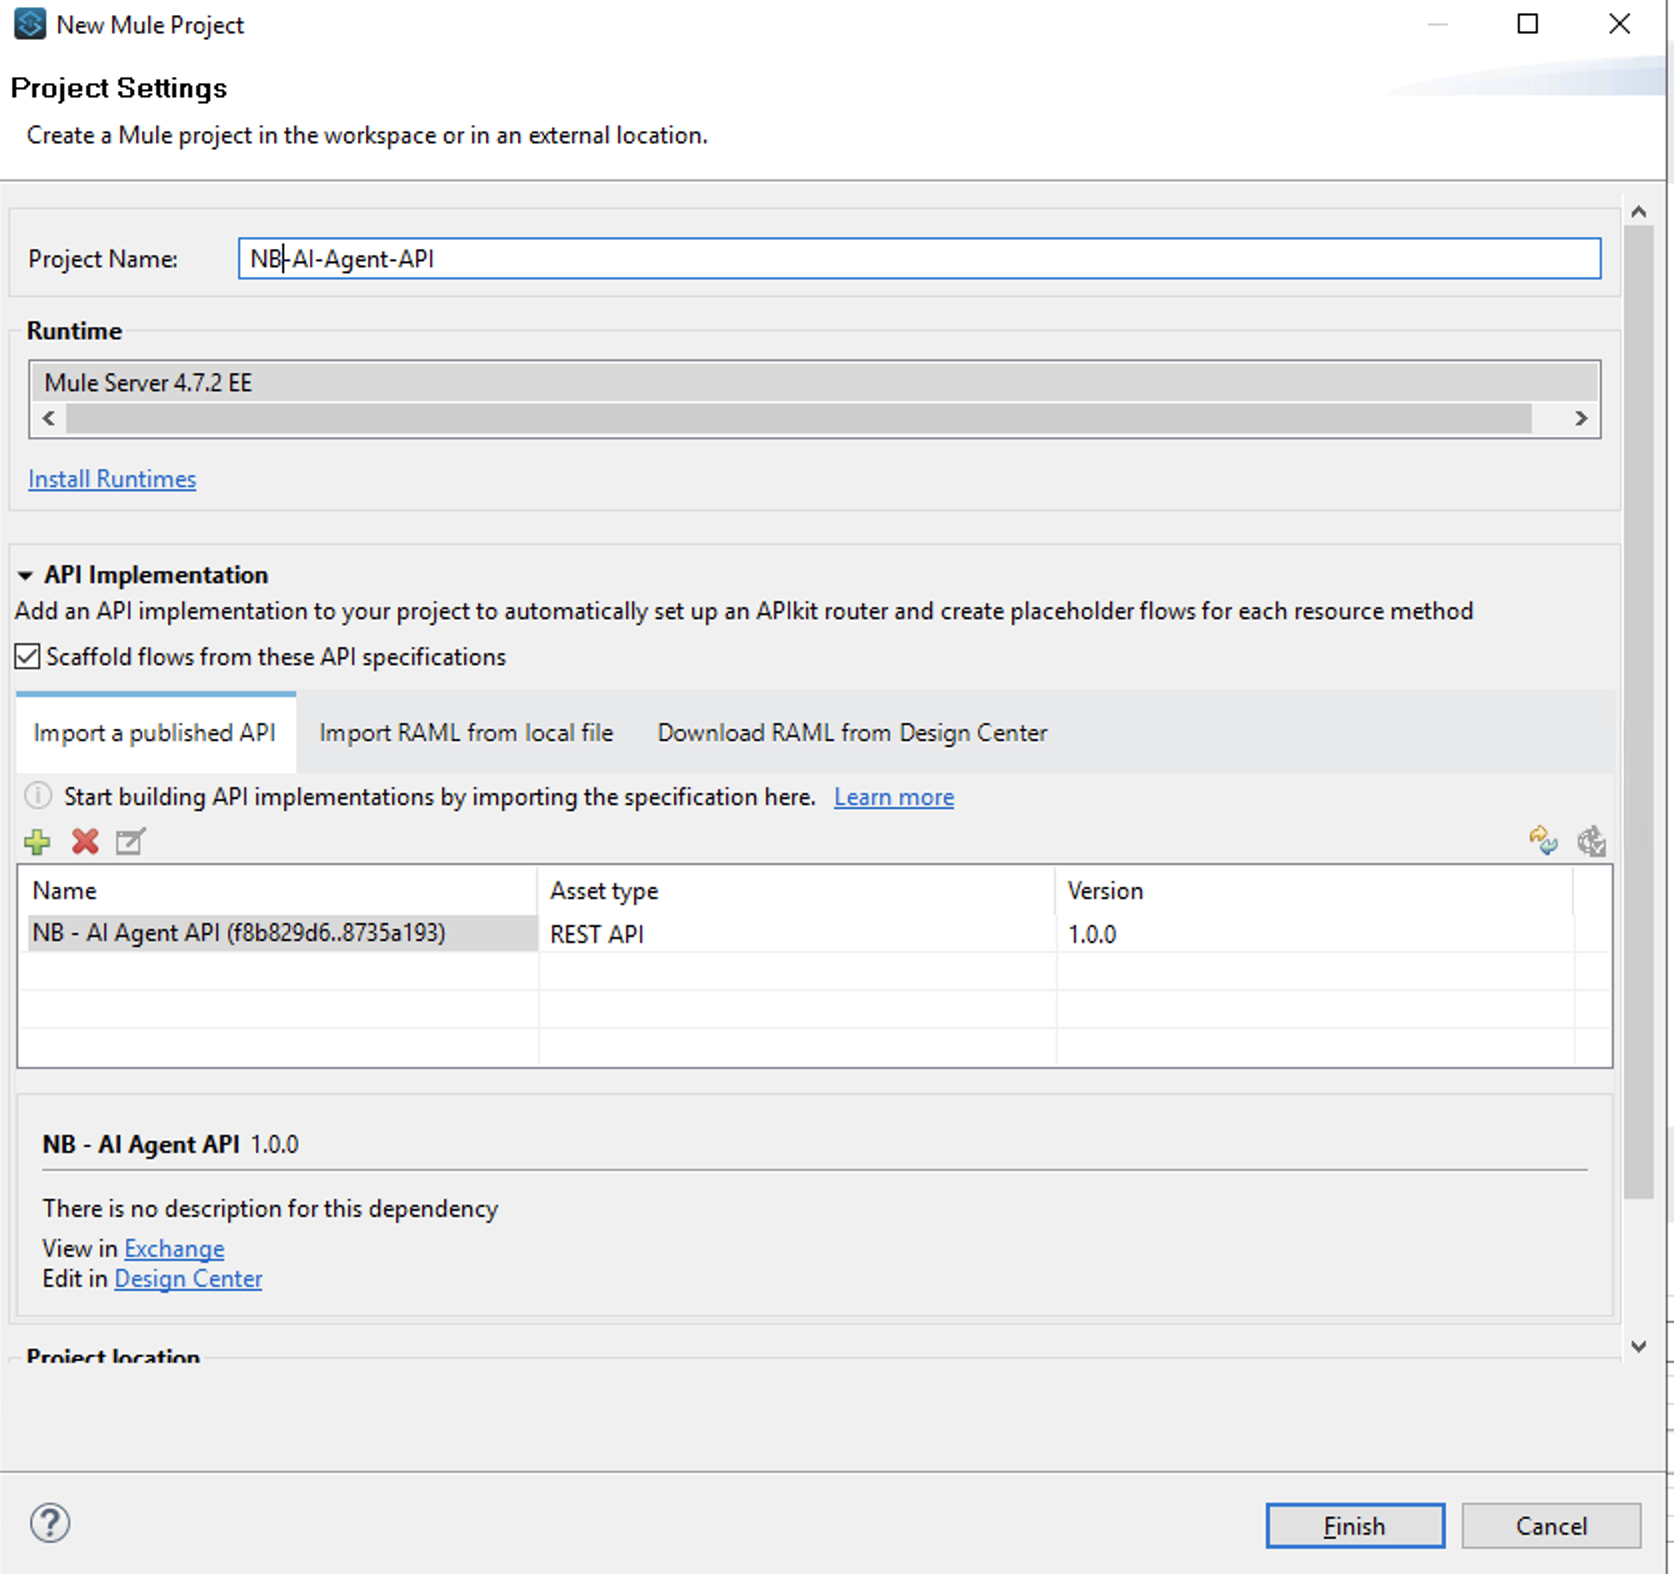
- In Anypoint Studio select File –> New –> Mule Project
- Call your project
<initials> - AI Agent API In Import a published API select the “+” icon, select from Exchange and type the name of the API specification you published to Exchange in Step 1
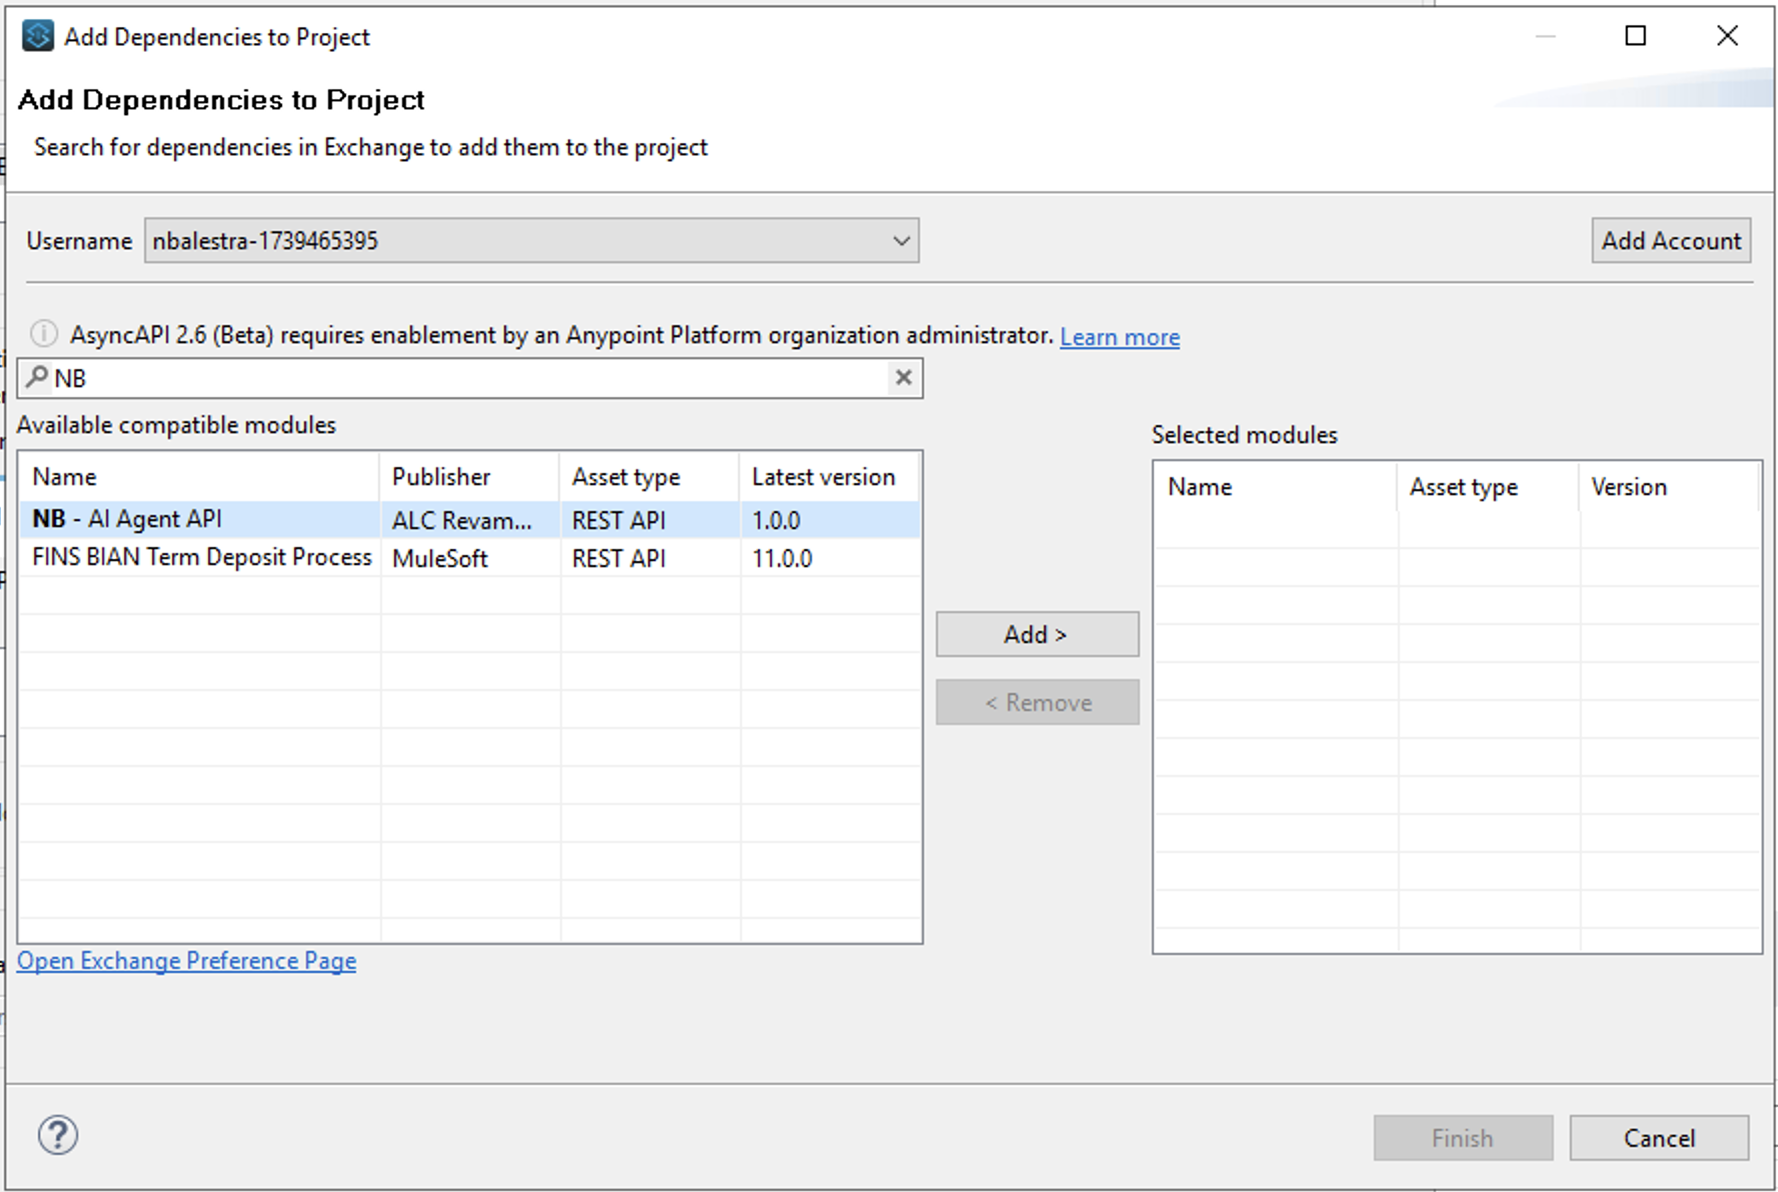
- click on Add > then Finish
- Now you can click on Finish to scaffold the API implementation
You should now have a new API scaffolding in place.
In the Package Explorer right click on src/main/resources and select
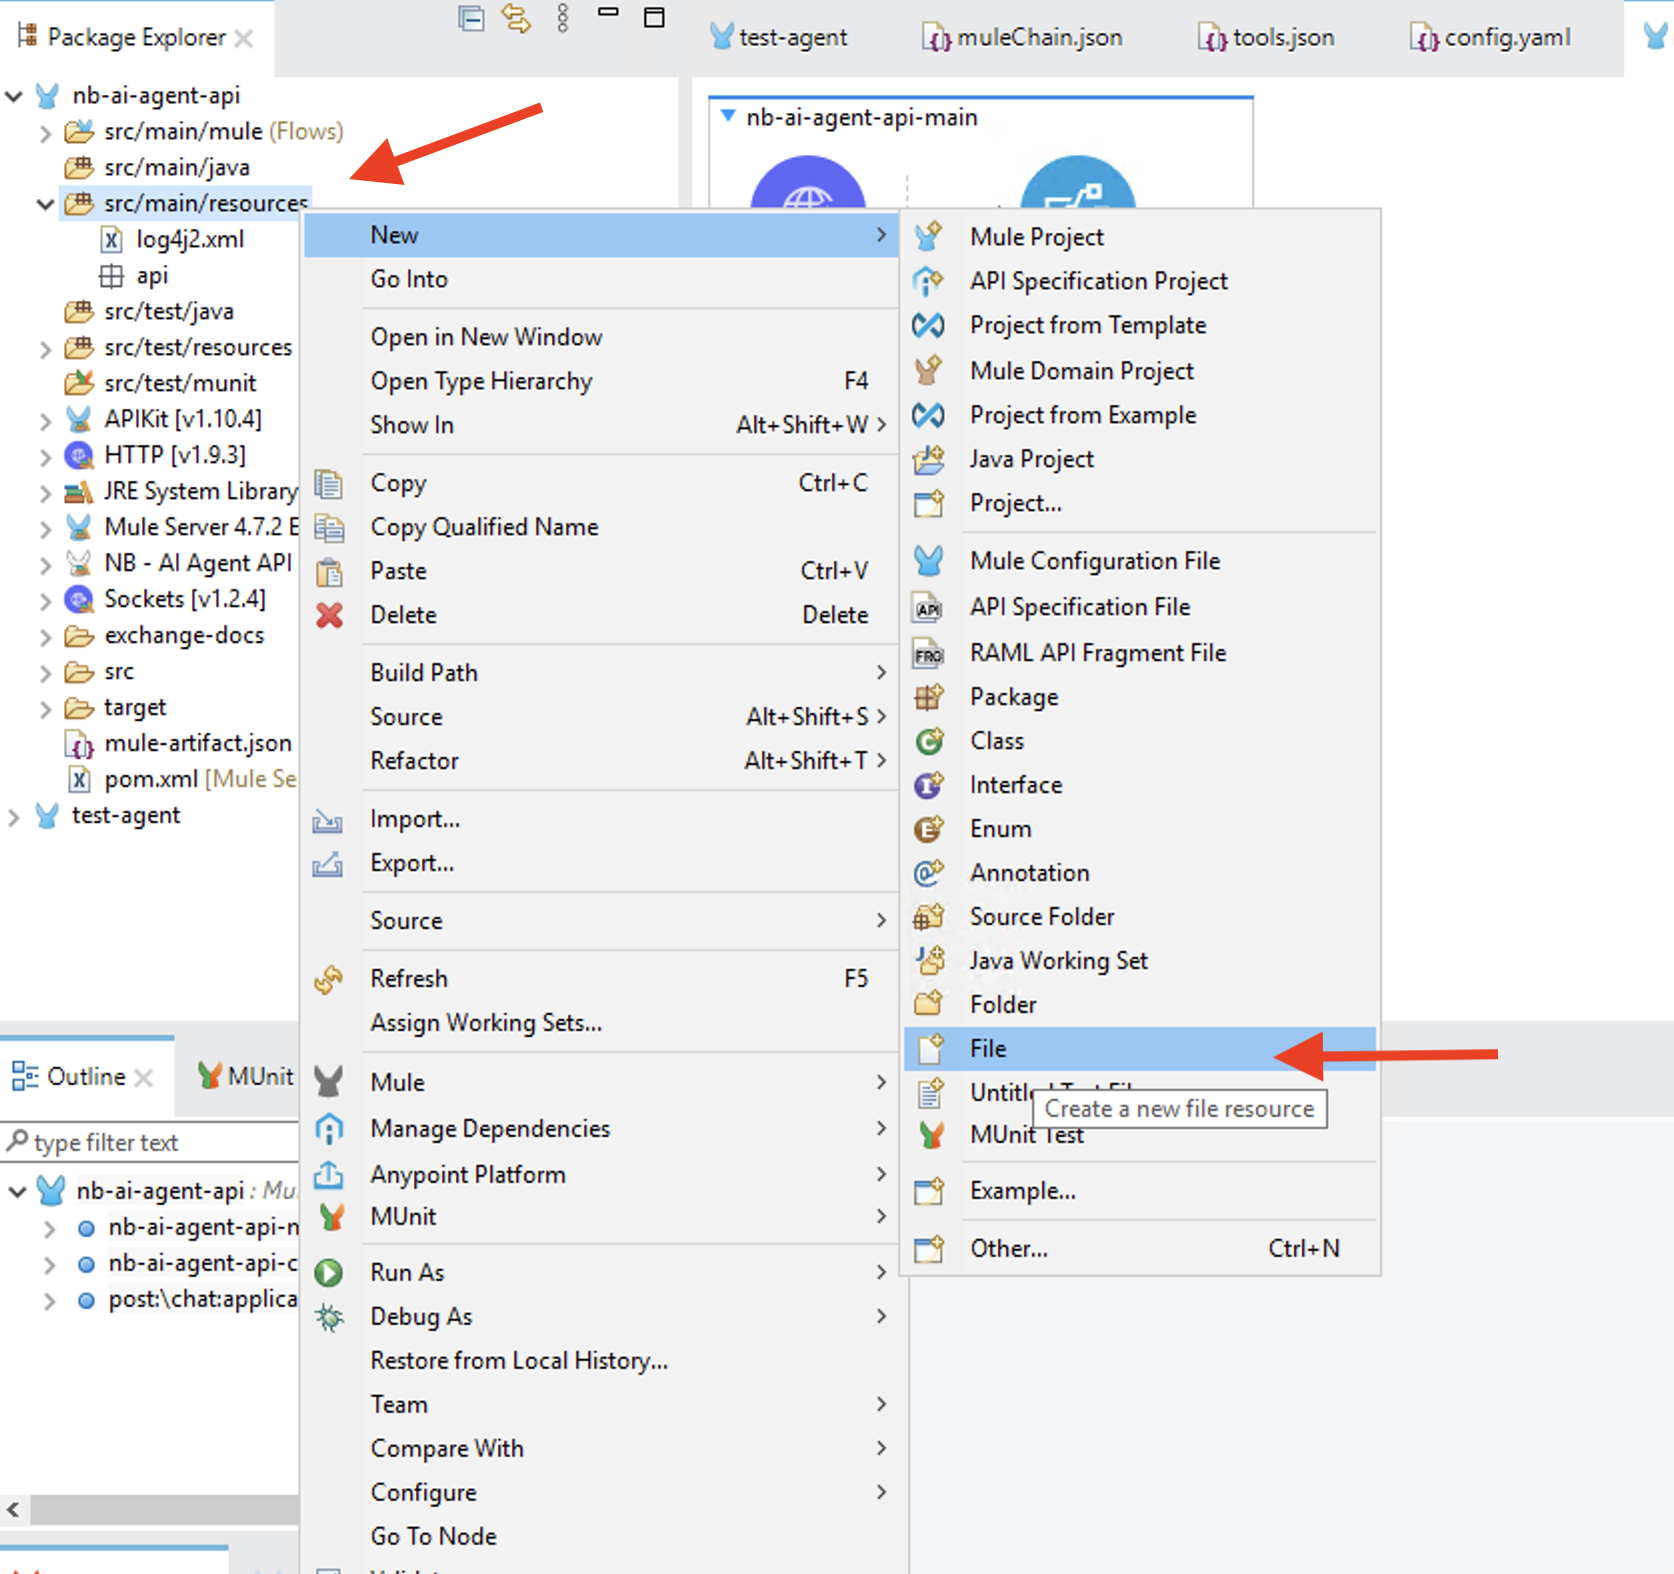
- Name the file
mule-chain.jsonand click on Finish Paste the following content in the newly created file:
     {
         "AZURE_OPENAI": {
         "AZURE_OPENAI_KEY": "",
         "AZURE_OPENAI_ENDPOINT": "",
         "AZURE_OPENAI_DEPLOYMENT_NAME": ""
         }
     }
For this workshop we’ll be leveraging Azure OpenAI as the LLM to generate the natural language response. However, our connector supports multiple LLMs as you can se on the connector documentation page.
Your instructor should have provided you with the API Key and Deployment Name needed to connect to the LLM provisioned for this workshop.
To allow your agent to invoke the orders API we will leverage the Tooling capability of the Mule AI Chain connector. Tools is the ability of an LLM to invoke an action whenever the LLM is not able to answer the user’s question. In our case the only way the LLM can provide details about orders is by invoking an external API which we will configure.
Following the steps above, create a new file and name it tools.json
Once created paste the following content (which we’ll need to tweak a bit):
 [
     {
         "action": "Execute GET requests for API endpoints.",
         "url": "<CHANGE THIS>/api/orders?customerId={customerId}",
         "name": "Retrieve orders",
         "method": "GET",
         "example-payload": "{}",
         "headers" : "",
         "query": [
             "What are my order",
             "List all the open orders",
             "Show a list of all my orders",
             "Show me the list of my orders. My ID is assdf-342a-sdfa"
         ],
         "description": "Retrieve the list of orders for a given customer. If the ustomer ID is not known ask the customer to provide their ID. Once the ID is known replace {customerId} in the URL with the actual customer ID This action applies whenever users' intent is 'Orders overview', 'My orders', 'All orders'."
     }
 ]
We now need to update the previous file with the host name of the orders API that the connector will invoke to ground the customer’s prompt.
The API-Led workshop Anypoint environment already has a mok implementation of the Order API which, among others, provides an endpoint to get all the orders given a customer ID. This implementation doesn not connect to any backend and therefore you can pass the API any value as customerId.
- Login into Anypoint Platform
- Head to Runtime Manager
- Select the Sandbox environment and select the
mon-order-apiapplication - Copy the Public Endpoint and paste it in the
tools.jsonfile where it says<CHANGE THIS>
Check the following animation to see the steps we just described:
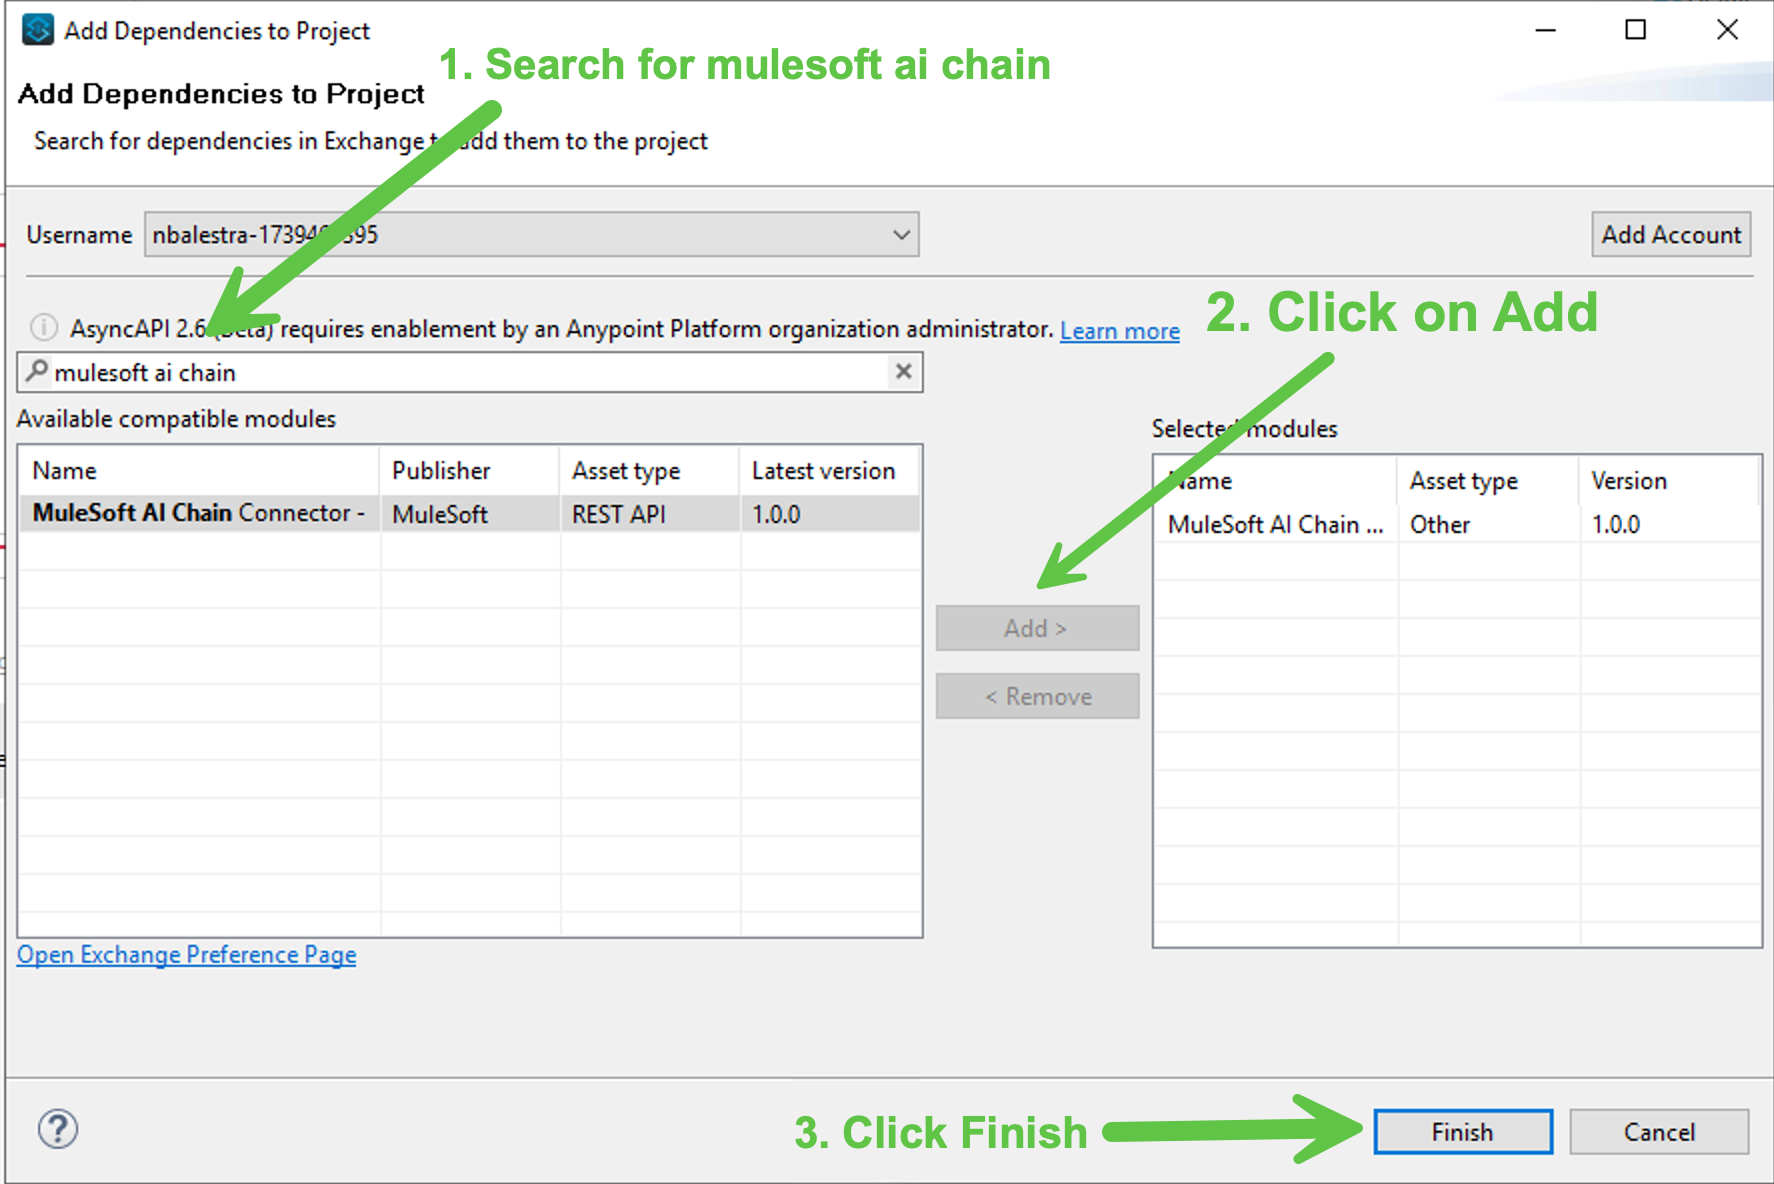
- Open the
<initials>-ai-agent-api.xmlfile and in the Mule Palette click on Search in Exchange Search for mulesoft ai chain, click on Add once the MuleSoft AI Chain Connector is displayed then click on Finish
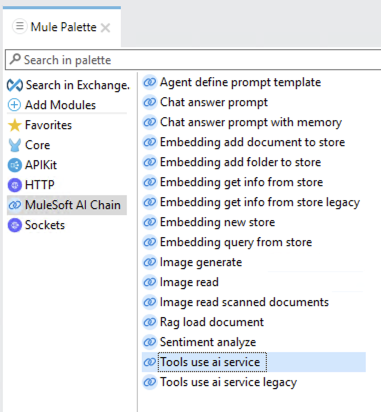
- Now scroll down to the
post:\chat:application\json:nb-ai-agent-api-configflow and remove the Logger connector From the Mule Palette select the MuleSoft AI Chain connector and then select the Tools use ai service operation
Drag the Tools use ai service operation into the
post:\chat:application\json:nb-ai-agent-api-configflow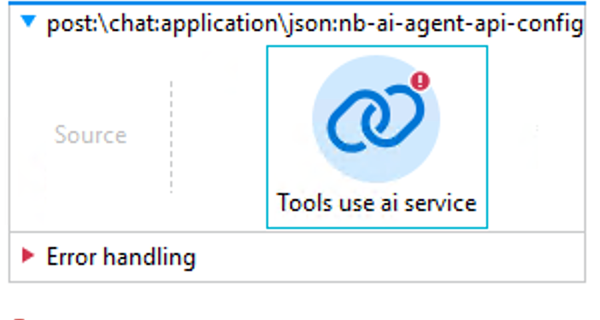
Believe it or not, our agent is pretty much done. The last task is to configure the MuleSoft ai Chain connector.
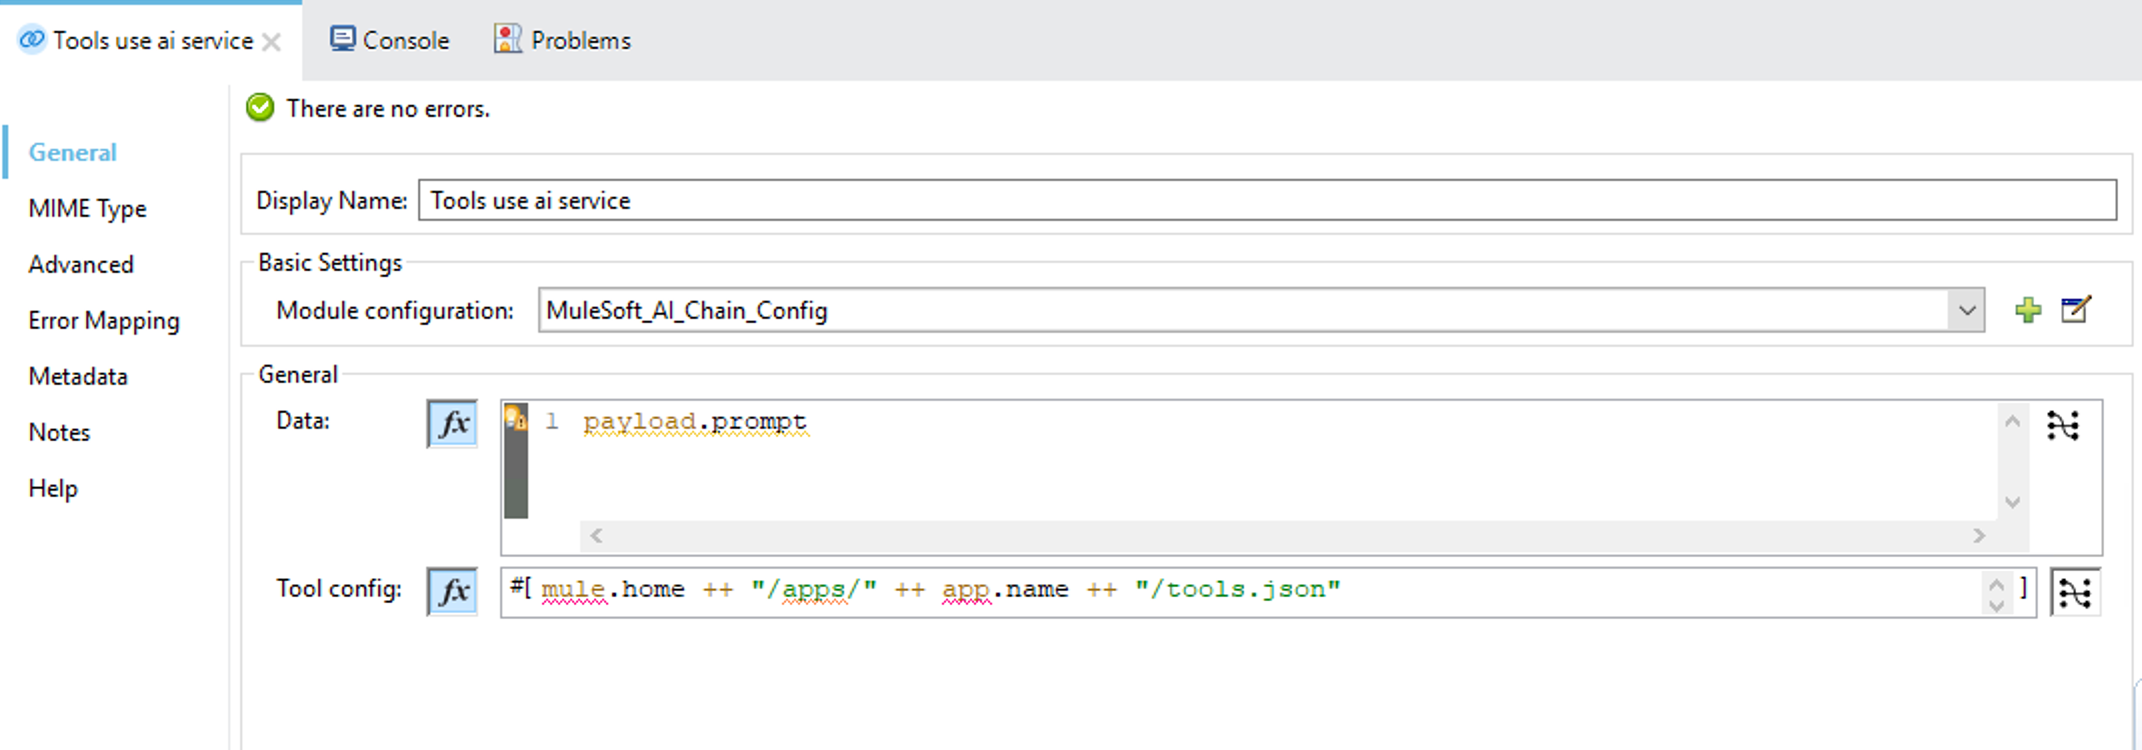
Click on the Tools use ai service connector you just added to the flow and in the configuration pane paste this value in the Tool config field:
mule.home ++ "/apps/" ++ app.name ++ "/tools.json"Ensure the “Switch to expression mode” button
 is enabled. If this is true you will see the value above showing syntax highlighting:
In the Data field enter:
payload.promptAgain, ensure the “Switch to expression mode” button
is enabled (it should already be the case)- Finally click the “+” button next to Module configuration and select the following values:
- LLM Type :
AZURE_OPENAI - Config type :
Configuration Json(we’ll specify themuleChain.jsonfile we created earlier) - File path:
mule.home ++ "/apps/" ++ app.name ++ "/mule-chain.json"- Make sure the expression language button Fx is enabled. You should see the syntax being highlighted as explained earlier
- Model name -
gpt-4o-mini
You can leave all the other fields with the pre-defined default values.
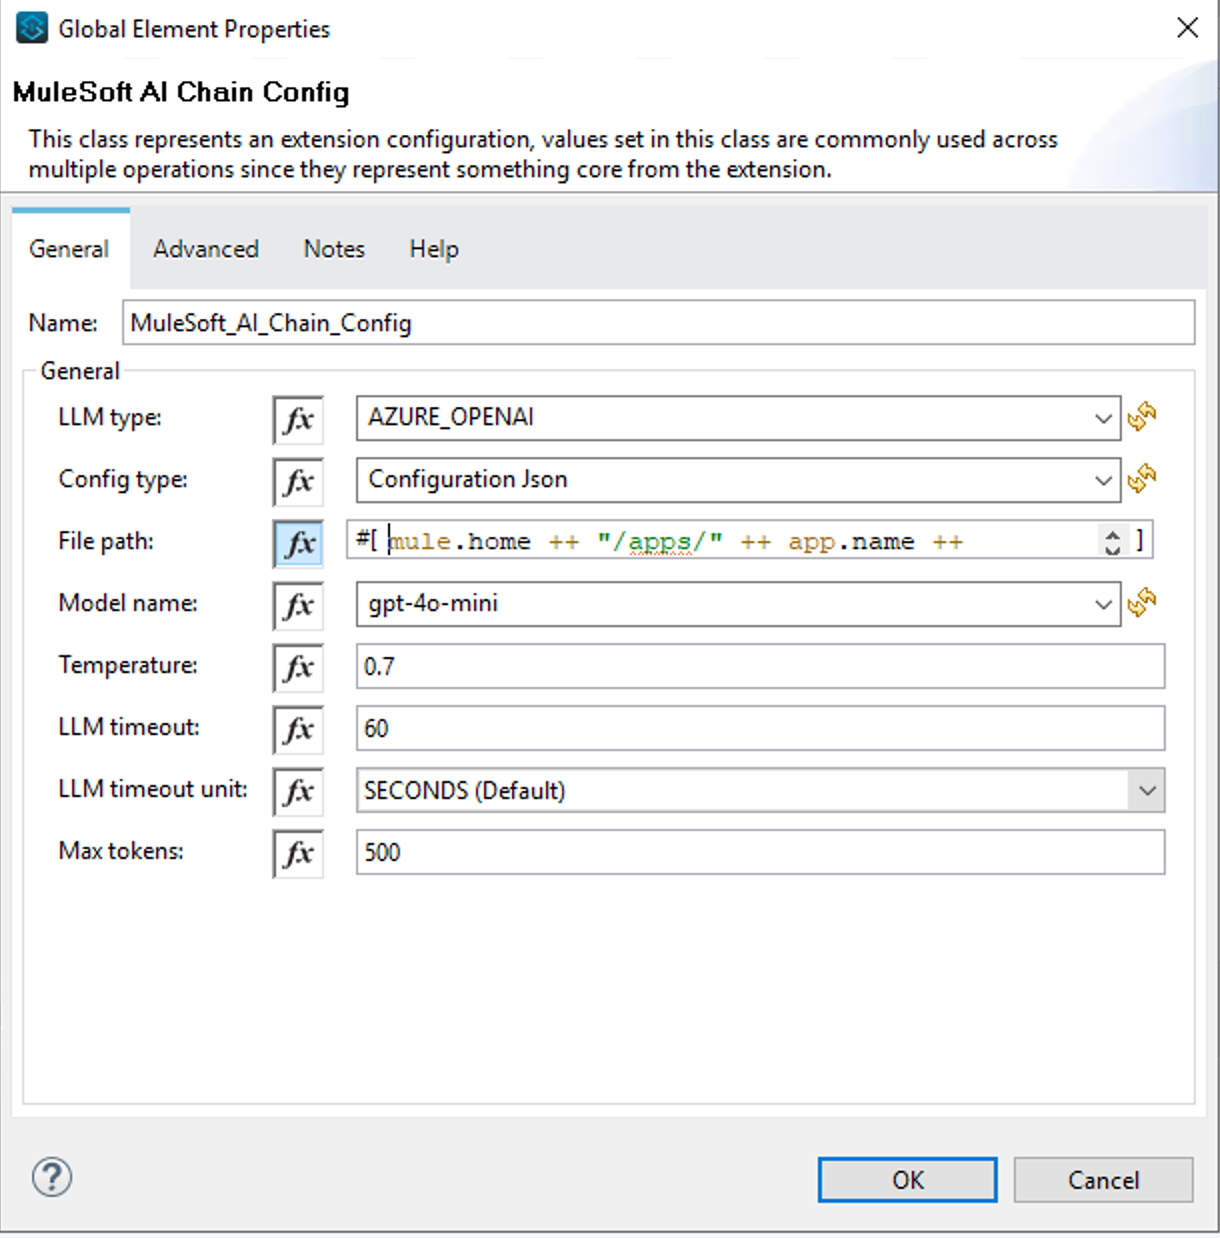
This is how the connector configuration should look like:
And that’s it! Your agent is basically done!
- LLM Type :
Step 3 - Test your agent locally
We can test our agents directly in Studio before deploying it. We will use the embedded API console to invoke our agent
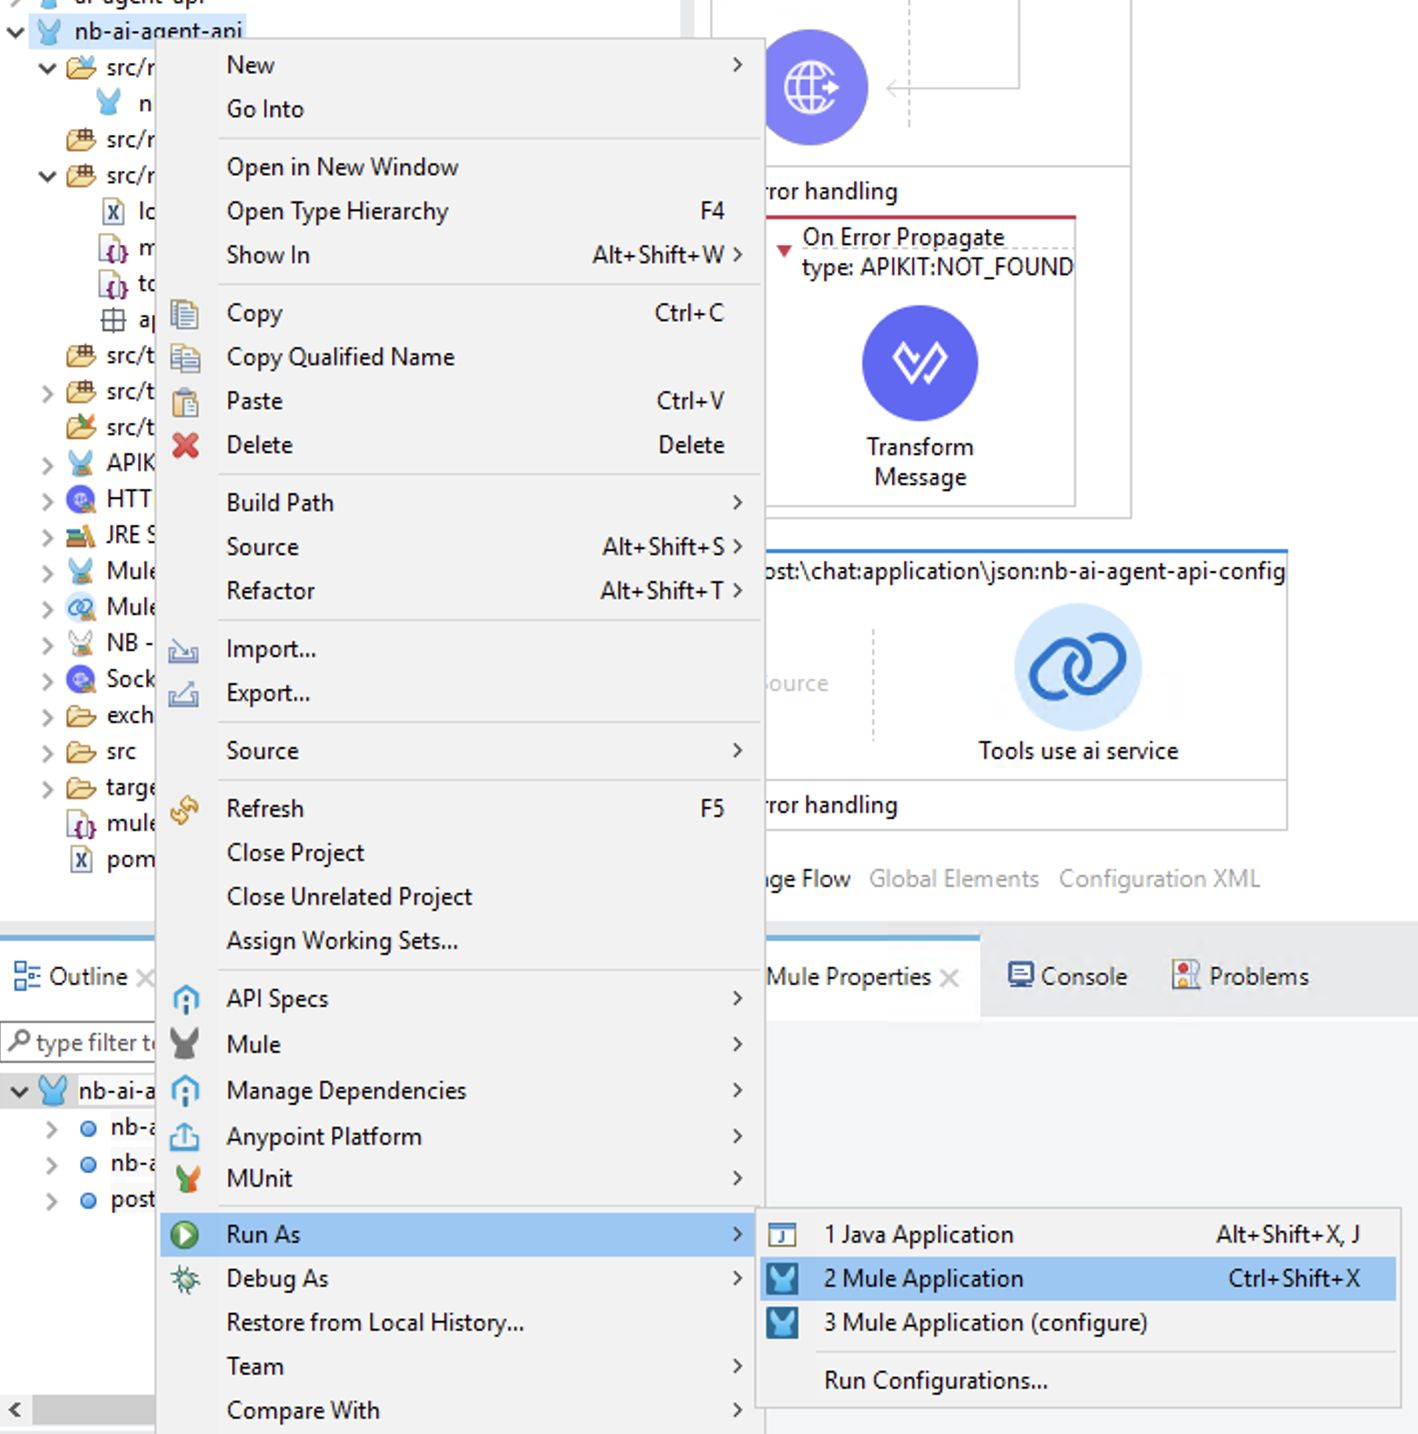
Right click on your application name in Package Explorer and select Run As -> Mule Application
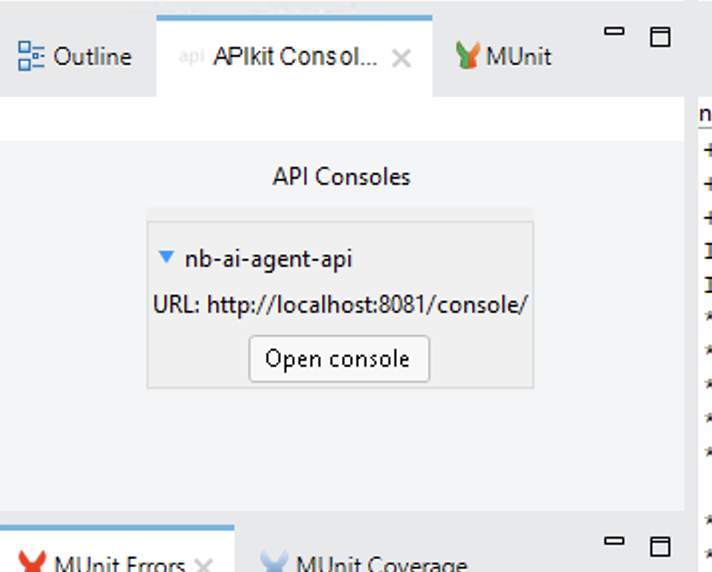
Once the application is running click on Open console in the APIKit Console pane:
Now click on the
POSTmethod: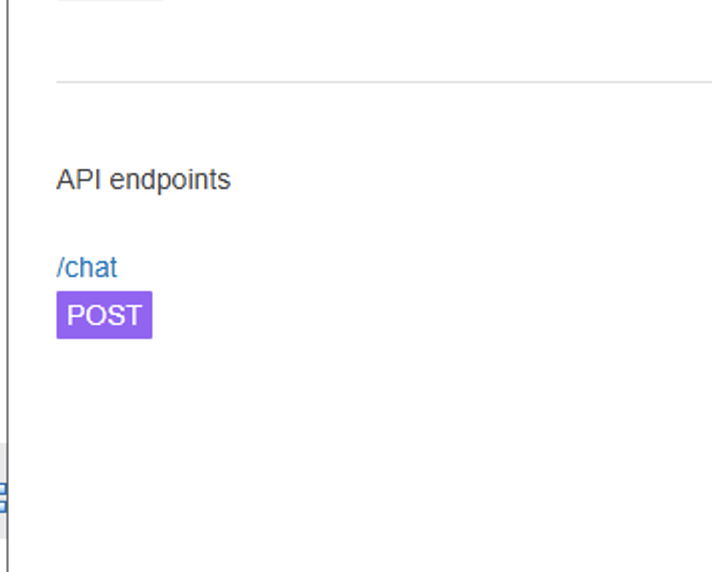
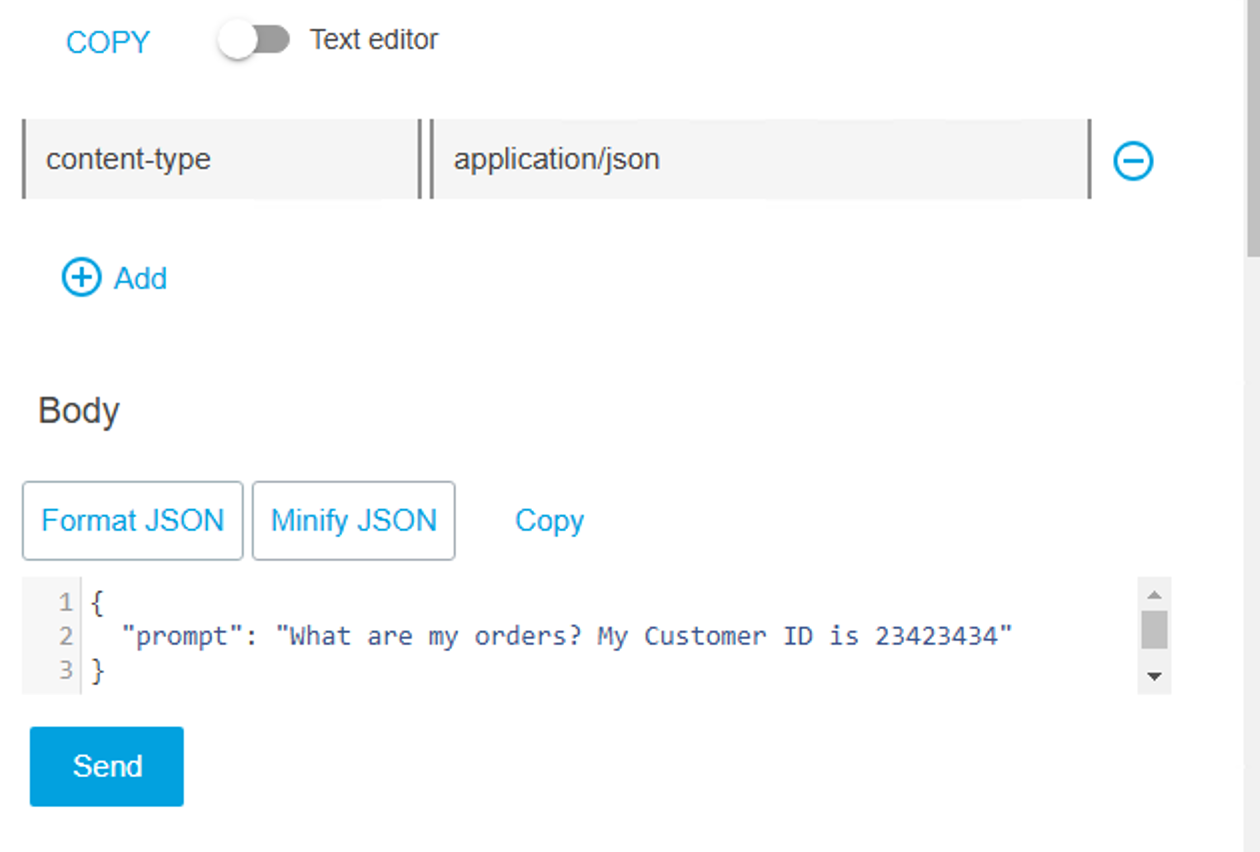
Click on the Try It button on the top right and in the Body section, type “What are my orders? My Customer ID is 23423434” and click on Send
If everything goes well you should receive a response that provides a list of orders:
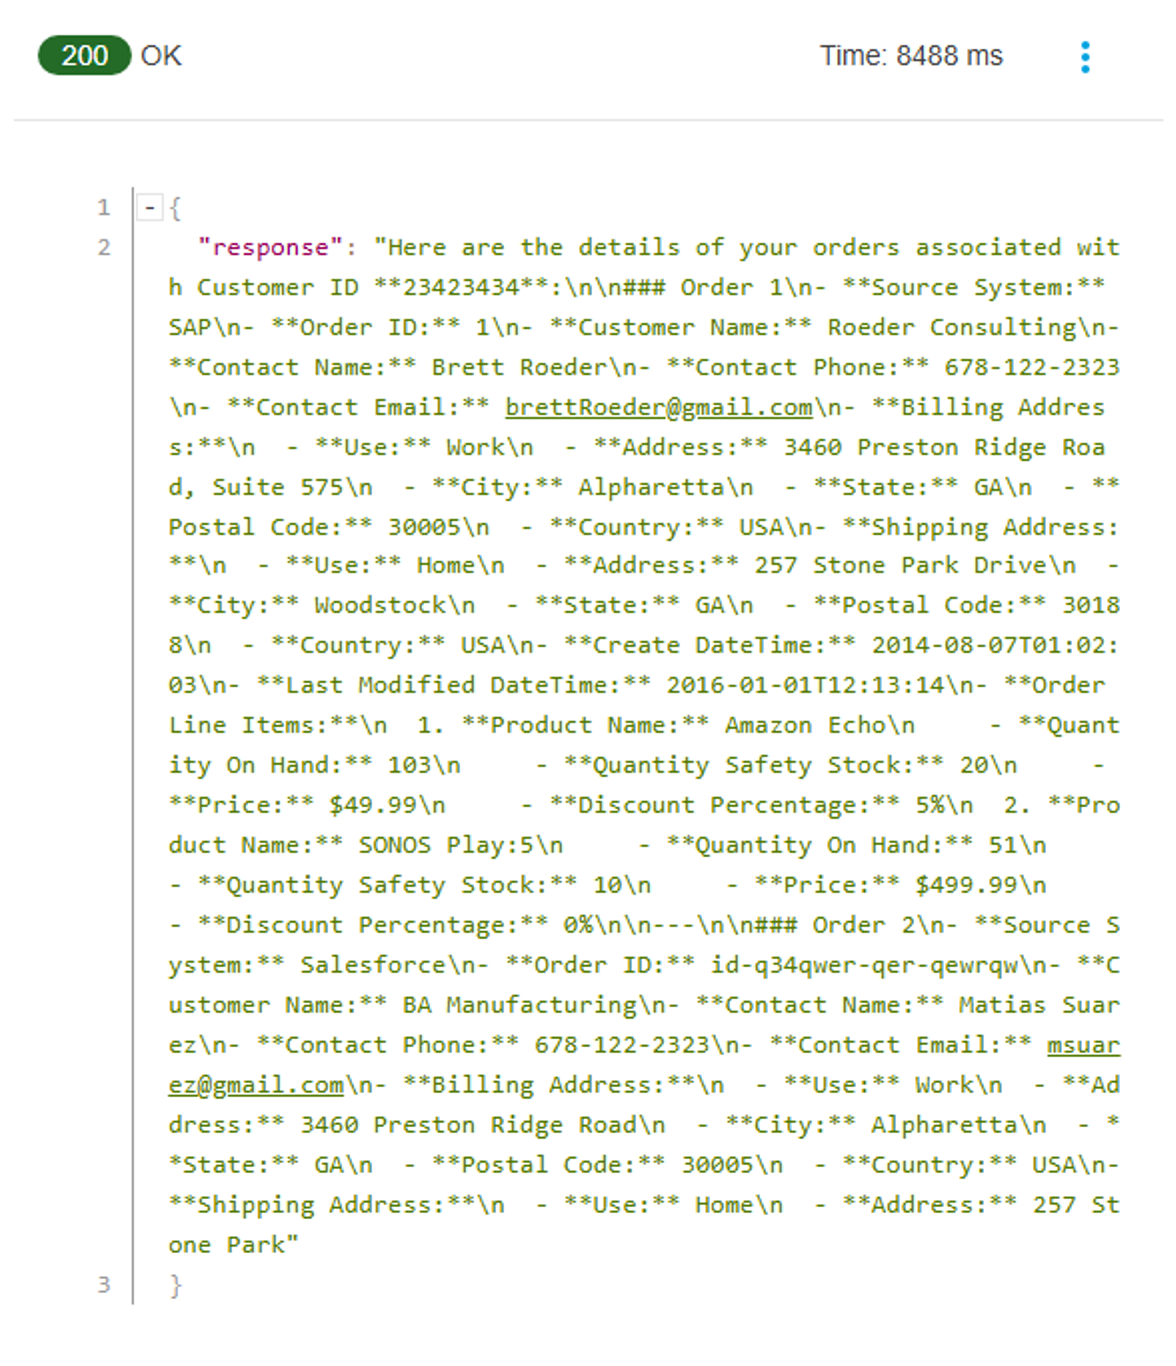
The API we are invoking is not actually connected to any backend and therefore you can provide any Customer ID. Also note that we wanted to keep this module simple hence why we need to provide a customer ID. In a real life project we would add other tools to allow the Agent to identify the customer so we wouldn’t need to provide an ID which customers wouldn’t necessarely know.
Summary
In this module you’ve learned about the MuleChain AI connector and specifically how to leverage the Tooling to instruct the agent to autonomously invoke an existing API to ground a customer prompt.
Now let’s move to the Next module to deploy and test our agent!