- Overview
- Step 1: Add Salesforce Connector to the Project
- Step 2: Create a Property File
- Step 3: Configure Salesforce Connector
- Step 4: Create an Account
- Step 5: Validate Salesforce Response
- Step 6: Build the Response
- Summary
Lab 2: Implement the customer creation logic
Overview
In the previous lab, we created the project skeleton from the Customer API. Now it’s time to implement it. The Customer API contains all the operations for managing customer data - create (POST), read (GET) , update (PUT) and delete (DELETE). For the purposes of this lab, we will only implement the customer creation represented by the POST method.
The customer creation logic is as follows:
- Create the Account in Salesforce (SFDC) to represent the customer
- Validate the successful creation of the account
- If validation fails,
- Raise an error mapped to Bad Request (400 is the status code for Bad Requests)
- If successful,
- Get Account Details
- Convert Response to JSON
Step 1: Add Salesforce Connector to the Project
The steps that need to be executed are:
With the api view selected, click the Add Module
 sign in the Mule Palette view in order to add the Salesforce Connector and Validation module required for our implementation in the next step.
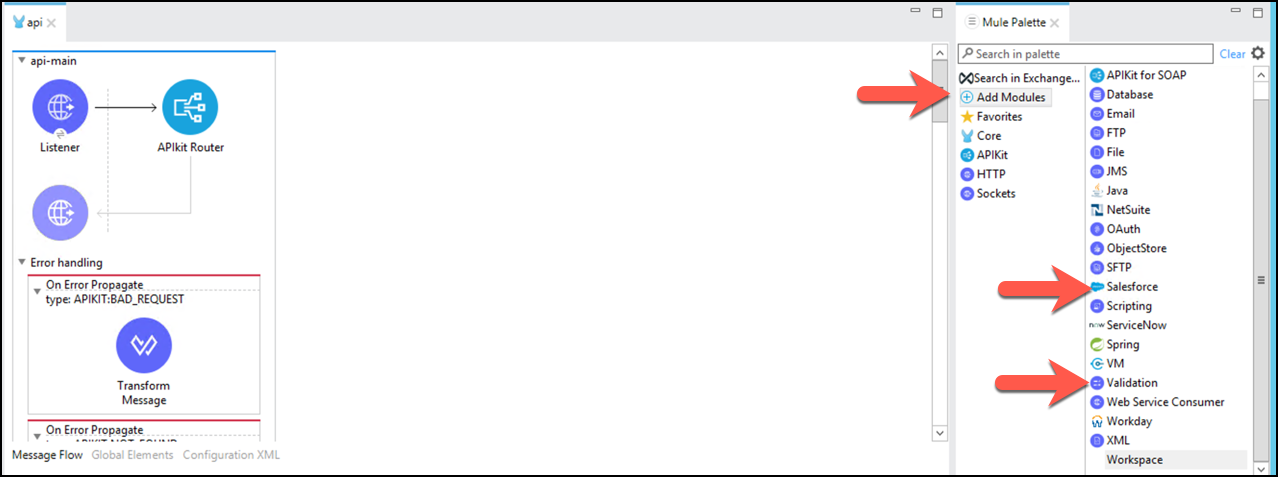
Drag and Drop Salesforce Connector and Validation Module (select latest version for this one).
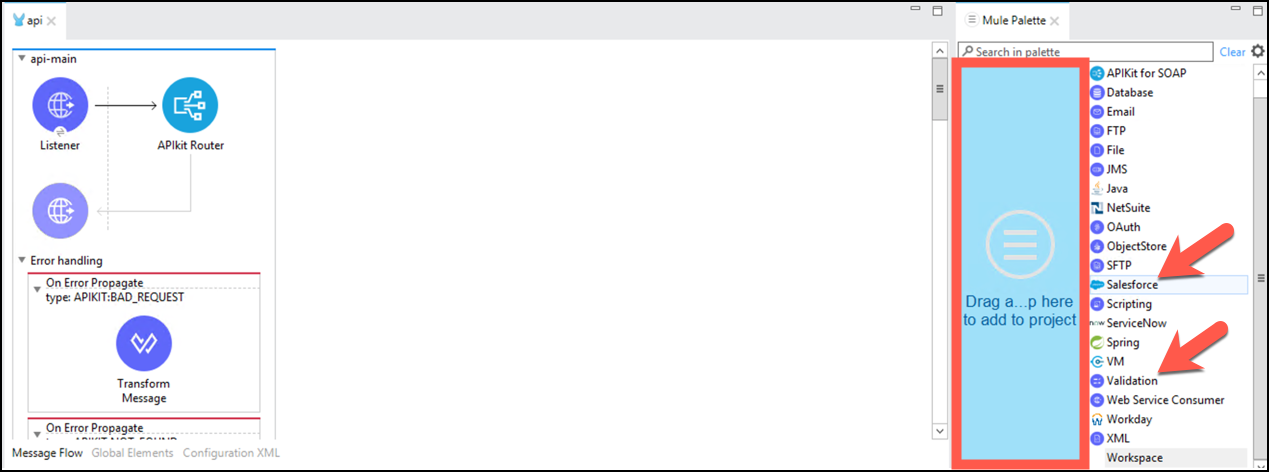
Notice that we’re leveraging the mule lightweight module-based framework to support our use case. The Salesforce Connector provides connectivity to Salesforce and the Validation Module is a component to implement validations, similar to the concept of an assertion, for validation checks like boolean expressions, null values, specific values, and other conditions. Subsequently, the flow execution can generate out of the box and custom Error Types to the Error handling scopes within your flow.
At the end, the palette should look similar to the following image.
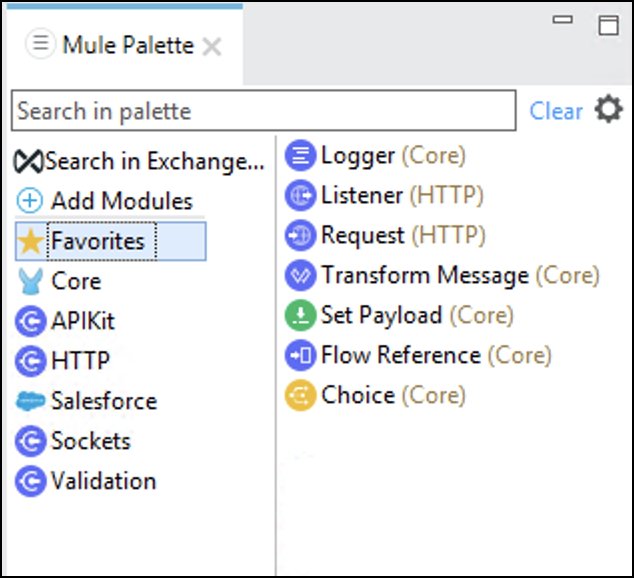
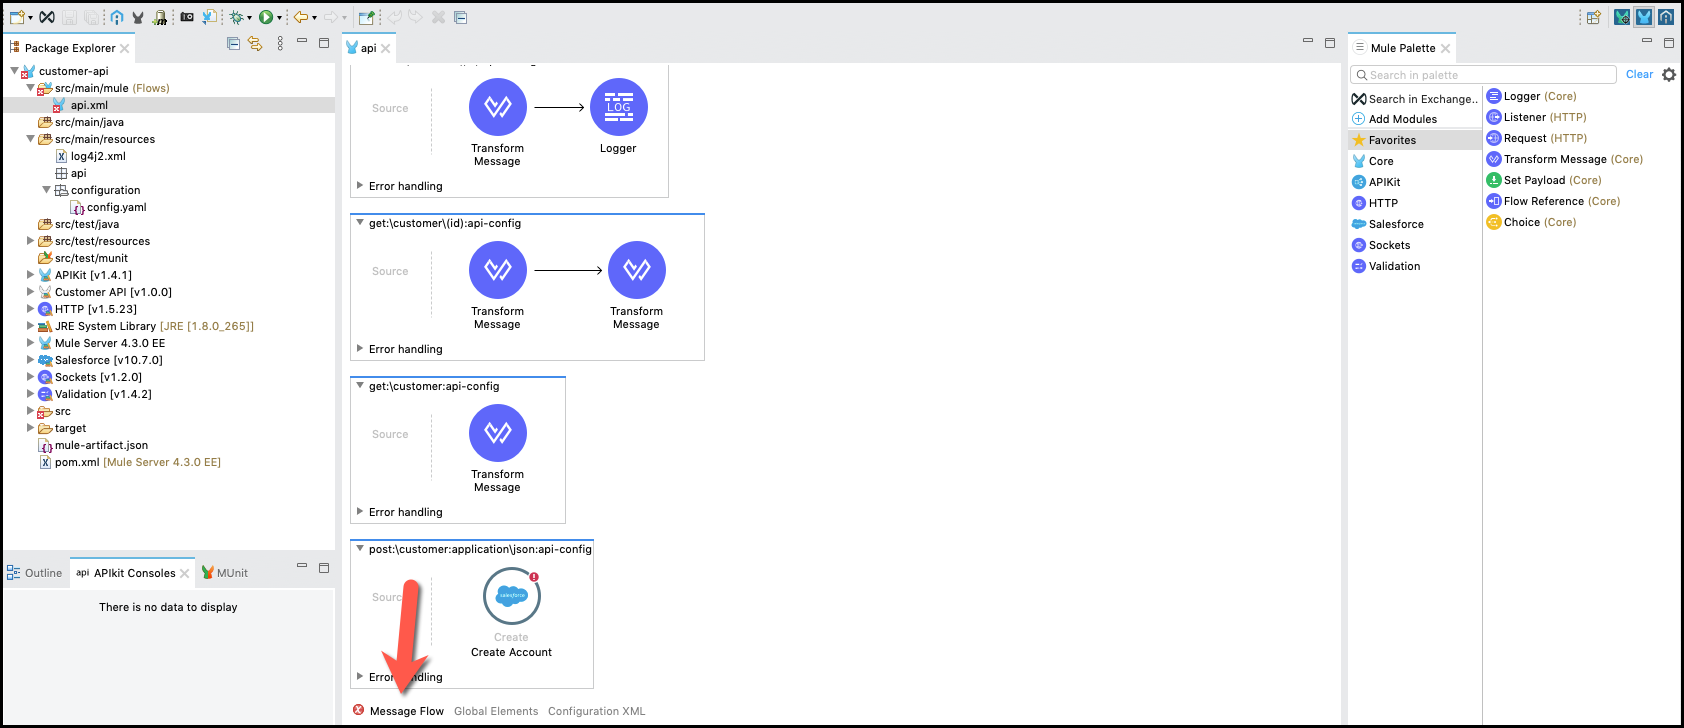
Now, you are ready to implement the POST resource operation. Find the
post:\customer:application\json:api-configresource flow (at the bottom of the api view)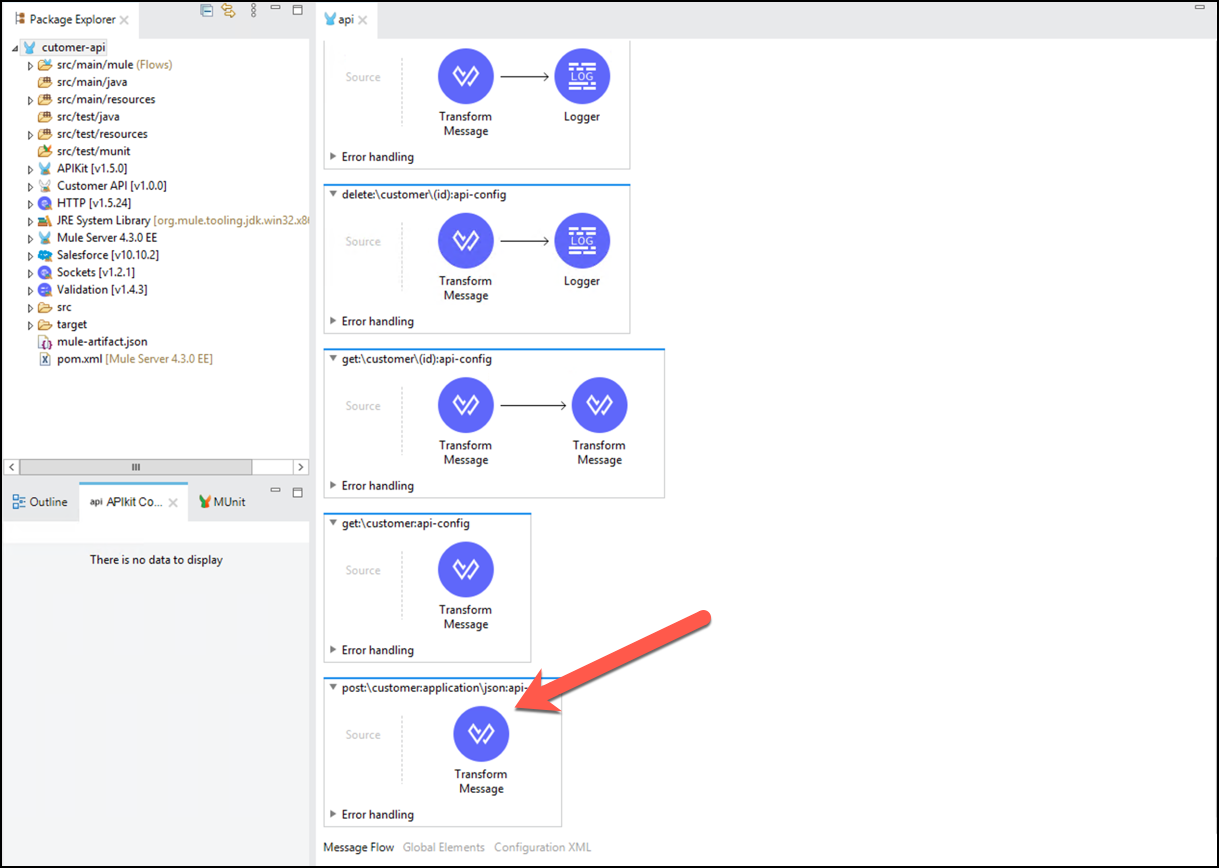
Delete the generated Transform Message step that returned the sample response from the API specification
From the Mule Palette, select Salesforce, scroll to Create and drag and drop the component to the flow.

Click on Salesforce icon and the configuration will be shown below.
Change its name to
Create Account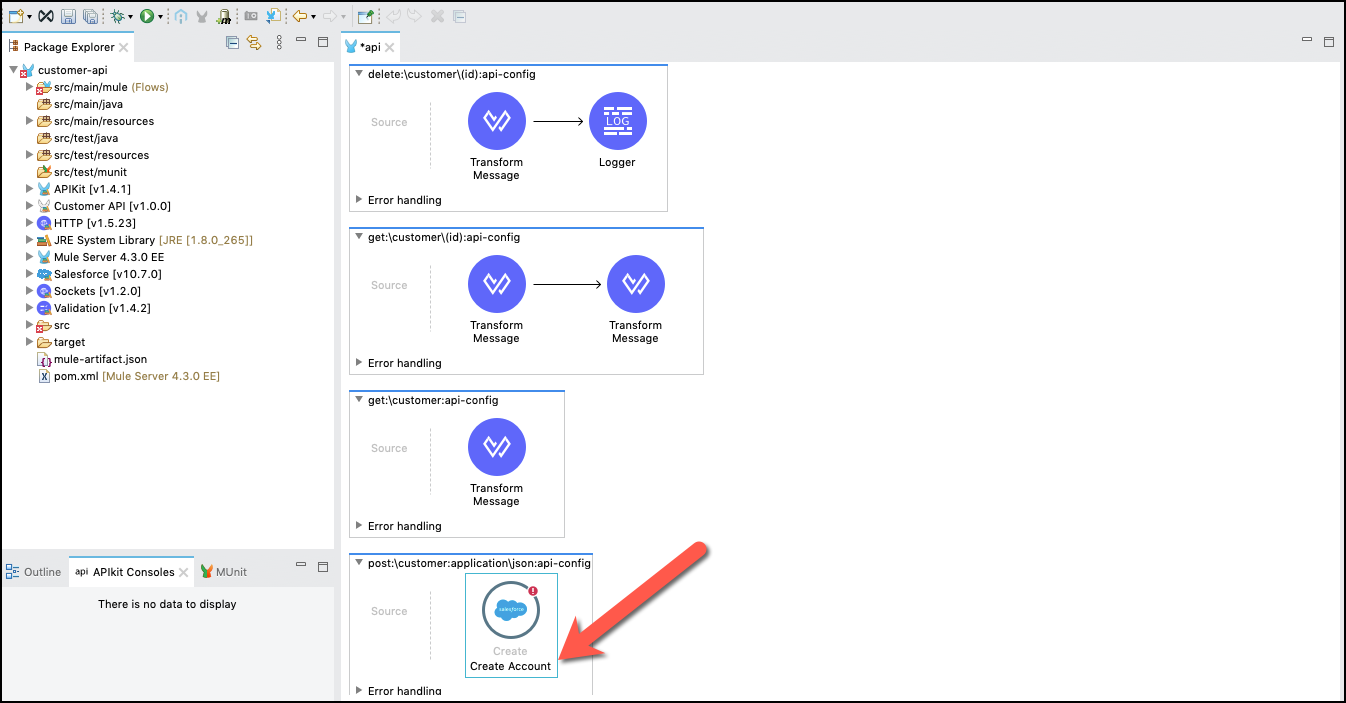
Click the
 Save All button.
Step 2: Create a Property File
It’s a good practice to create a configuration file to hold all the parametrized properties in the project. We are going to create one and configure the connection credentials for our API implementation. First, we are going to create a folder and then create the config file.
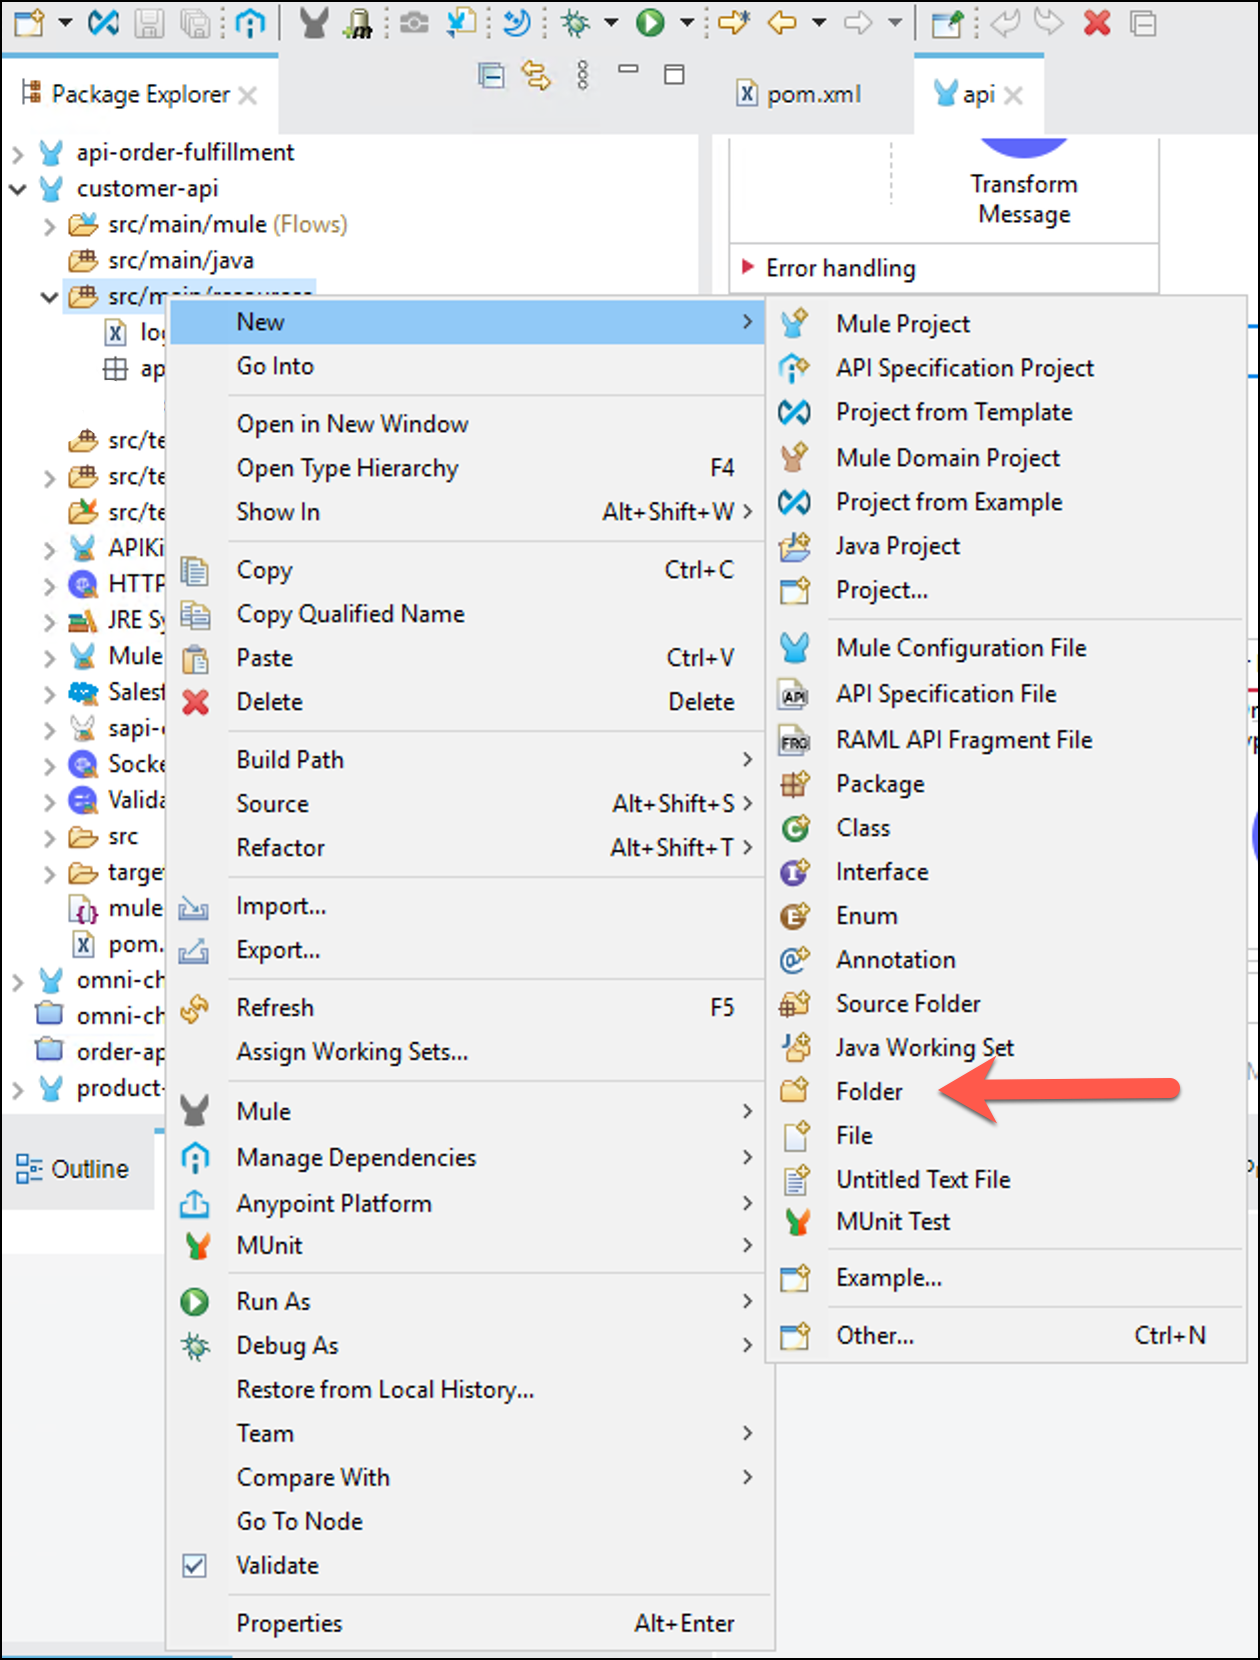
Click on src/main/resources in the Package Explorer view, right click and create a New → Folder, name it configuration and click Finish
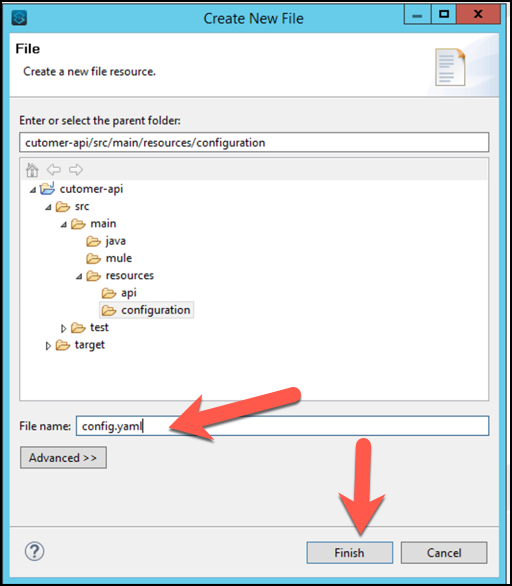
Click on src/main/resources/configuration in the Package Explorer view, right click and create a New → File, name it
config.yamland click Finish.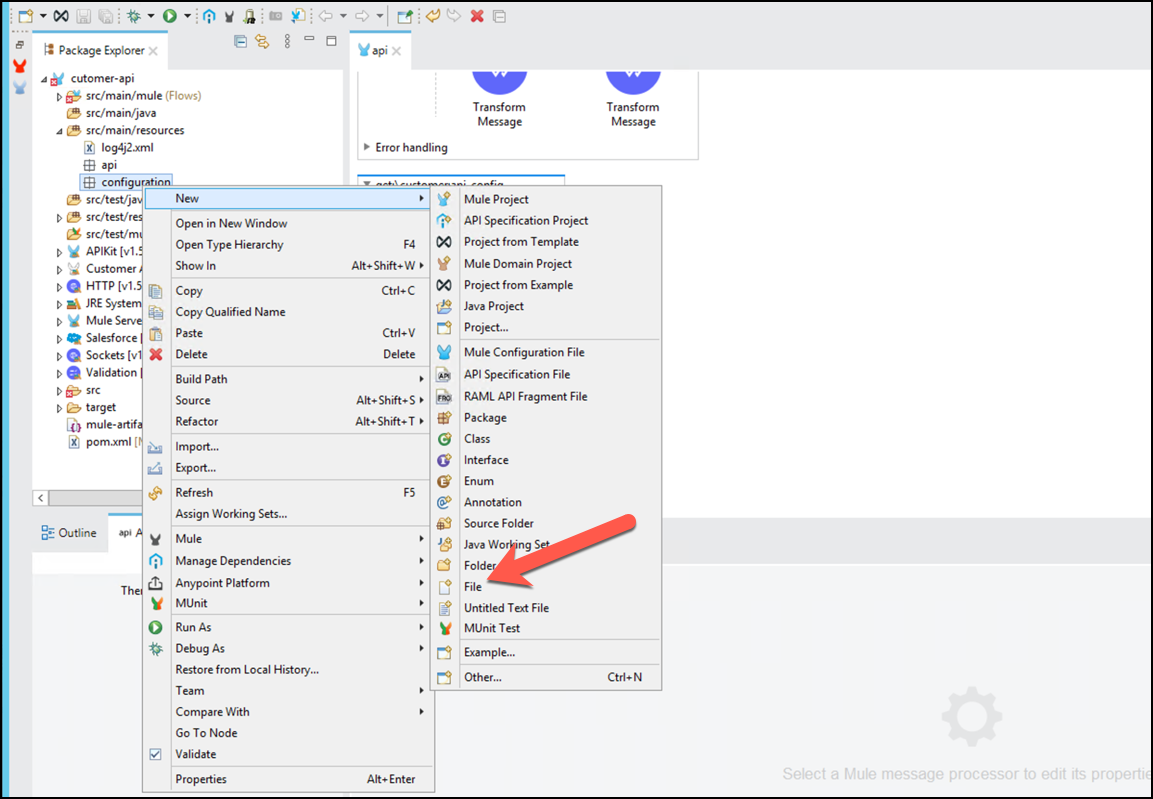
Copy the following contents into
config.yaml. These are the connection credentials your API will use for the Salesforce connector.sfdc: username: "<WILL BE PROVIDED>" password: "<WILL BE PROVIDED" securityToken: "<WILL BE PROVIDED"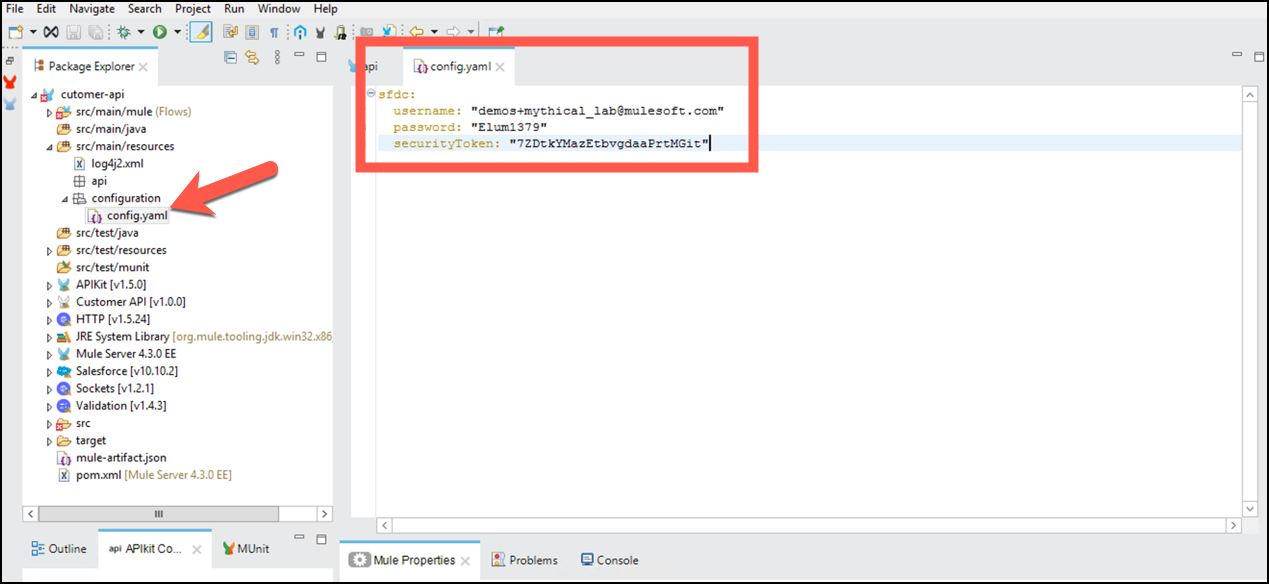
To finish the configuration of the properties file for your API, click on the api view and click on the Global Elements tab.
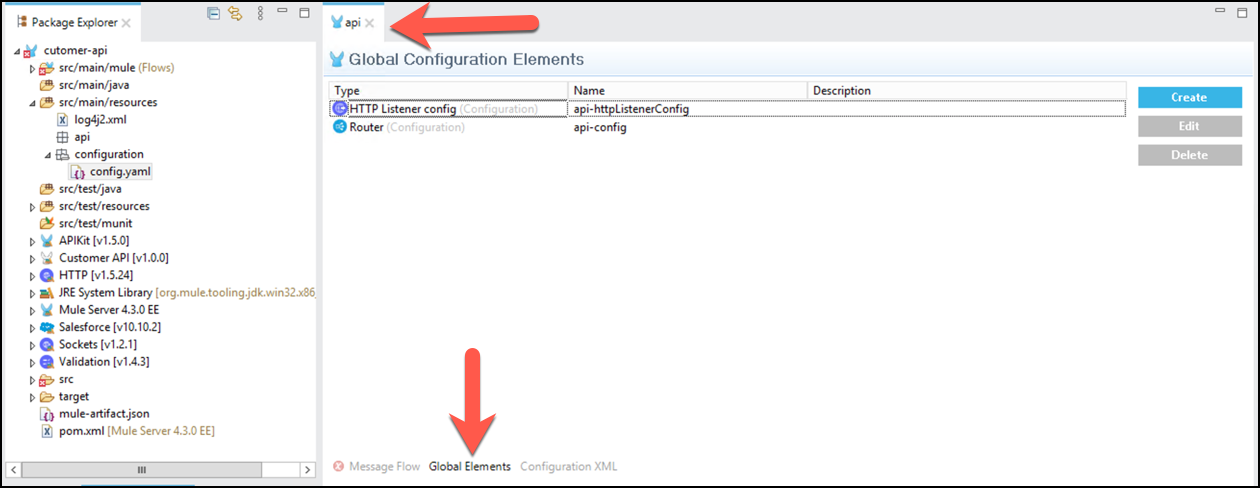
Click Create, search for properties, select Configuration Properties, click OK. enter
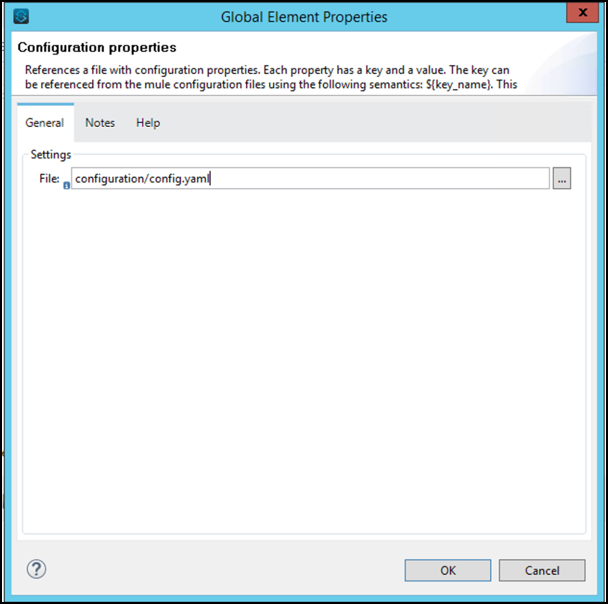
configuration/config.yamlin the File: attribute and click OK.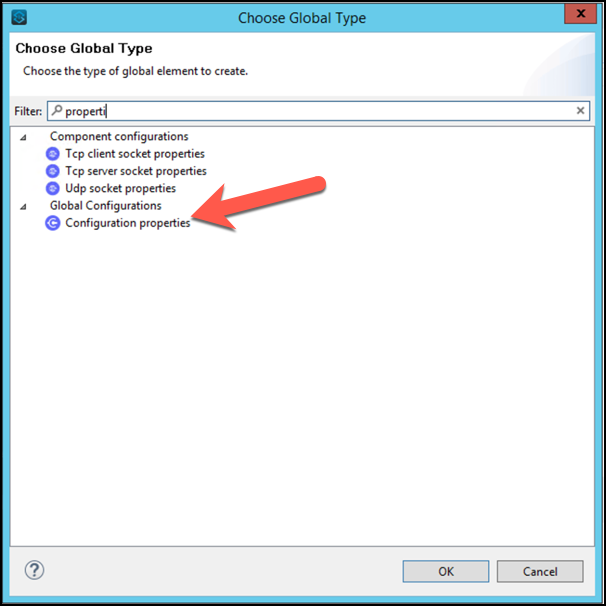
Click the
 Save All button
Step 3: Configure Salesforce Connector
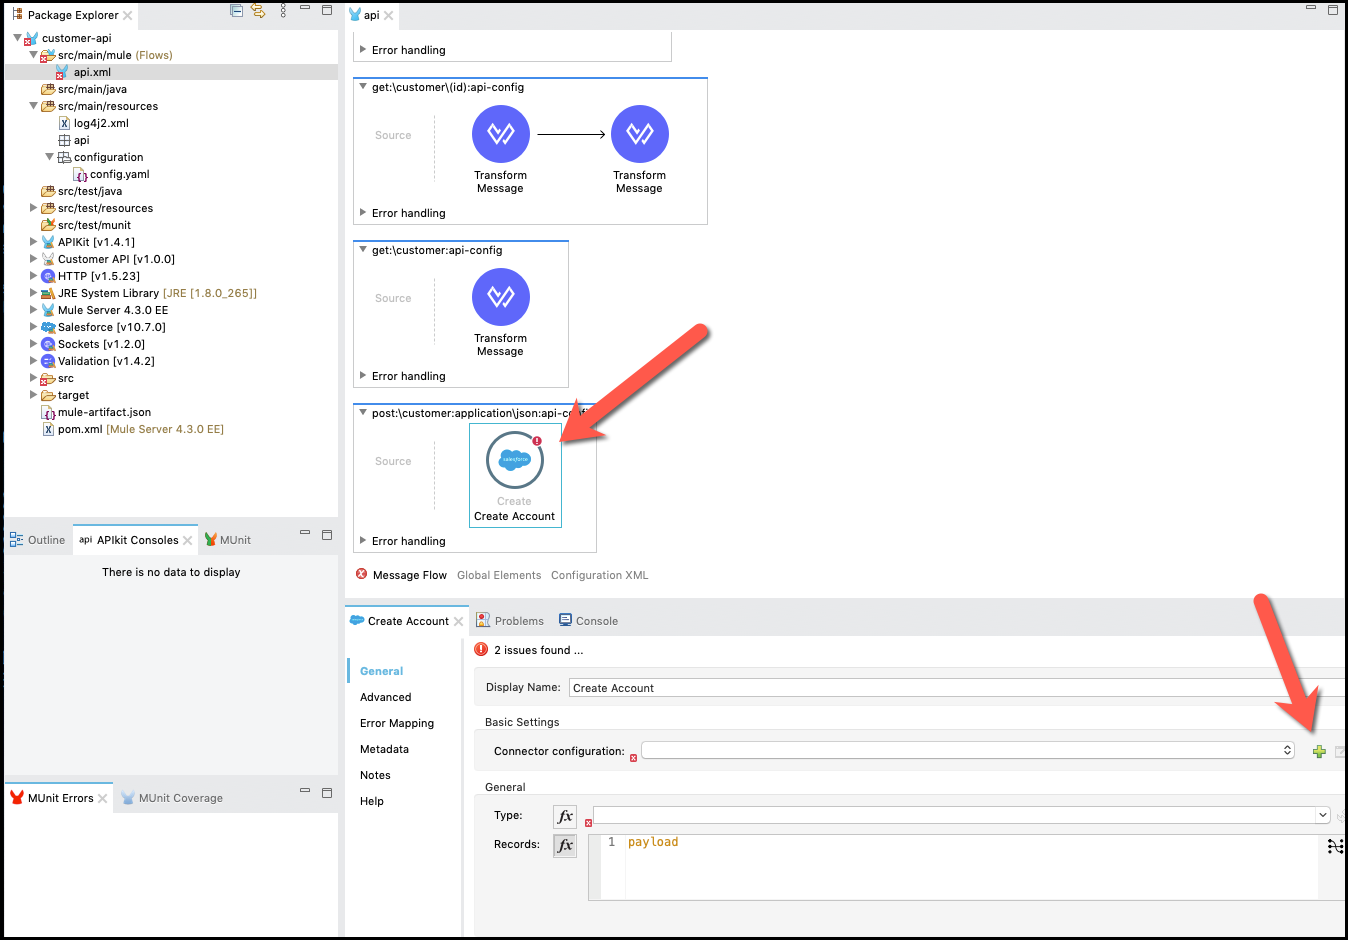
Now that you have your properties defined, let’s configure a new connector configuration. Go back to the Message Flow tab where you previously dropped the Salesforce connector and select it.
Click on
 button on the Connector Configuration.
For the connector configuration we are going to put the following properties:
- username:
${sfdc.username} - password:
${sfdc.password} - securityToken:
${sfdc.securityToken}
Press Test Connection… to check everything is in place.
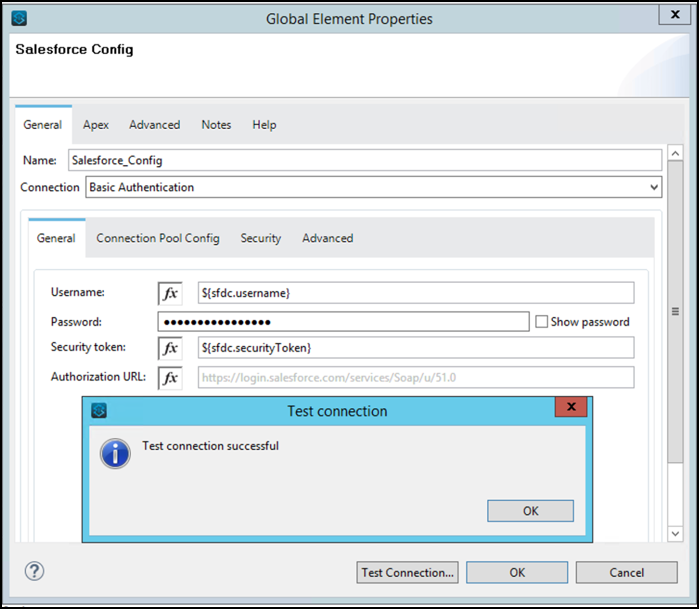
Press OK (2 times).
Click the
 Save All button.
Step 4: Create an Account
Let’s configure the Salesforce connector to create an Account. We continue in the Salesforce Panel.
Adjacent to the Type: property click the
 refresh button refresh button, then select Account.
If no options are displayed insert manually the option Account yourself.
Remove payload word in the Record box and press Refresh Metadata.

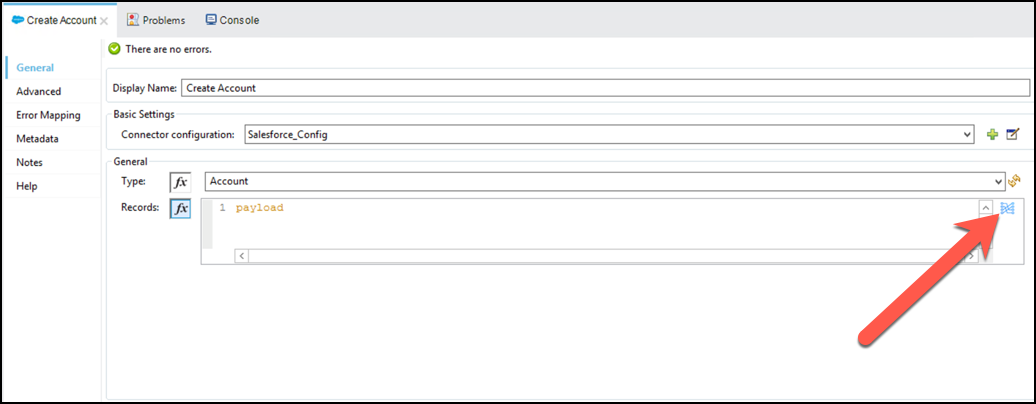
Now that we have configured the Salesforce connector, we need to create a mapping that will convert the JSON message from the Request to the Account Object that is going to be saved in Salesforce.
Inside the Salesforce connector panel, in the Records section, press on
 .
.
You will see a Dataweave transformation, look at the input and output panels. You can drag and drop each field from the request (input) to the Salesforce object (output).
In this mapping you will also use a function, uuid(), to generate a unique AccountNumber.
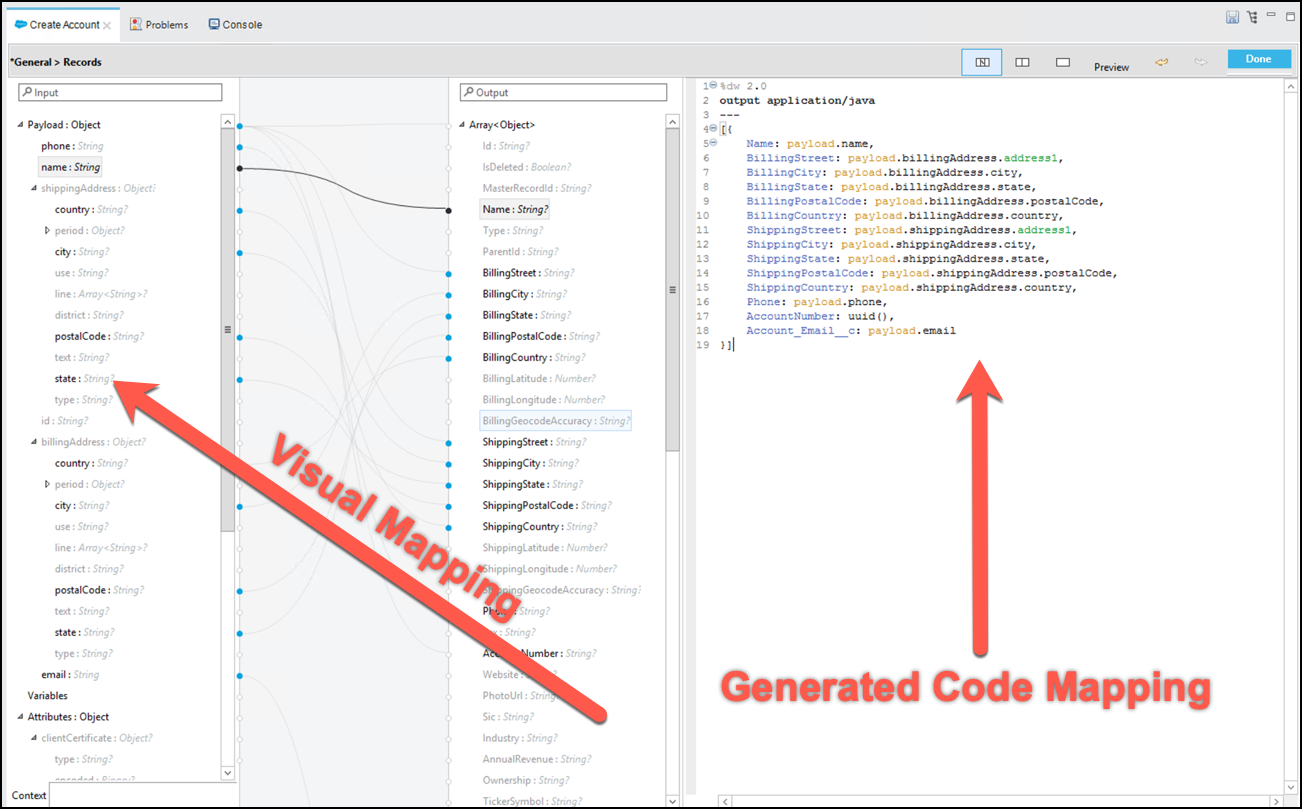
This is the mapping code that the picture reflects. You can copy and paste it into your Dataweave text editor and the UI will reflect the changes
     %dw 2.0
     output application/java
     ---
     [{
         Name: payload.name,
         BillingStreet: payload.billingAddress.address1,
         BillingCity: payload.billingAddress.city,
         BillingState: payload.billingAddress.state,
         BillingPostalCode: payload.billingAddress.postalCode,
         BillingCountry: payload.billingAddress.country,
         ShippingStreet: payload.shippingAddress.address1,
         ShippingCity: payload.shippingAddress.city,
         ShippingState: payload.shippingAddress.state,
         ShippingPostalCode: payload.shippingAddress.postalCode,
         ShippingCountry: payload.shippingAddress.country,
         Phone: payload.phone,
         AccountNumber: uuid(),
         Account_Email__c: payload.email
     }]
Dataweave has a lot of useful functions that can be explore in Studio. Stand in the AccountNumber field and press F3 you can see all the functions that can be applied. Filter by uuid and you will find information about the function.
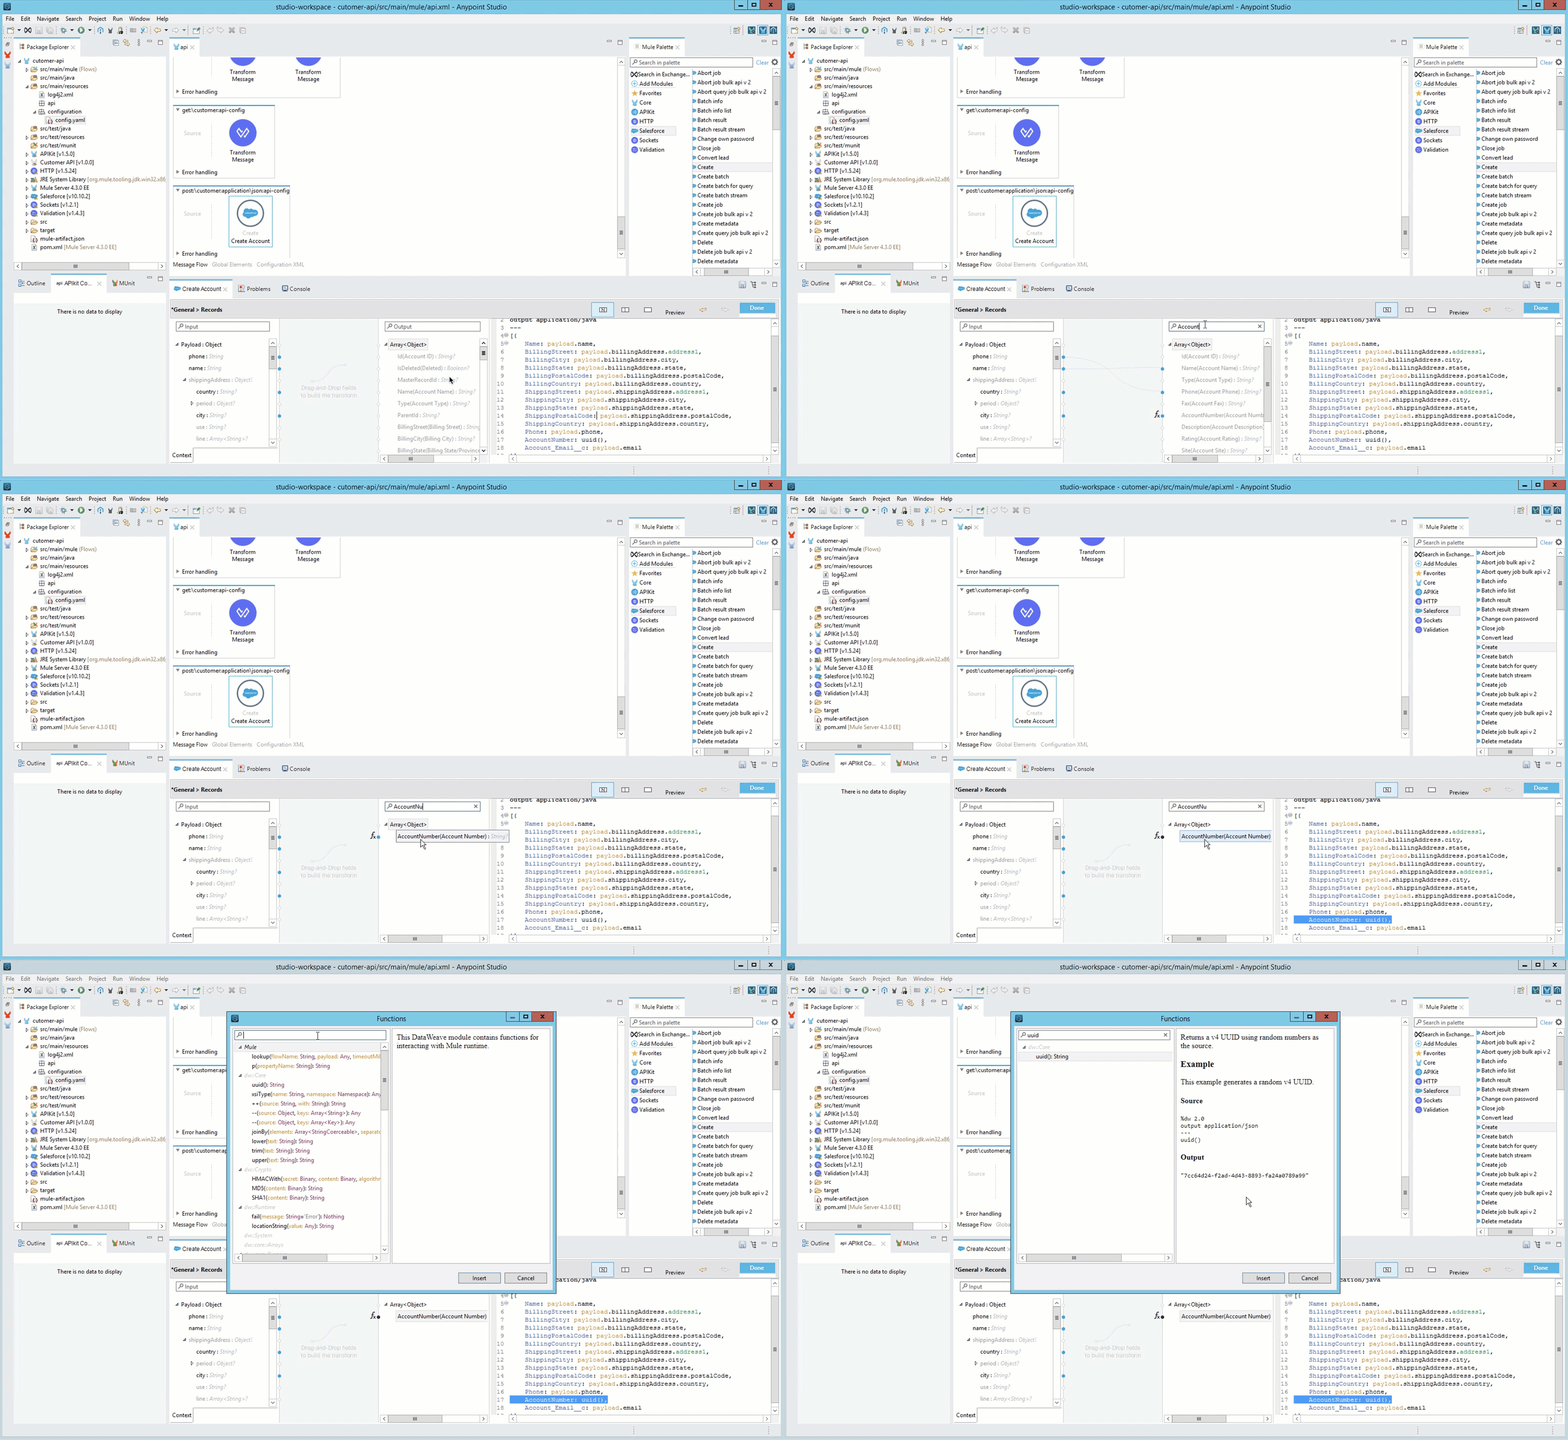
Press Done when you finish the mapping.
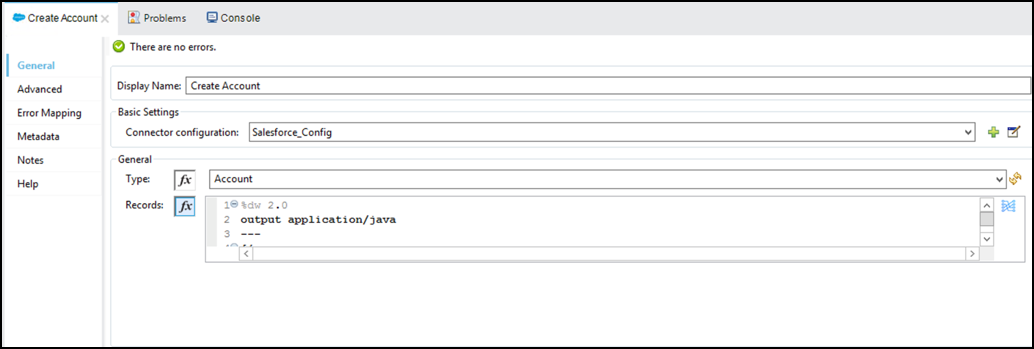
Click the
 Save All button
Step 5: Validate Salesforce Response
Once the Customer is saved, we need to evaluate the response from Salesforce (the request may fail if the information being sent is invalid).
- To do this, we are going to add a Validation: is true component. Type is true in the Mule Palette
Drag and drop the icon at the end of the Flow.
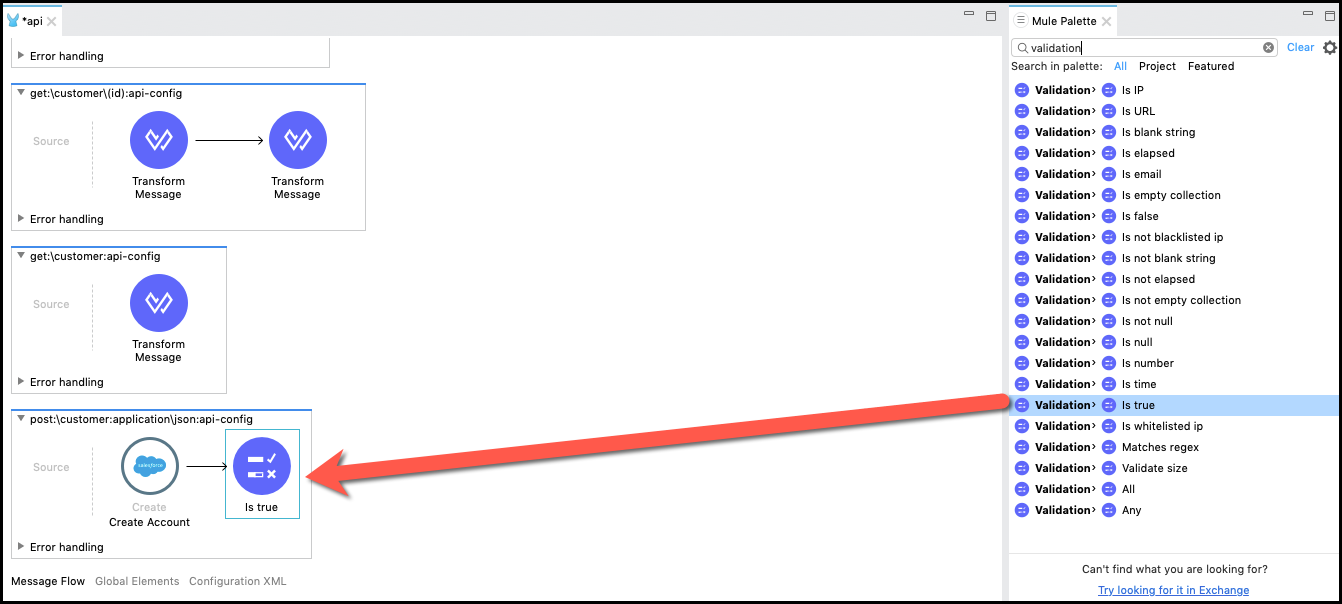
Implement the validation properties
a. Display Name:
Validate Responseb. Expression:
#[payload.successful == true]c. Message:
Account Creation was Unsuccessful
In the Validation component we are evaluating the Salesforce response.
In the Validation, there are going to be two configuration changes, the Expression and the Message. Also, You will ensure that the out of the box error type is used to generate a validation error.
a. Validate the response value
b. If there was an error, we are going to respond with a Bad Request.
Check the error mapping for the validation. Click the Error Mapping tab and click the
 button to view the out of the box error types, note the VALIDATION:INVALID_BOOLEAN is pre-populated so you don’t have to do anything else here.
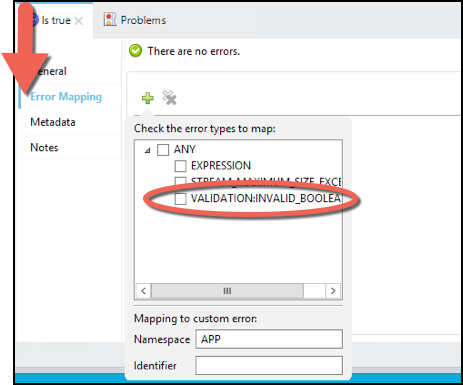
In this case we are not going to map the error validation to a custom error. Instead, we are going to add the VALIDATION:INVALID_BOOLEAN to the APIKIT errors.
Now, set the VALIDATION:INVALID_BOOLEAN in the APIKIT:BAD_REQUEST Error handler. Navigate towards the top of the api Message Flow view, locate the error handler, and select the Error Type.
In the Type section add the following text
,VALIDATION:INVALID_BOOLEAN(mind the comma)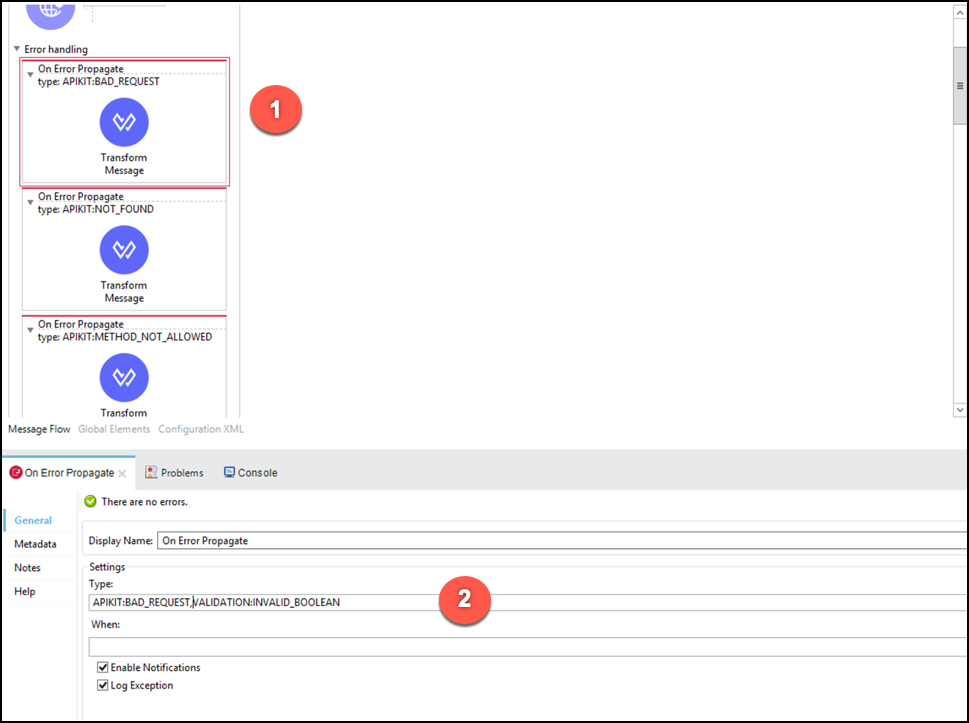
Notice that mule provides an easy way to generate and capture out of the box, as well as, custom error types, to enable easy configuration of error handling scenarios.
- Click the
 Save All button
Step 6: Build the Response
In this step we are going to get the created account and then we will build the response.
Similar to the earlier step, drag and drop a Query component within the Salesforce connector to the end of the flow.
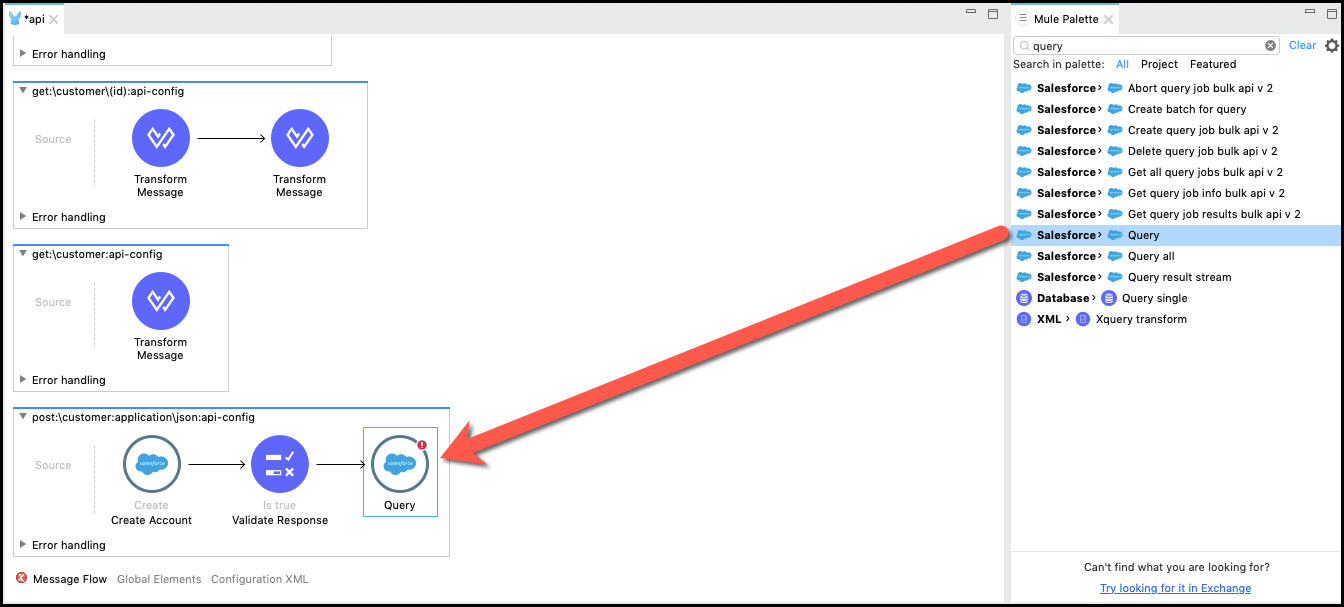
Configure the following properties:
a. Display Name:
Get Account Detailb. Connector Configurator:
Salesforce_Config(we are reusing the configuration we created before).c. Salesforce query:
SELECT Id, AccountNumber, Name FROM Account where Id = ':id'd. Parameters:
Name:
"id"Value:
payload.items[0].id
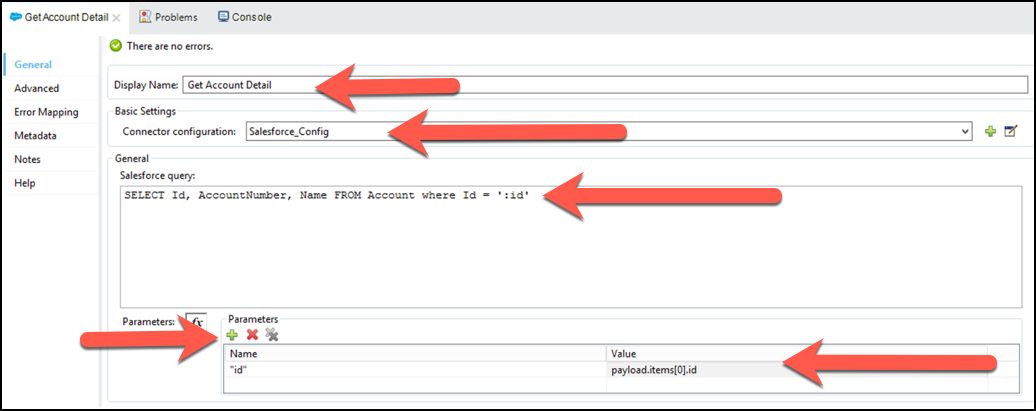
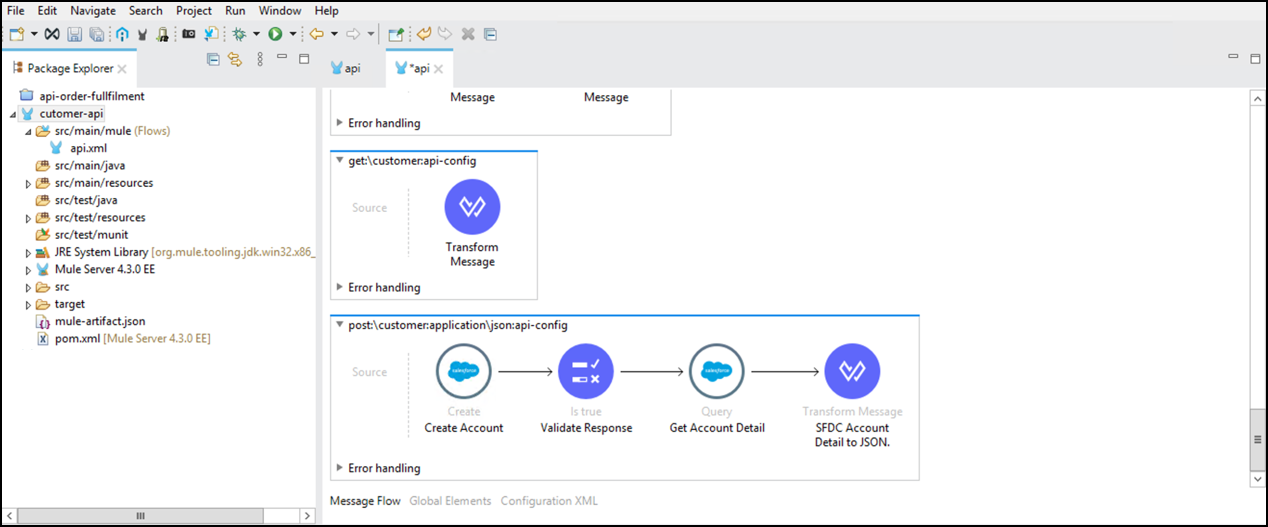
Now you will create the transform step that will build the service response. To do that drag and drop a Transform Message after the Salesforce icon that was created in the previous step.
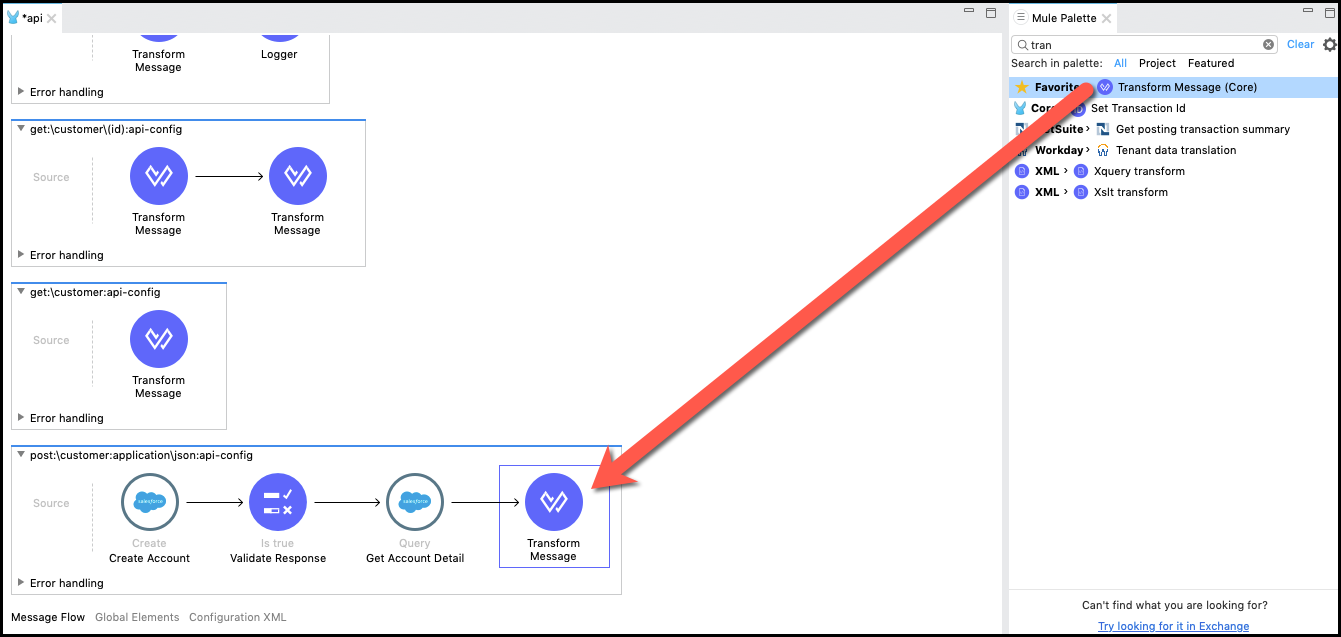
Right click on the Transform Message and select Rename. Change the Transform Message text with SFDC Account Detail to JSON.
Click on the icon and let’s see the transformation
You will see the response from SFDC and the API Response.

Copy and Paste the following dataweave script:
     %dw 2.0
     output application/json
     var customer = payload[0]
     ---
     {
         name: customer.Name default "",
         id: customer.AccountNumber default ""
     }
If you look carefully, you will notice that 1. The Response is an array. That’s why we are saving the first element is saved in a variable called customer. 1. The Id and AccountNumber are defined as optional in the input. While in the output they are mandatory. That’s why you set a default value.
Click the
 Save button.
This concludes the customer creation logic and we are ready to test the API.
Summary
In this lab, we
Implement the post flow
Configure the Salesforce connector
Retrieve Salesforce Account Object
Handle Salesforce Error
Go Further:
See the link Dataweave doc for more information
See the link Salesforce Connector doc for more information
See the link Validation Module for more information
Congratulations! You have completed Lab 2.
Please proceed to Lab 3