Lab 3: Run and Debug the API
Overview
In this lab we’ll run through an end to end test, and add unit testing coverage.
Step 1: Full test
In this step, you will go through a use case of creating a product, making an update and finally deleting it. These instructions will assume you are using POSTMAN, but the API Console can be used directly within Anypoint Studio. Along the way you’ll check the state of the product. You will need to:
Create a product.
Check for its existence.
Perform an update.
Check the change has been applied.
Delete the product.
Confirm the product is no longer available.
The following instructions will guide you through the process:
Right click the application. Select Run As > Mule Application.
The application will start running, and after a few seconds the API console will be available for us to test out the integration.
Open up POSTMAN (or an equivalent).
Start by creating a product. Select the POST method and set the body using the example from the RAML specification, or the example below:
     {
     "id": 1,
     "name": "ELMO",
     "description": "Playskool sesame street play all day Elmo",
     "productNumber": "UUID34234923934293",
     "manufactured": true,
     "safetyStockLevel": 540,
     "standardCost": 78,
     "listPrice": 99.9,
     "size": "200x300",
     "sizeUnitMeasureCode": "in",
     "weightUnitMeasureCode": "gr",
     "weight": 400,
     "daysToManufacture": 10,
     "categories": [
         "playskool",
         "sesame street"
     ],
     "stock": 2800,
     "colors": [
         "blue",
         "red",
         "green"
     ],
     "images": [
         "/wcsstore/HTSStorefrontAssetStore/Attachment/HomePage/Product eSpots/Play-All-Day-Elmo.png"
     ]
     }
The
productNumbermust be unique, so if this record has already been created, try setting a different random value, or ask you instructor to provide a value by querying the database directly to check for existing records.Set the endpoint to be http://localhost:8081/api/product, and add a
Content-Typeheader with valueapplication/json.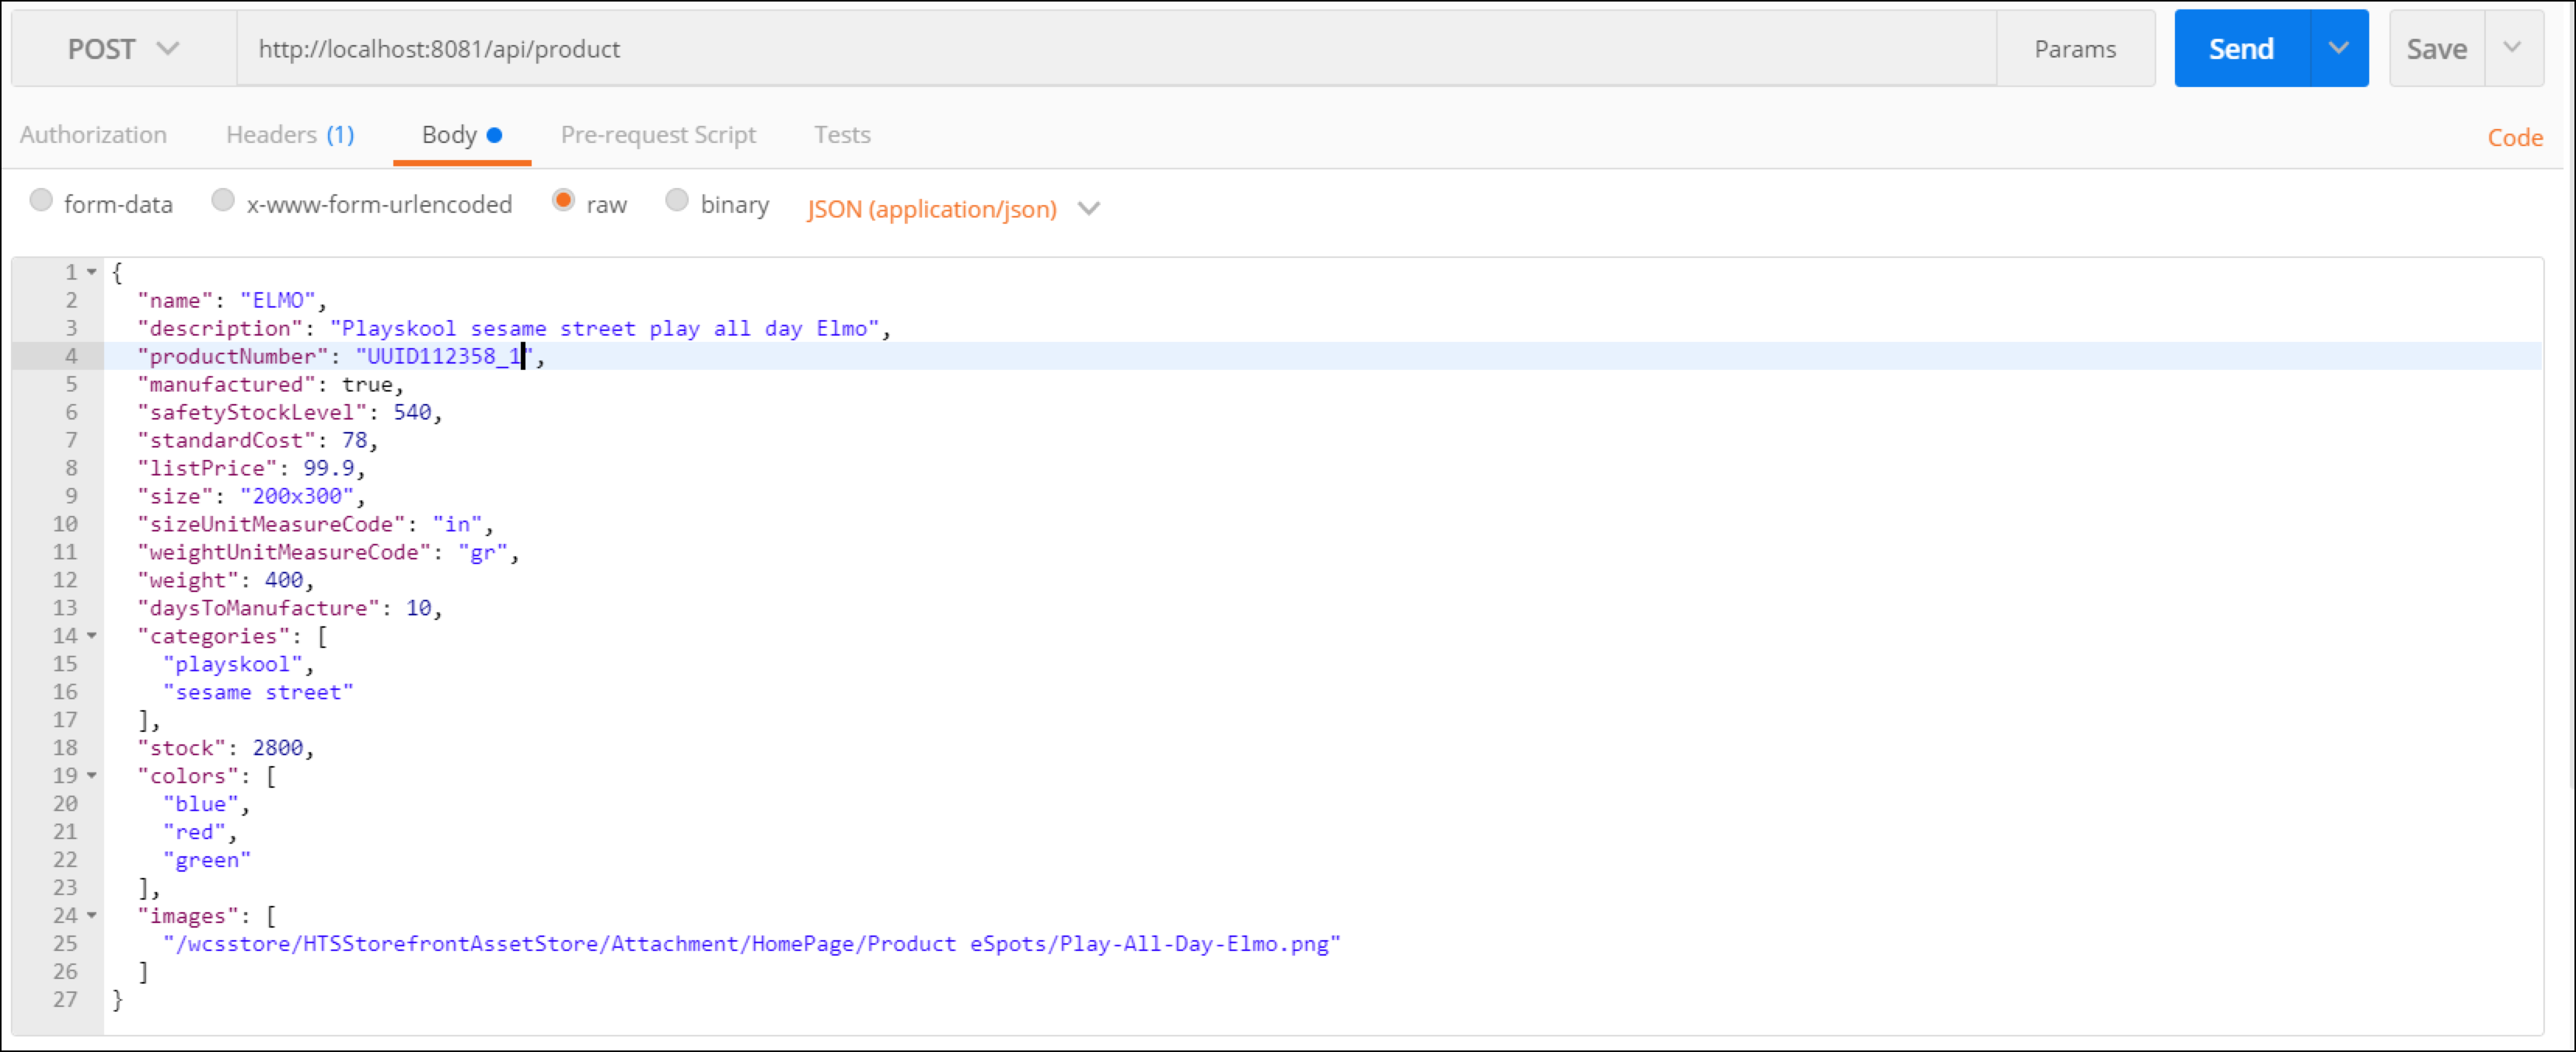
Review the mock body of the operation, which in this case, contains the name, description, category, etc. of the product to be created, and click the Send button.
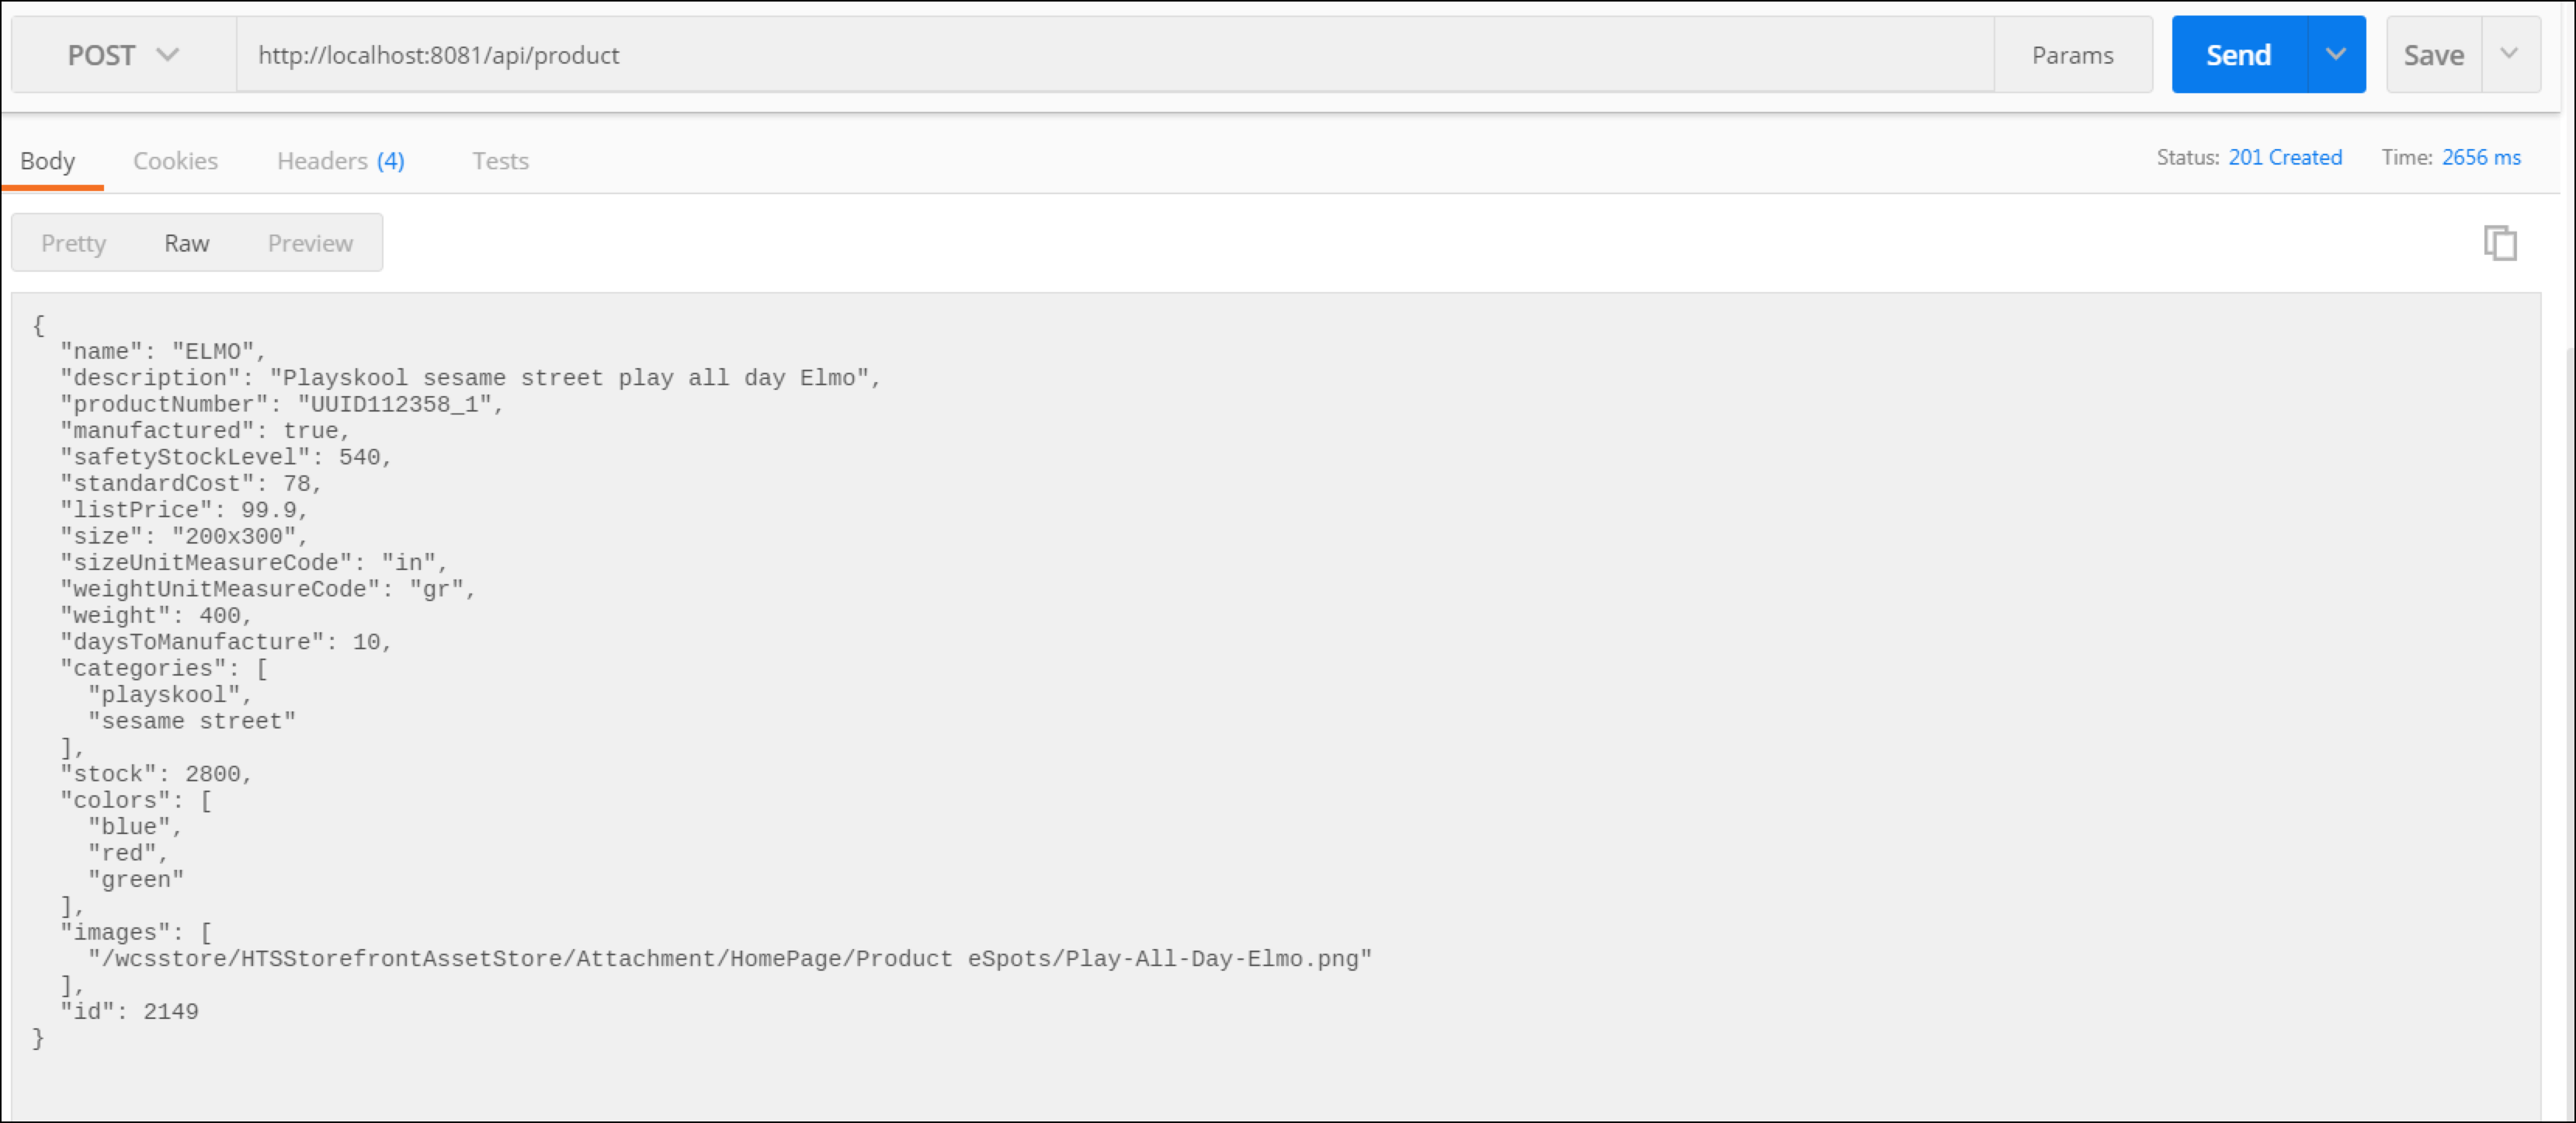
If everything was successful, you should receive a
201 - Createdresponse code, and a response body that contains the new product ID.Take note of this ID. We will use it in the following steps.
Open a new tab for the GET method on the
/product/{id}resource.Enter the ID from the product you created before, and click Send.
If everyhing goes Ok, you should get a 200 status response code, with the body of the product you created before.

You have created a product and confirmed it exists. Now update it. Open a new tab and select PUT.
Again, specify the product ID to update in the URL (set the url to http://localhost:8081/api/product/{id}, which is the same ID from before, and take a moment to check how you are changing the product (pick a minor update or your choice). Set a
Content-Typeheader with valueapplication/json.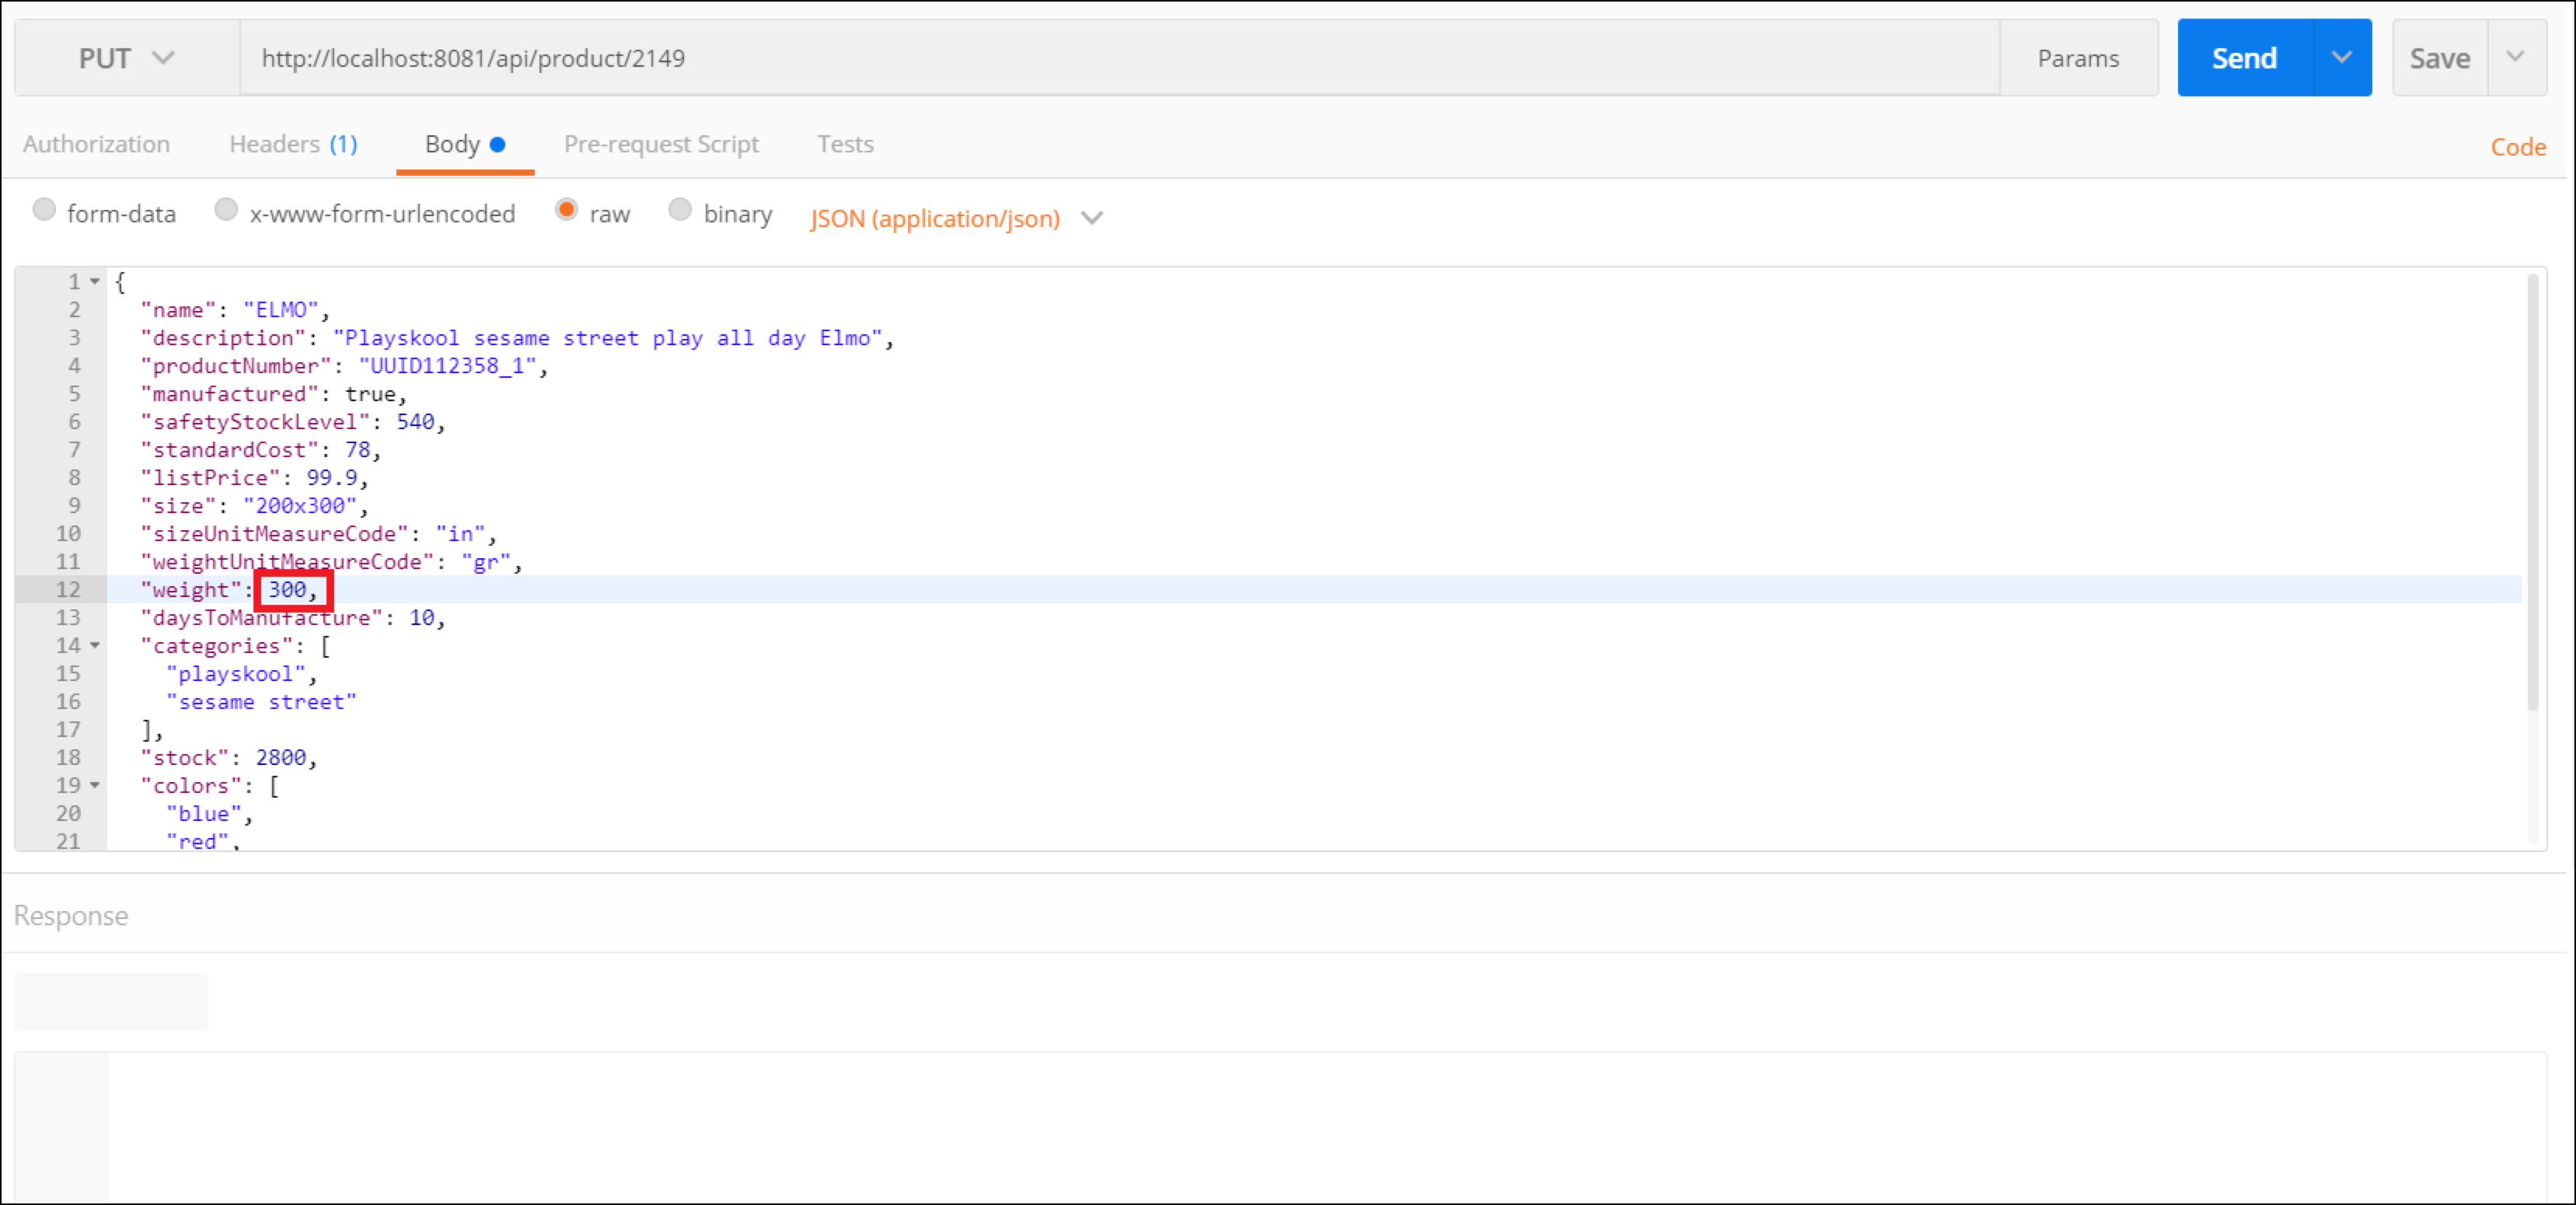
After taking note of your update click Send.
If everything goes ok, you should get a 204 status response code and no body.
After you update the information, perform a GET operation again under the
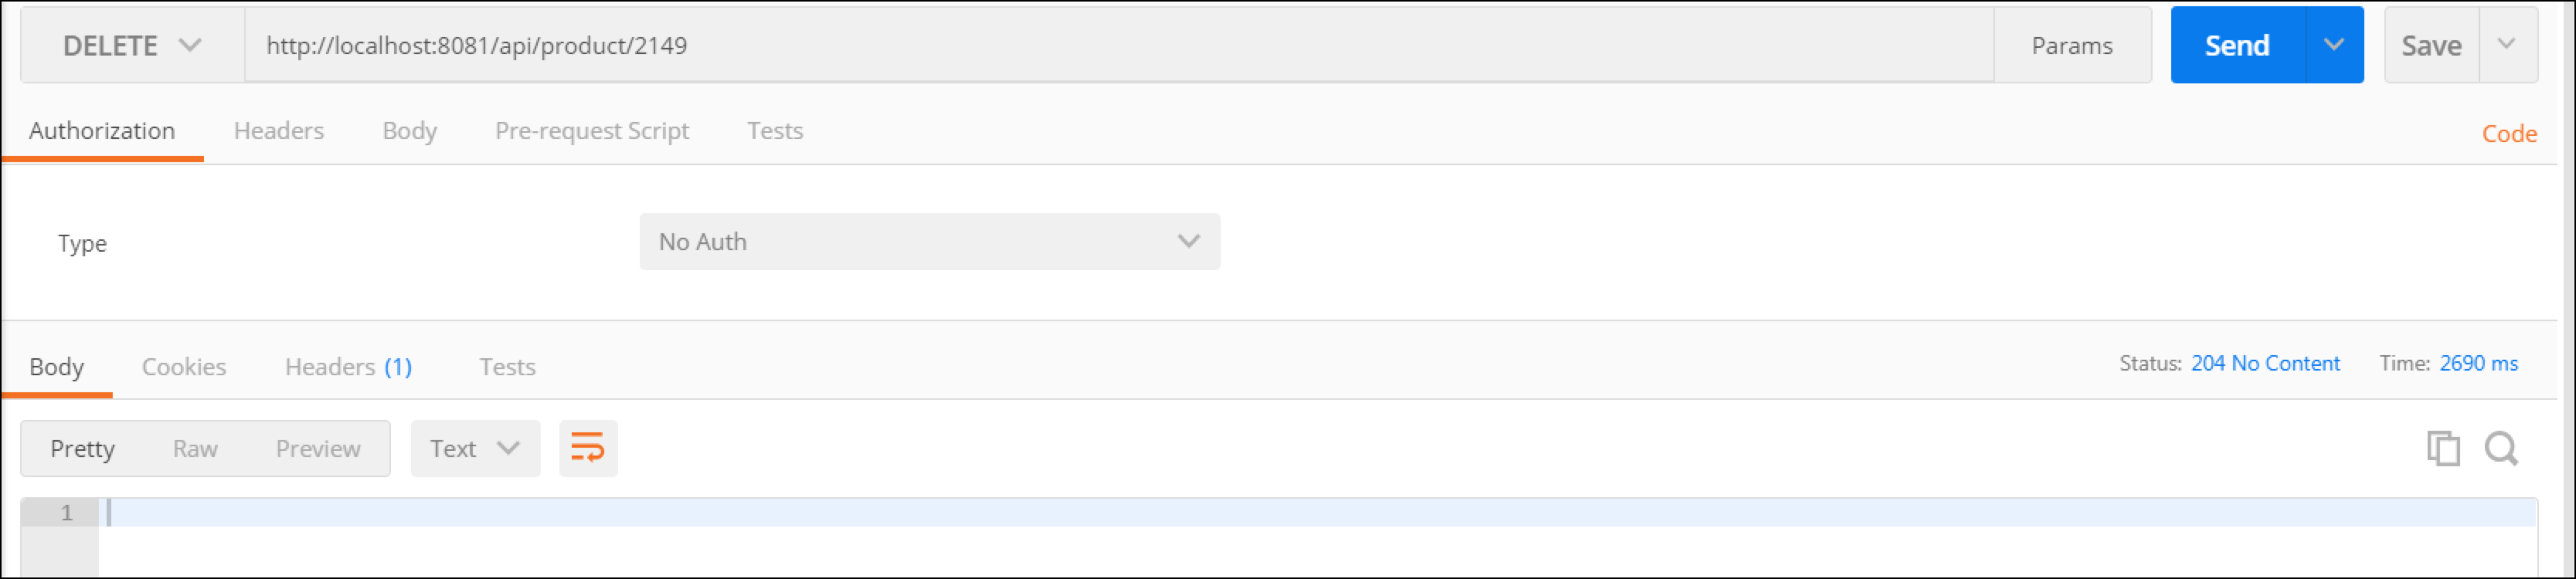
/product/{id}resource, specifying the ID of your product, and you should obtain the updated information.To end with your basic operations, delete the product. Cretae a new tab and select DELETE as the HTTP verb. Set the url to http://localhost:8081/api/product/{id} with your product id.
If everything goes Ok, you should get a 204 status response code and no body.
To confirm we have deleted it, perform a GET operation under the
/product/{id}resource, specifying the ID of your product. You should get no information. In fact, as the product and resource do not exist, you should get a 404 status response code, and the message “Resource not found”, which is what we want.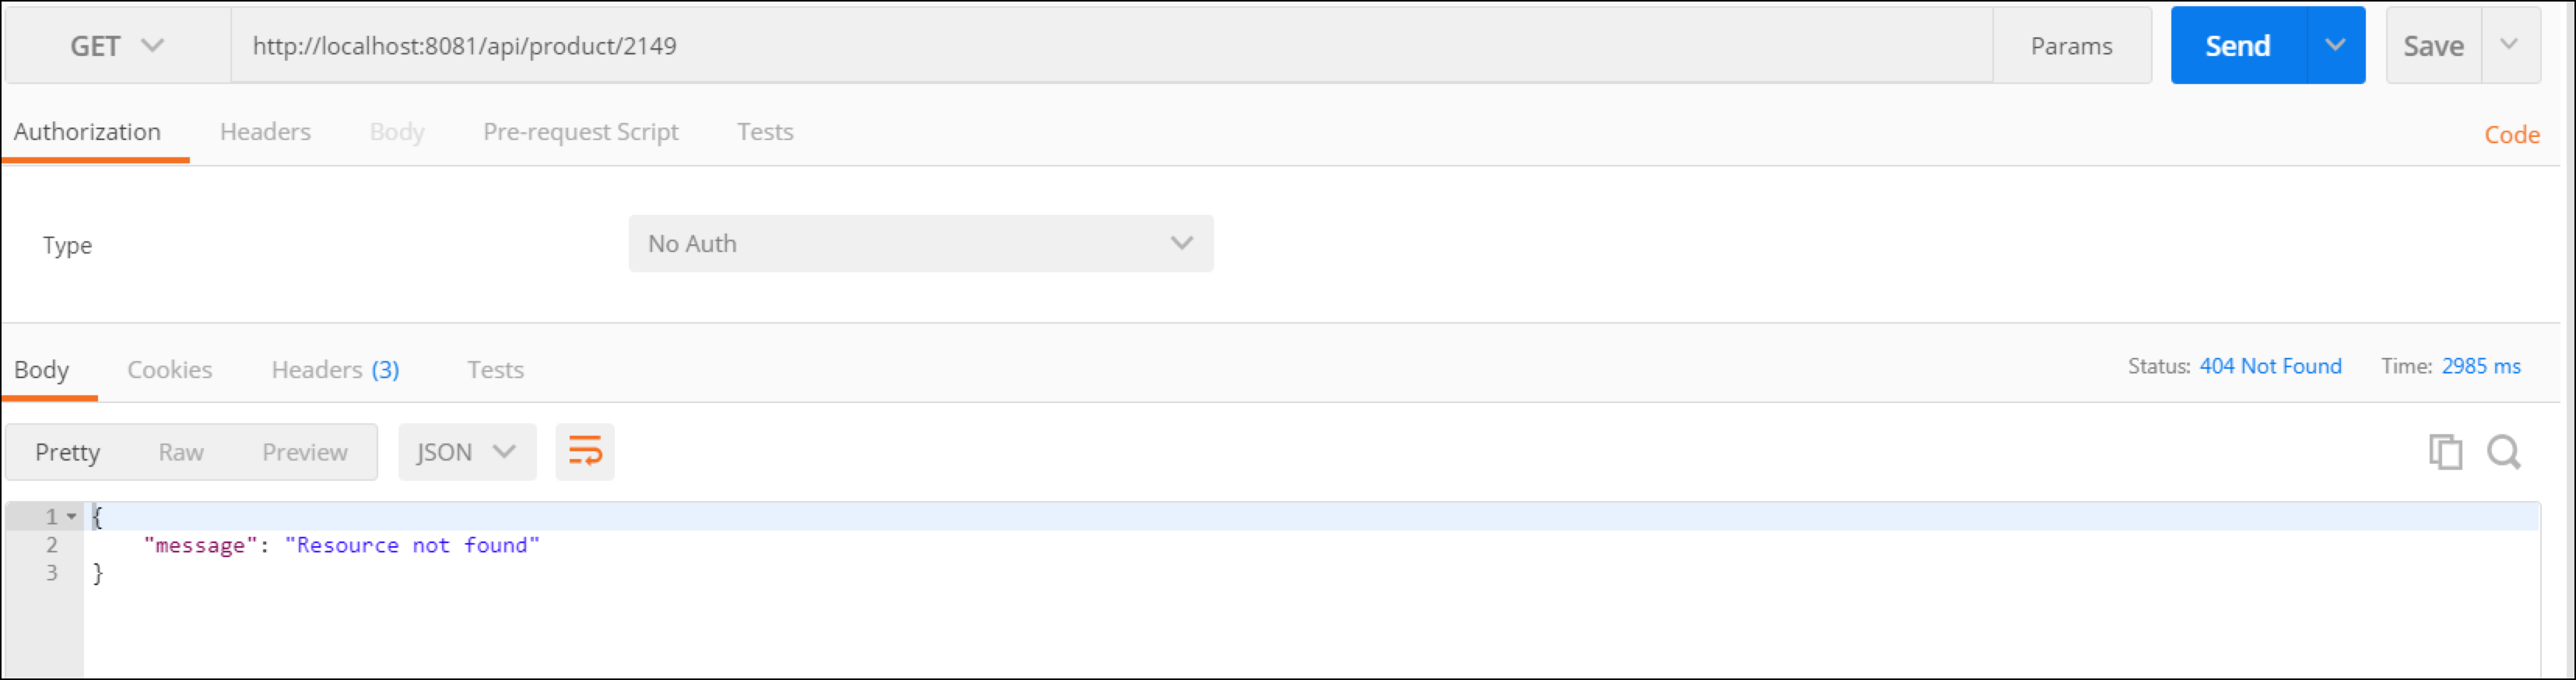
Stop the Mule runtime.
Step 2: Add MUnit to your API
MUnit is an application testing framework that allows you to easily build automated tests for your integrations and APIs. It provides a full suite of integration and unit test capabilities, and is fully integrated with Maven and Surefire for integration with your continuous testing and deployment environment.
In this step you will use the MUnit for RAML feature to create a test for a specific flow.
The following instructions will guide you through the process.
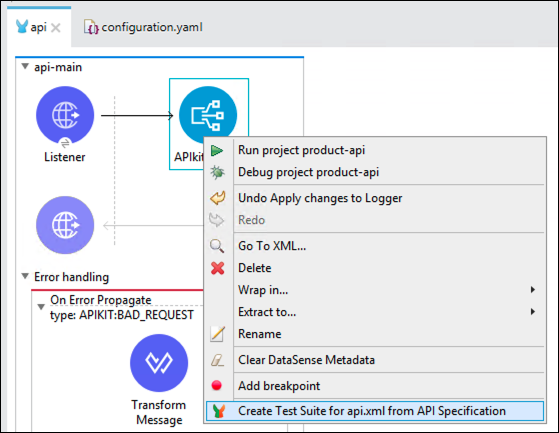
Inside api-product.xml file, right click on the “APIKit Router” component and select “Create Test Suite for api.xml from API Specification”.
A new sapi-products-db-apikit-test.xml file will be generated within the folder src/test/munit and a viewer will open.
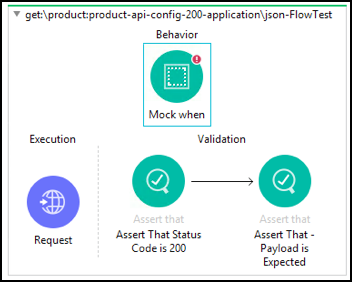
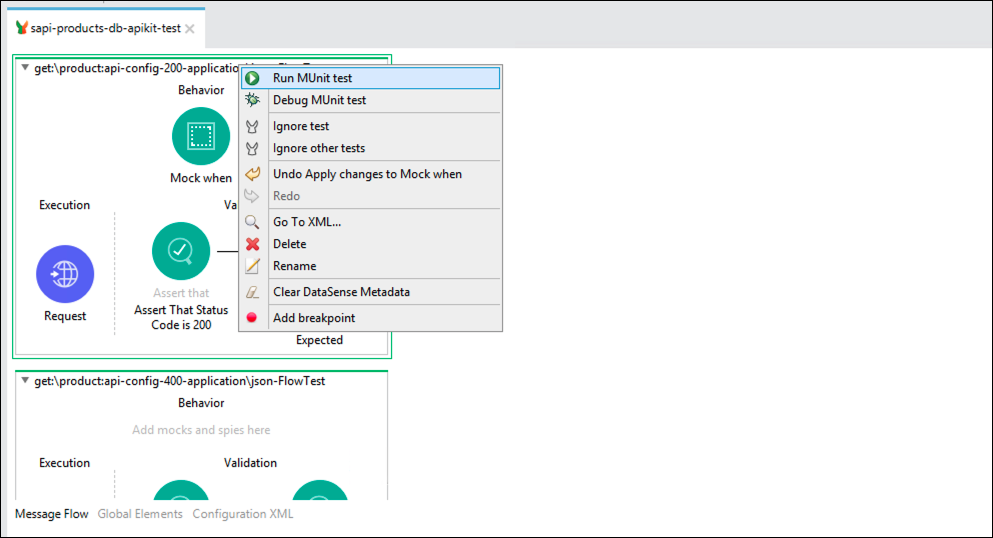
Let’s focus on the test flow called “
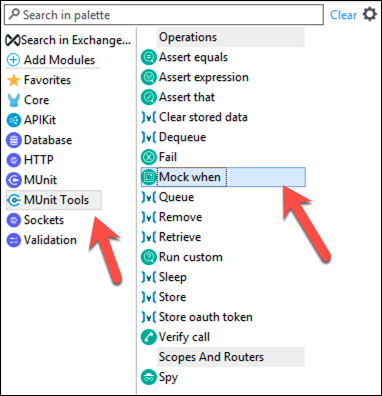
get:/product:api-config-200-application/json-FlowTest”. We are going to mock the Database invocation, so you do not have to depend on external resources.Go to the palette and select the Mock When operation from the MUnit Tools component.
Drag & drop in the Behavior section
Click on the Mock component configuration.

In the General Panel complete with the following data
Processor:
db:selectIn the Then return section, select Payload tab
Complete the field Value with this representation of a product simulating the Database response (press
functionbutton first):%dw 2.0 output application/json --- [{ id: 1, name: "ELMO", description: "Playskool sesame street play all day Elmo", product_number: "UUID34234923934293", manufactured: true, safety_stock_level: 540, standard_cost: 78, list_price: 99.9, size: "200x300", size_unit_measure_code: "in", weight_unit_measure_code: "gr", weight: 400, days_to_manufacture: 10, categories: "playskool, sesame street", stock: 2800, colors: "blue, red, green", images: "/wcsstore/HTSStorefrontAssetStore/Attachment/HomePage/Product_eSpots/Play-All-Day-Elmo.png", created_date: now(), modified_date: now() }, { id: 2, name: "ELMO", description: "Playskool sesame street play all day Elmo", product_number: "UUID34234923934293", manufactured: true, safety_stock_level: 540, standard_cost: 78, list_price: 99.9, size: "200x300", size_unit_measure_code: "in", weight_unit_measure_code: "gr", weight: 400, days_to_manufacture: 10, categories: "playskool, sesame street", stock: 2800, colors: "blue, red, green", images: "/wcssatore/HTSStorefrontAssetStore/Attachment/HomePage/Product_eSpots/Play-All-Day-Elmo.png", created_date: now(), modified_date: now() }]Now complete the field
Media-Typewith the valueapplication/javaThe final configuration for the
Then returnsection should look like this: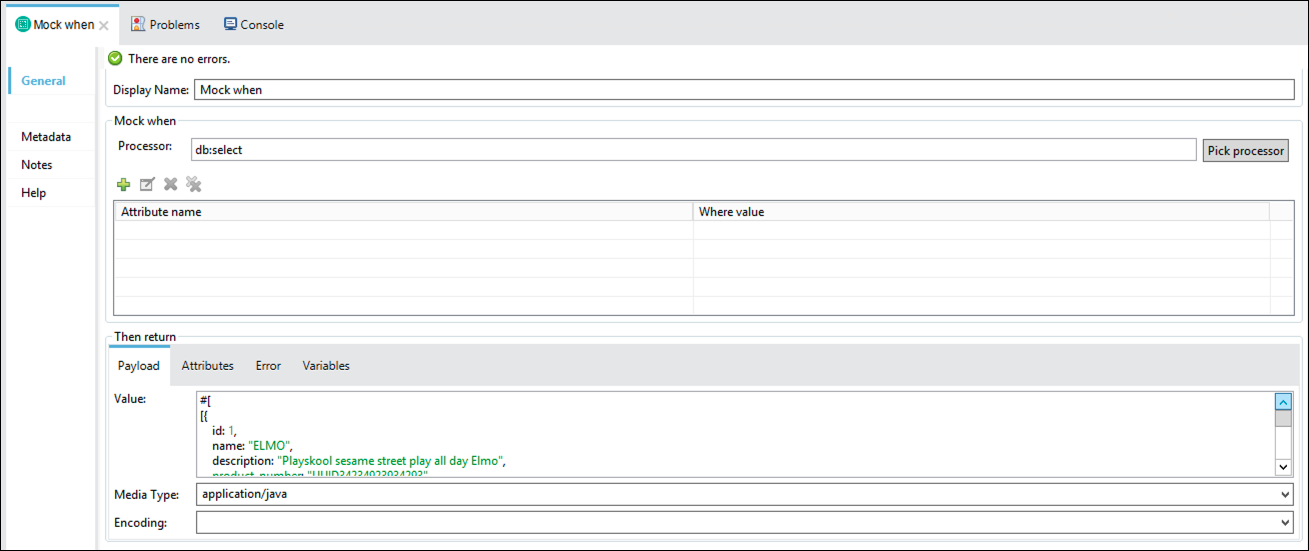
Check the assert called “Assert That - Payload is Expected”, adding a simple expression that checks that the result is the expected one. In this case you can simply check that the “id” that comes in the JSON response equals “1” (which is what you set it to in the mocked response) extracting it with a DataWeave inline expression.
Set these attributes on the component:
Expression:
#[payload[0].id]Is: #
[MunitTools::equalTo(1)]Failure Message:
The response payload is not correct!

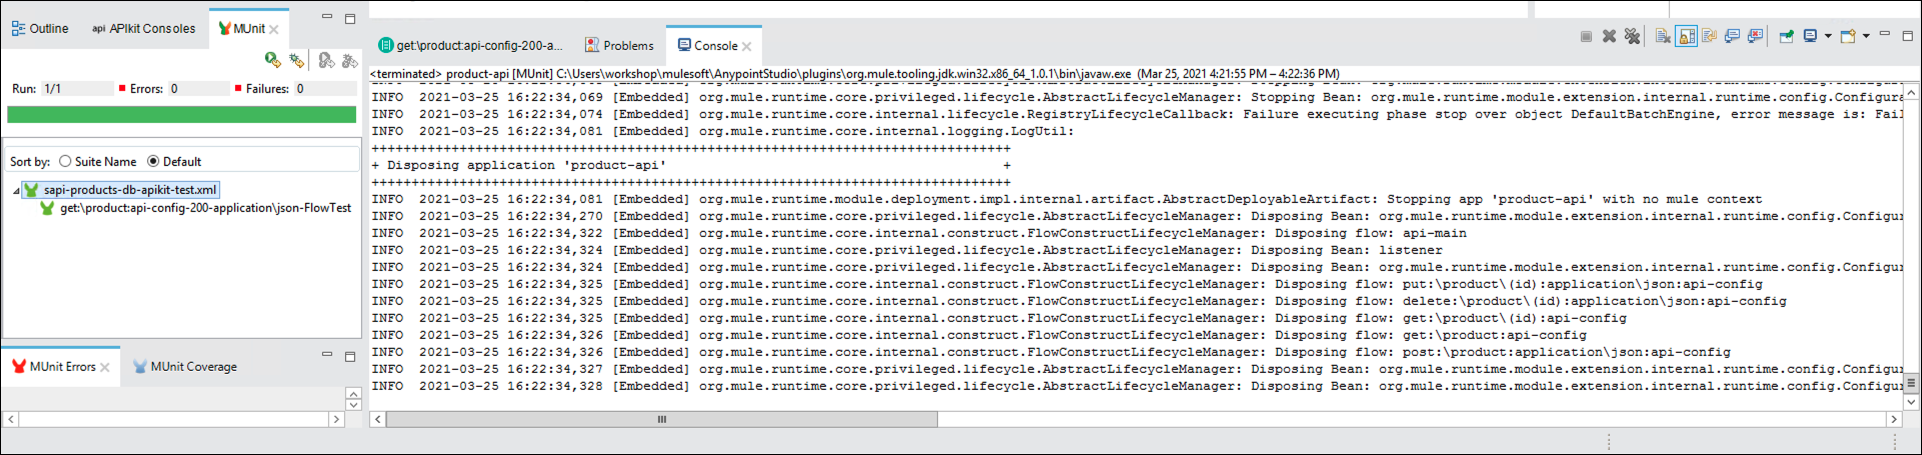
To run the test, right click on the flow name and select “Run MUnit test”. This will open the MUnit Tab and shows the execution.
If everything goes OK, you will see the test executed successfully.
If you have any problems, call over the instructor to assist.
You can download a complete project from exchange.
Summary
In this module we ran through a full set of tests, and added unit testing into the API.
We saw how easy it is to use MUnit to provide unit test coverage for the API.
See the MUnit documentation for more information.
Congratulations! You have completed Lab 3.
Please proceed to the optional Lab 4