- Overview
- Step 1: Add Webservice Connector to the Project
- Step 2: Add Consume Component
- Step 3: Configure the WS Connectivity
- Step 4: Configure Consumer Properties
- Step 5: Build the Response
- Summary
Lab 2: Connect the Order API to a SOAP Web Service
Overview
In this step we are going to implement the post:/orders flow. To create an order, we are going to need to
Call the .NET SOAP Service to create the Order.
Transform the request to XML and response back to JSON format.
Step 1: Add Webservice Connector to the Project
Since we are connecting to a SOAP Service, we are going to use the Webservice consumer.
Click on the Add Module link in the palette.
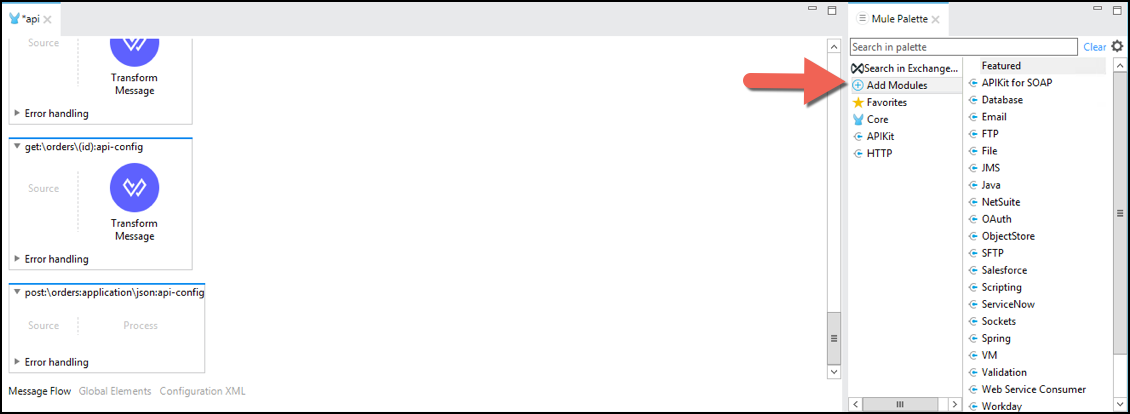
An “Add Modules to Project” window will open.
In this window, select the Web Service Consumer Module and drag & drop the icon to the left panel.
This will add the Module to your palette, allowing you to select and use the Web Service Consumer processor in your project.
Step 2: Add Consume Component
Now that we have the Webservice component in our project, We are going to consume a Webservice.
Go to post:\orders flow.
Make sure you are in the right flow: post:/orders. The flow name should look like
post:\orders:application\json:api-configor similar.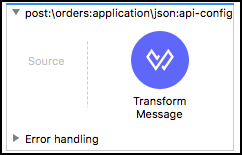
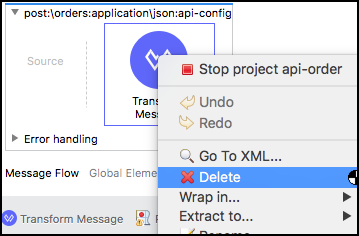
Remove the Transform Message component icon. To do that you just right-click on processor icon and select Delete.
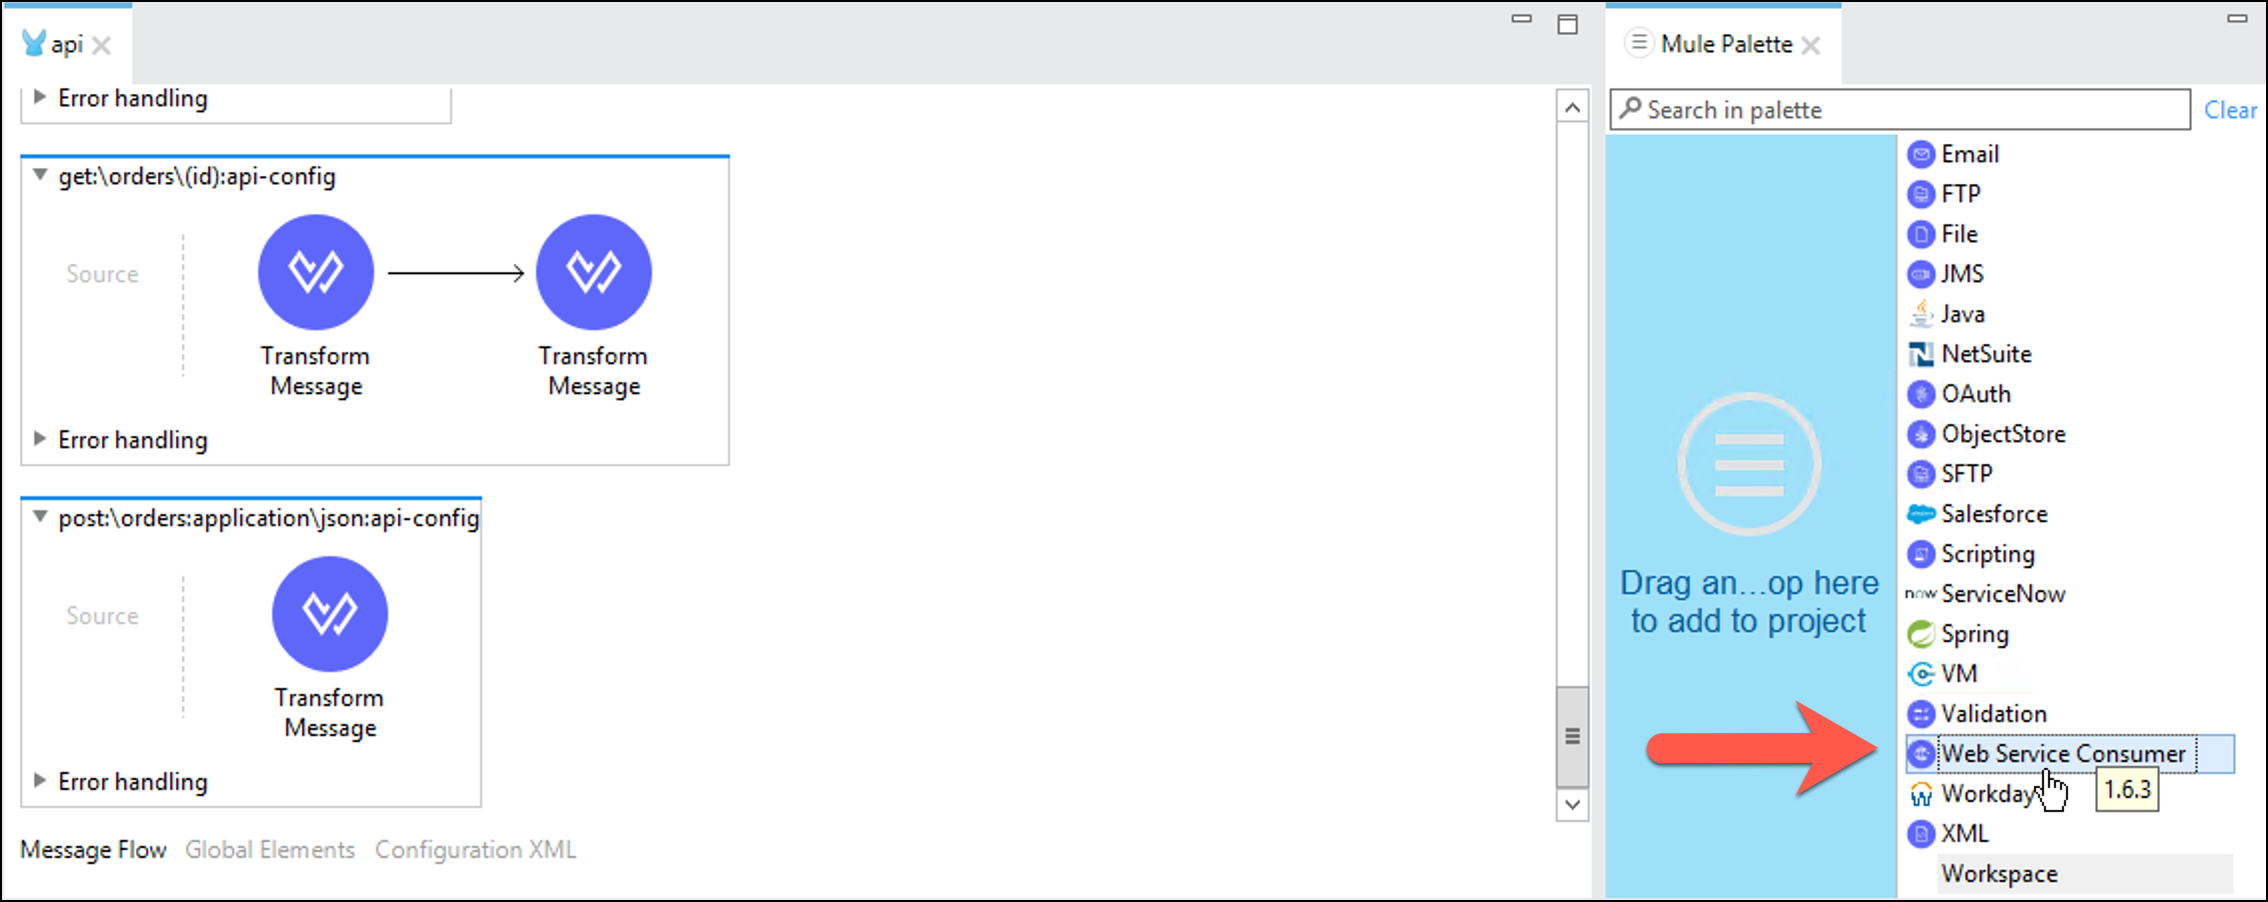
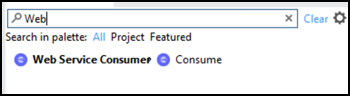
Let’s add the Web Service Consume processor to the flow. To do that go to the Mule Palette panel and in the filter text box type web service. You should see an icon like in the picture below.
Drag and drop the Consume processor into the empty flow.
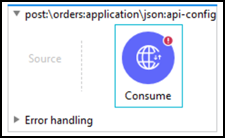
Make sure you put the connector in the Process and not in the Source
Step 3: Configure the WS Connectivity
Double-Click on the Consume processor icon to display its configuration panel. A new pannel will appear.
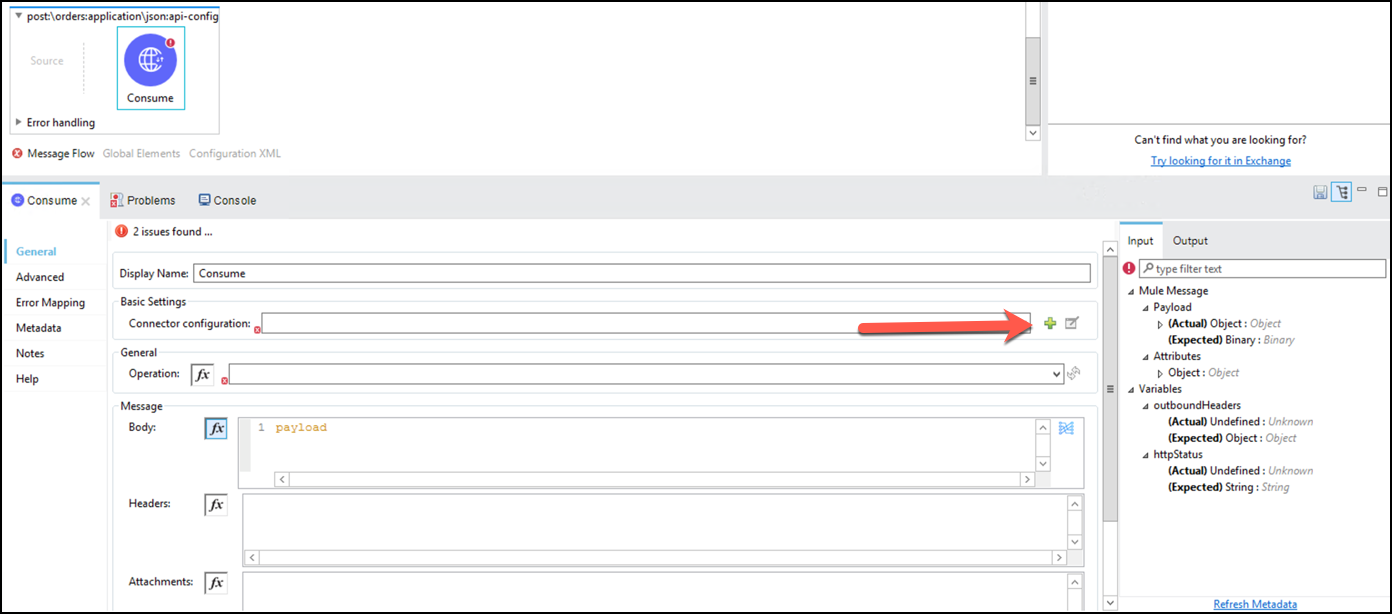
Let’s add a new connector configuration. Click on
 button on the Connector Configuration. Then this window below will pop up.
In the WSDL Location field, paste the following WSDL definition, that contains the definitions of our .NET SOAP Service which is already deployed: http://soap-order-ws-v5.us-e1.cloudhub.io/service/BasicHttpBinding_IOrderService?wsdl
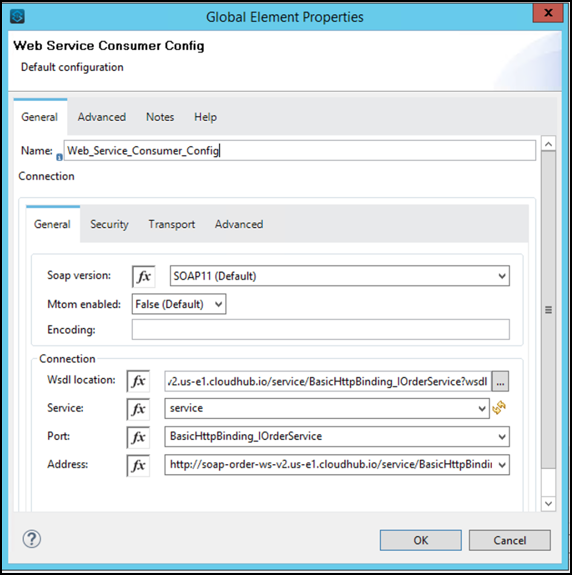
Connector automatically populates Services, Port and Address Configuration based on WSLD information. Ensure that service name is shown at Service attribute.
Click the Ok button
Step 4: Configure Consumer Properties
We connected to the service. Now going back to the basic settings, we need to choose the operation and the payload that is going to be sent.
Change the Display Name to Create Order
Select Create Order from the list of operations.
Go to the Message section
In the Body section press the
 button and then press the
  button.
You will see a Dataweave panel

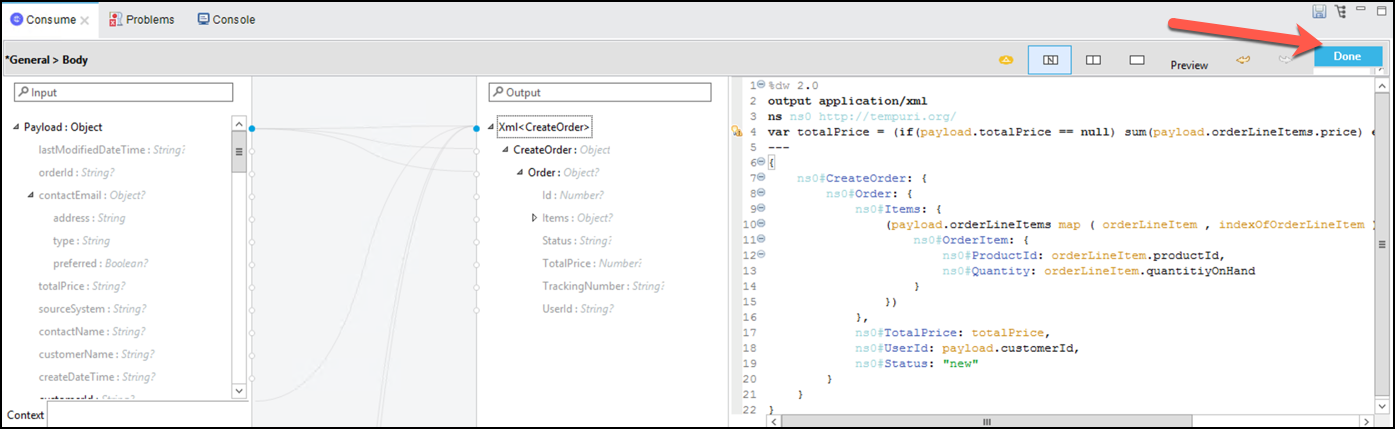
Copy the following script and paste it in the script text area by replacing the existing content (it should be just
payload)%dw 2.0 output application/xml ns ns0 http://tempuri.org/ var totalPrice = (if(payload.totalPrice == null) sum(payload.orderLineItems.price) else payload.totalPrice as Number) --- { ns0#CreateOrder: { ns0#Order: { ns0#Items: { (payload.orderLineItems map ( orderLineItem , indexOfOrderLineItem ) -> { ns0#OrderItem: { ns0#ProductId: orderLineItem.productId, ns0#Quantity: orderLineItem.quantitiyOnHand } }) }, ns0#TotalPrice: totalPrice, ns0#UserId: payload.customerId, ns0#Status: "new" } } }Pay attention at
var totalPrice = (if(payload.totalPrice == null) sum(payload.orderLineItems.price) else payload.totalPrice as Number). Here if thetotalPricedoesn’t come in the request, it will be calculated based on the price of each item.Click the Done button when you are finished.
Click the
 button on the top right of the Properties Panel to save the changes.
Step 5: Build the Response
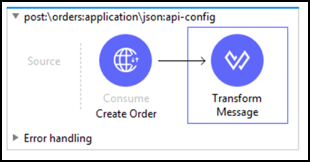
Now our configuration to create the order is complete, but there is one thing missing, we need to format the message coming of the Create Order icon. To do this, we need to add a Transform Message processor (DataWeave Elements) after the Web Service Consumer.
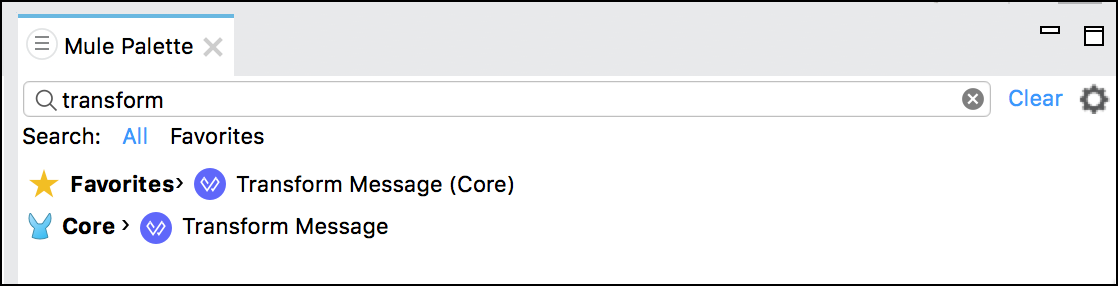
Type transform in the Mule Palette panel
Drag-&-drop a Transform Message after Create Order Web Service
You can see that this one is quite simple, it just returns(output) the id of the order just created.
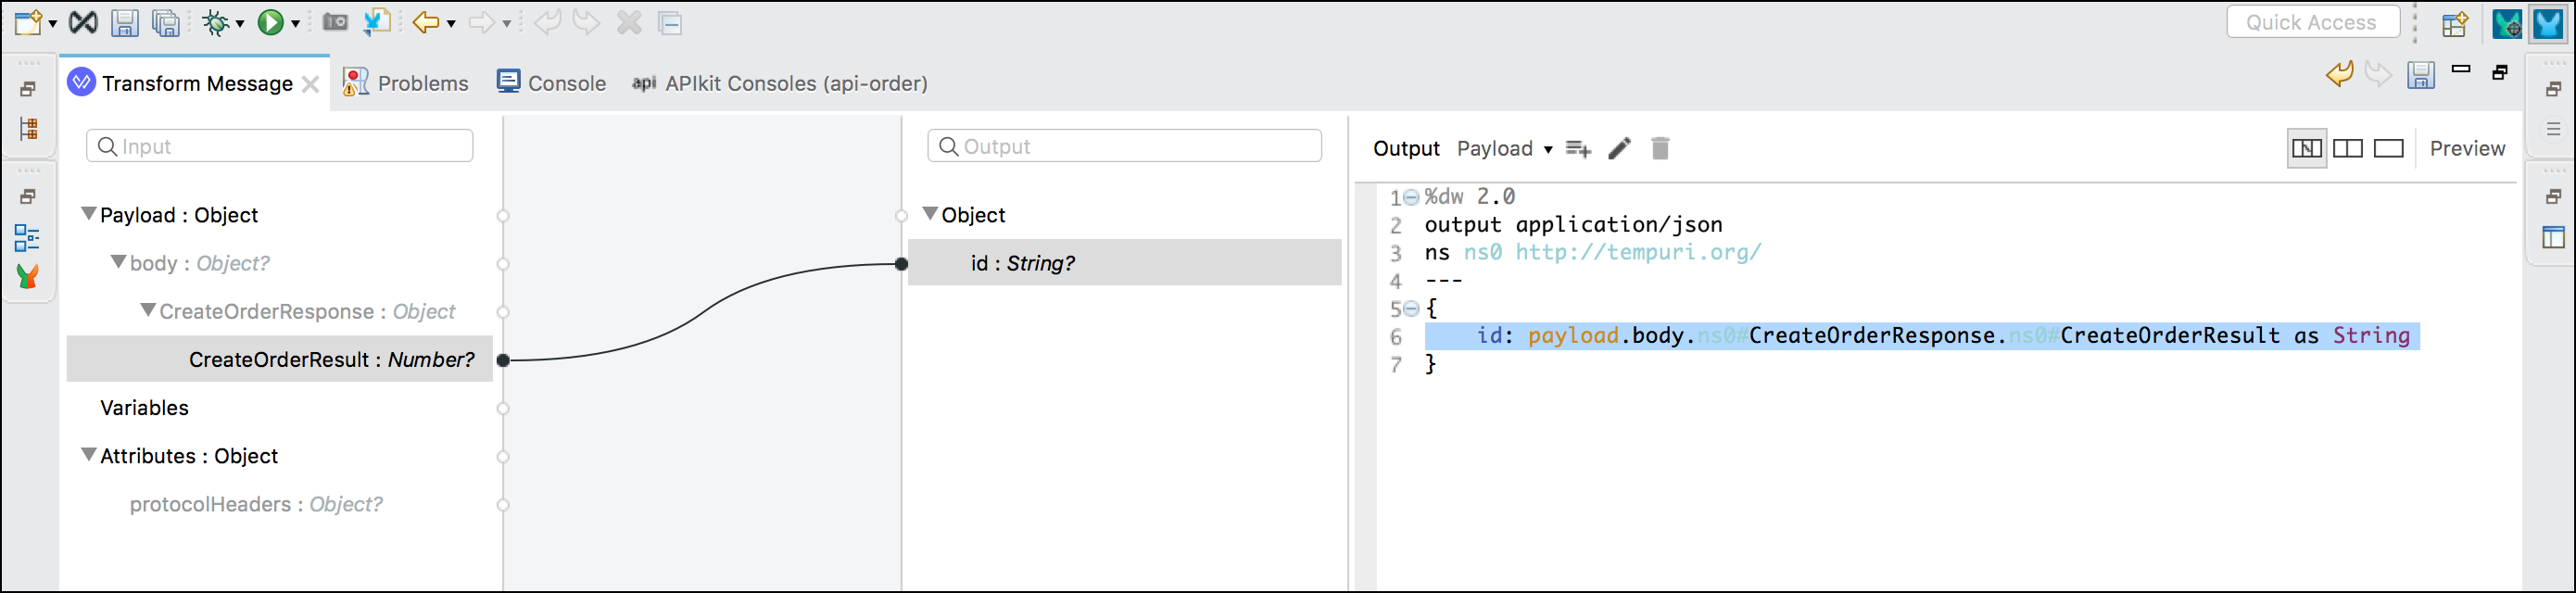
Match the CreateOrderResult on the left, with the id on the right by dragging the CreateOrderResult field from the input side over to id field on the output side. The Dataweave script should look something like the following:
    %dw 2.0
    output application/json
    ns ns0 http://tempuri.org/
    ---
    {
	  id: payload.body.ns0#CreateOrderResponse.ns0#CreateOrderResult as String default ""
    }
- After this, just click outside in the white canvas to save the changes, or click the button at the top right of the element panel.
Summary
In this lab, you completed the following steps:
- Step 1: Add Webservice Connector to the Project
- Step 2: Add Consume Component
- Step 3: Configure the WS Connectivity
- Step 4: Configure Consumer Properties
- Step 5: Build the Response
Earlier, we used the RAML specification to define our API and auto-generated a skeleton project to implement the API. In this lab we took a specific flow (POST) and implemented a real integration with an external service to Create Order. In doing so we added a Web Service Consumer component, configured it to a WSDL using a valid url. Additionally we transformed the inbound message to do a call to the service, added a Transform component after the Web Service Component to properly handle the response coming back from the web service call. Finally we are now able to run this project, in the next lab, locally on Anypoint Studio to test out the new implementation.
See the link Dataweave doc for more information
See the link Web Service Consumer Connector for more information.
Congratulations! You have completed Lab 2.
Please proceed to Lab 3