Lab 1: Implement the Order API in Studio
Overview
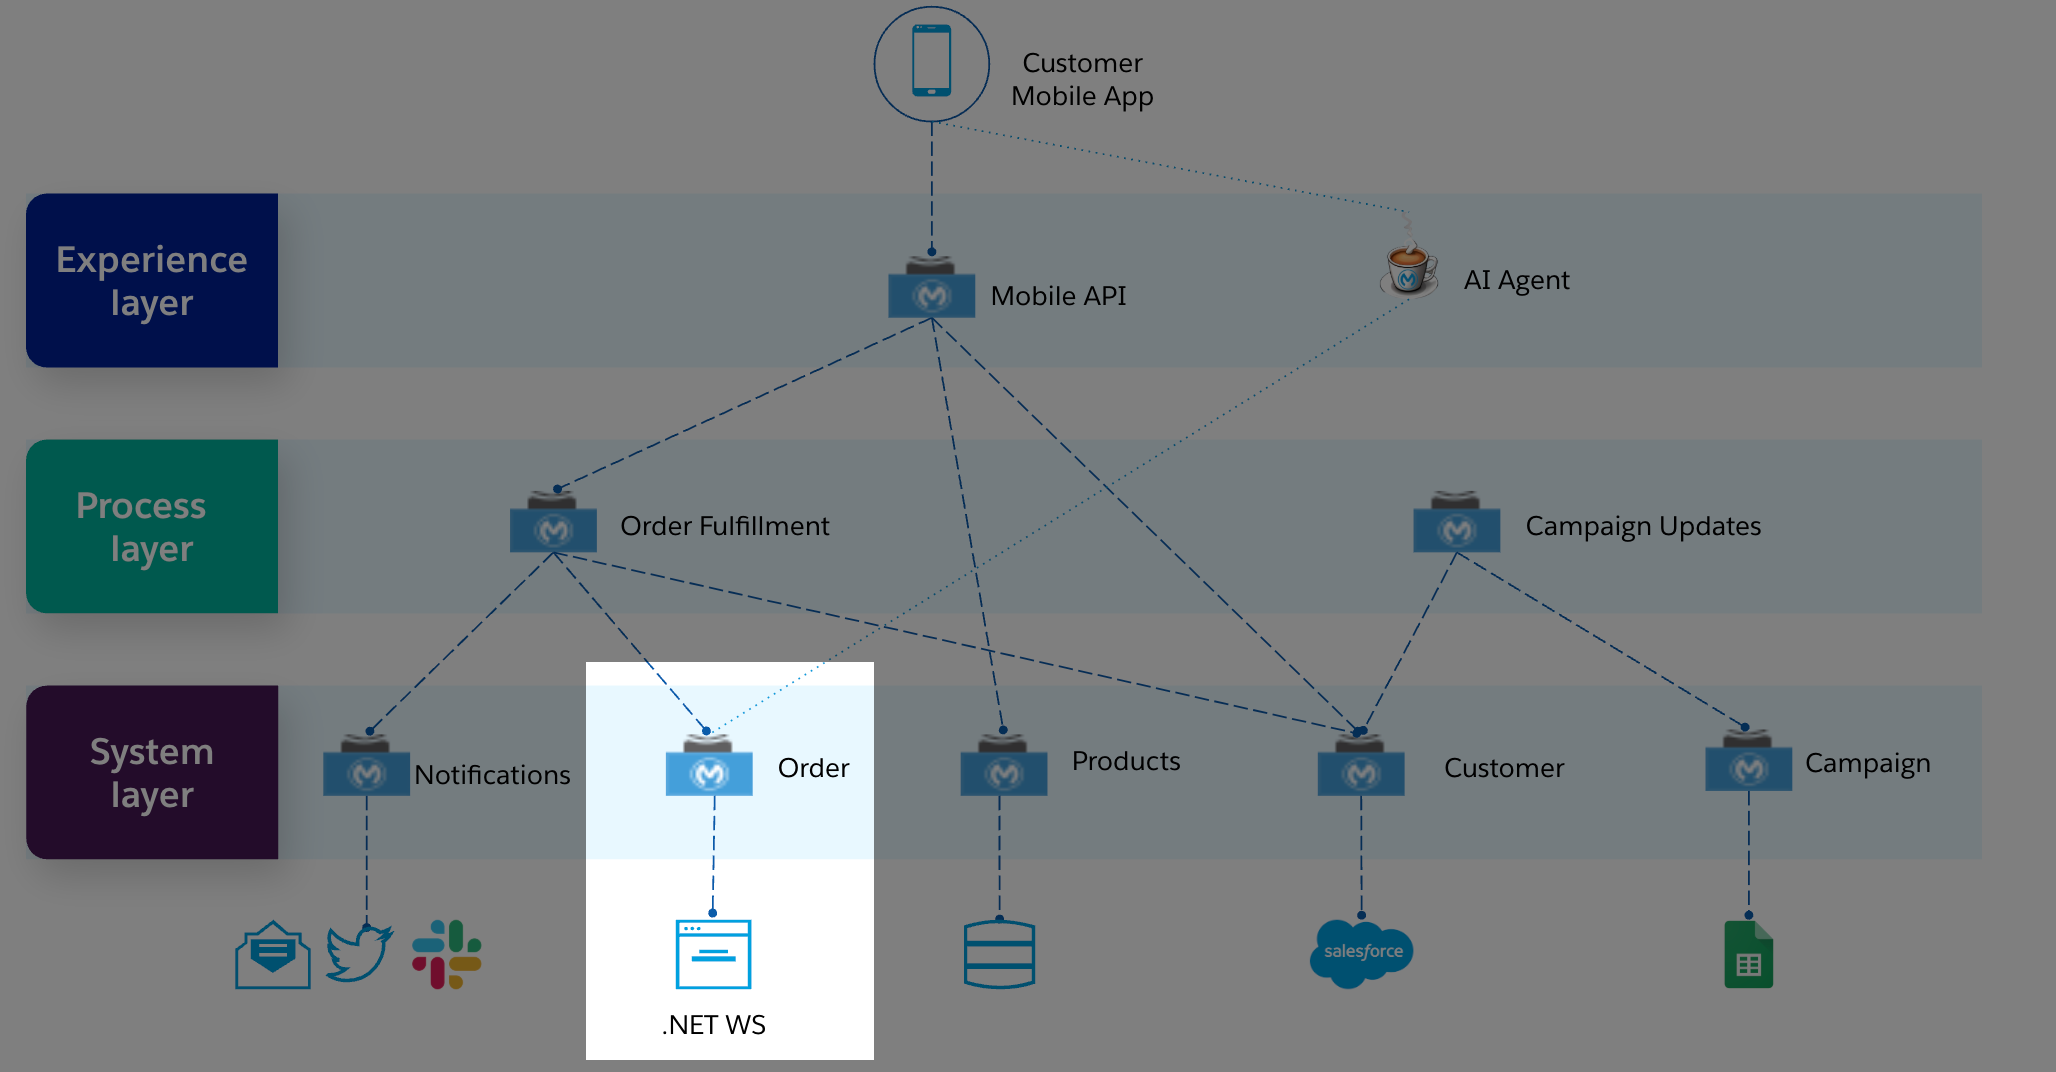
In this lab, we will create the skeleton implementation of our Order API that will process requests to a SOAP Web Service. You will use Anypoint Studio to create a Mule application where there will be one flow for each method of each resource (i.e. GET orders). Additionally you will use APIKit (as part of your Mule application) to process REST requests, transform them to messages to be handled and processed by each flow.
The implementation will consist of a couple of steps:
Create a new Mule Project in Anypoint Studio from the Order API RAML
Run the Mule API(Application) from Anypoint Studio
Then we will test this new API using the API Console, in Studio. In this application we will create an Order as the test.
Step 1: Create a new Mule Project from the RAML
In this step we will create a new Mule application in Anypoint Studio from the Order API RAML. This will be the implementation of our REST API.
If it’s not already opened, start Anypoint Studio from the desktop icon and select the same workspace you’ve been working (example: C:\workspaces\myworkspace).
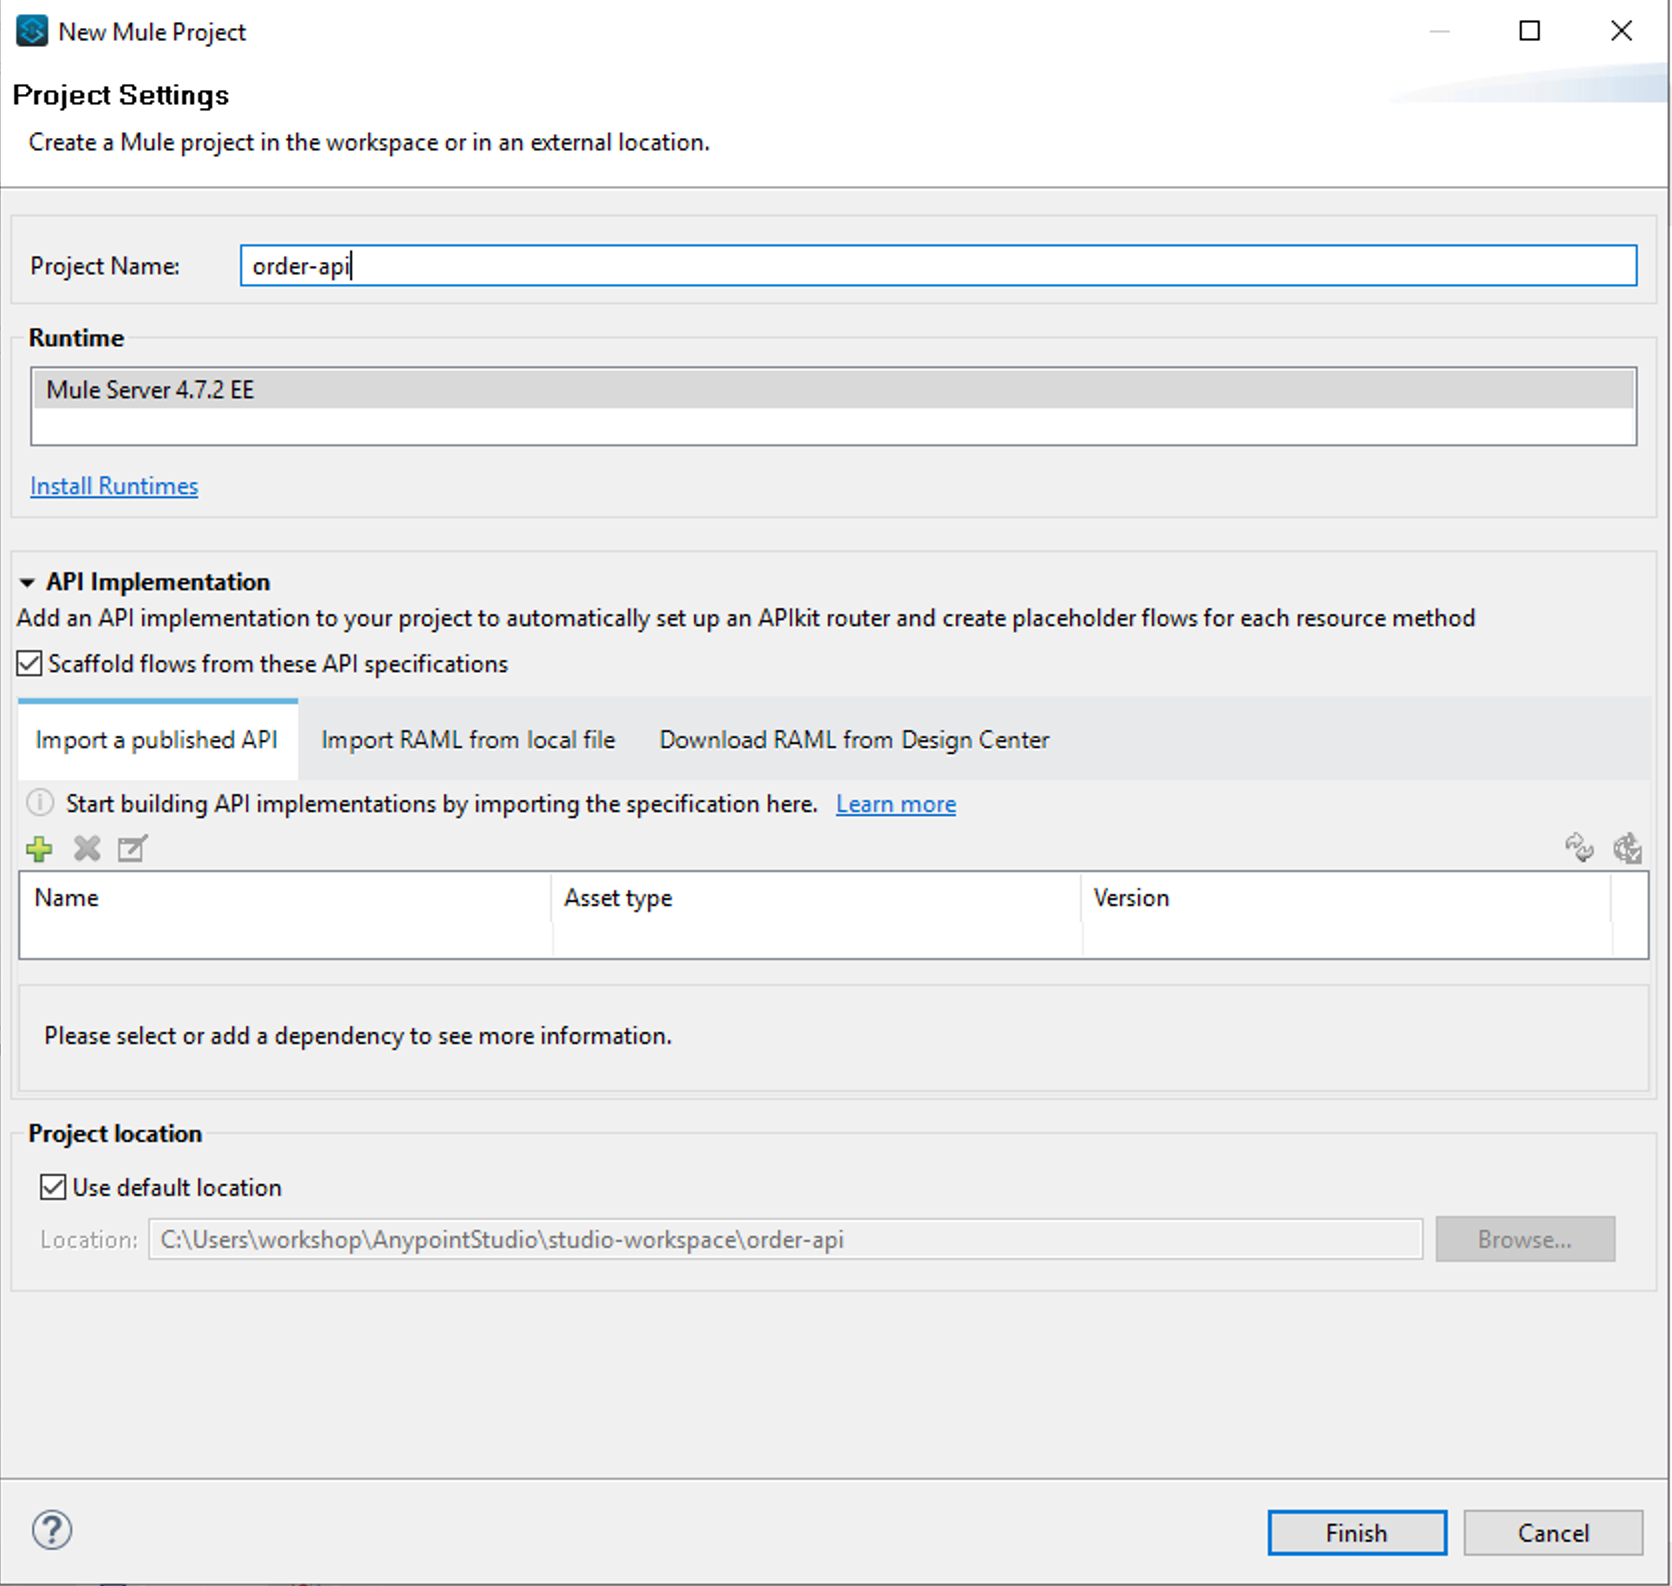
From Anypoint Studio’s menu, select File > New > Mule Project to create a New Mule project. A Window will pop-up to define the details of this new application.
Give the project the name order-api
Select the Mule Server 4.7.2 EE (or latest version available).
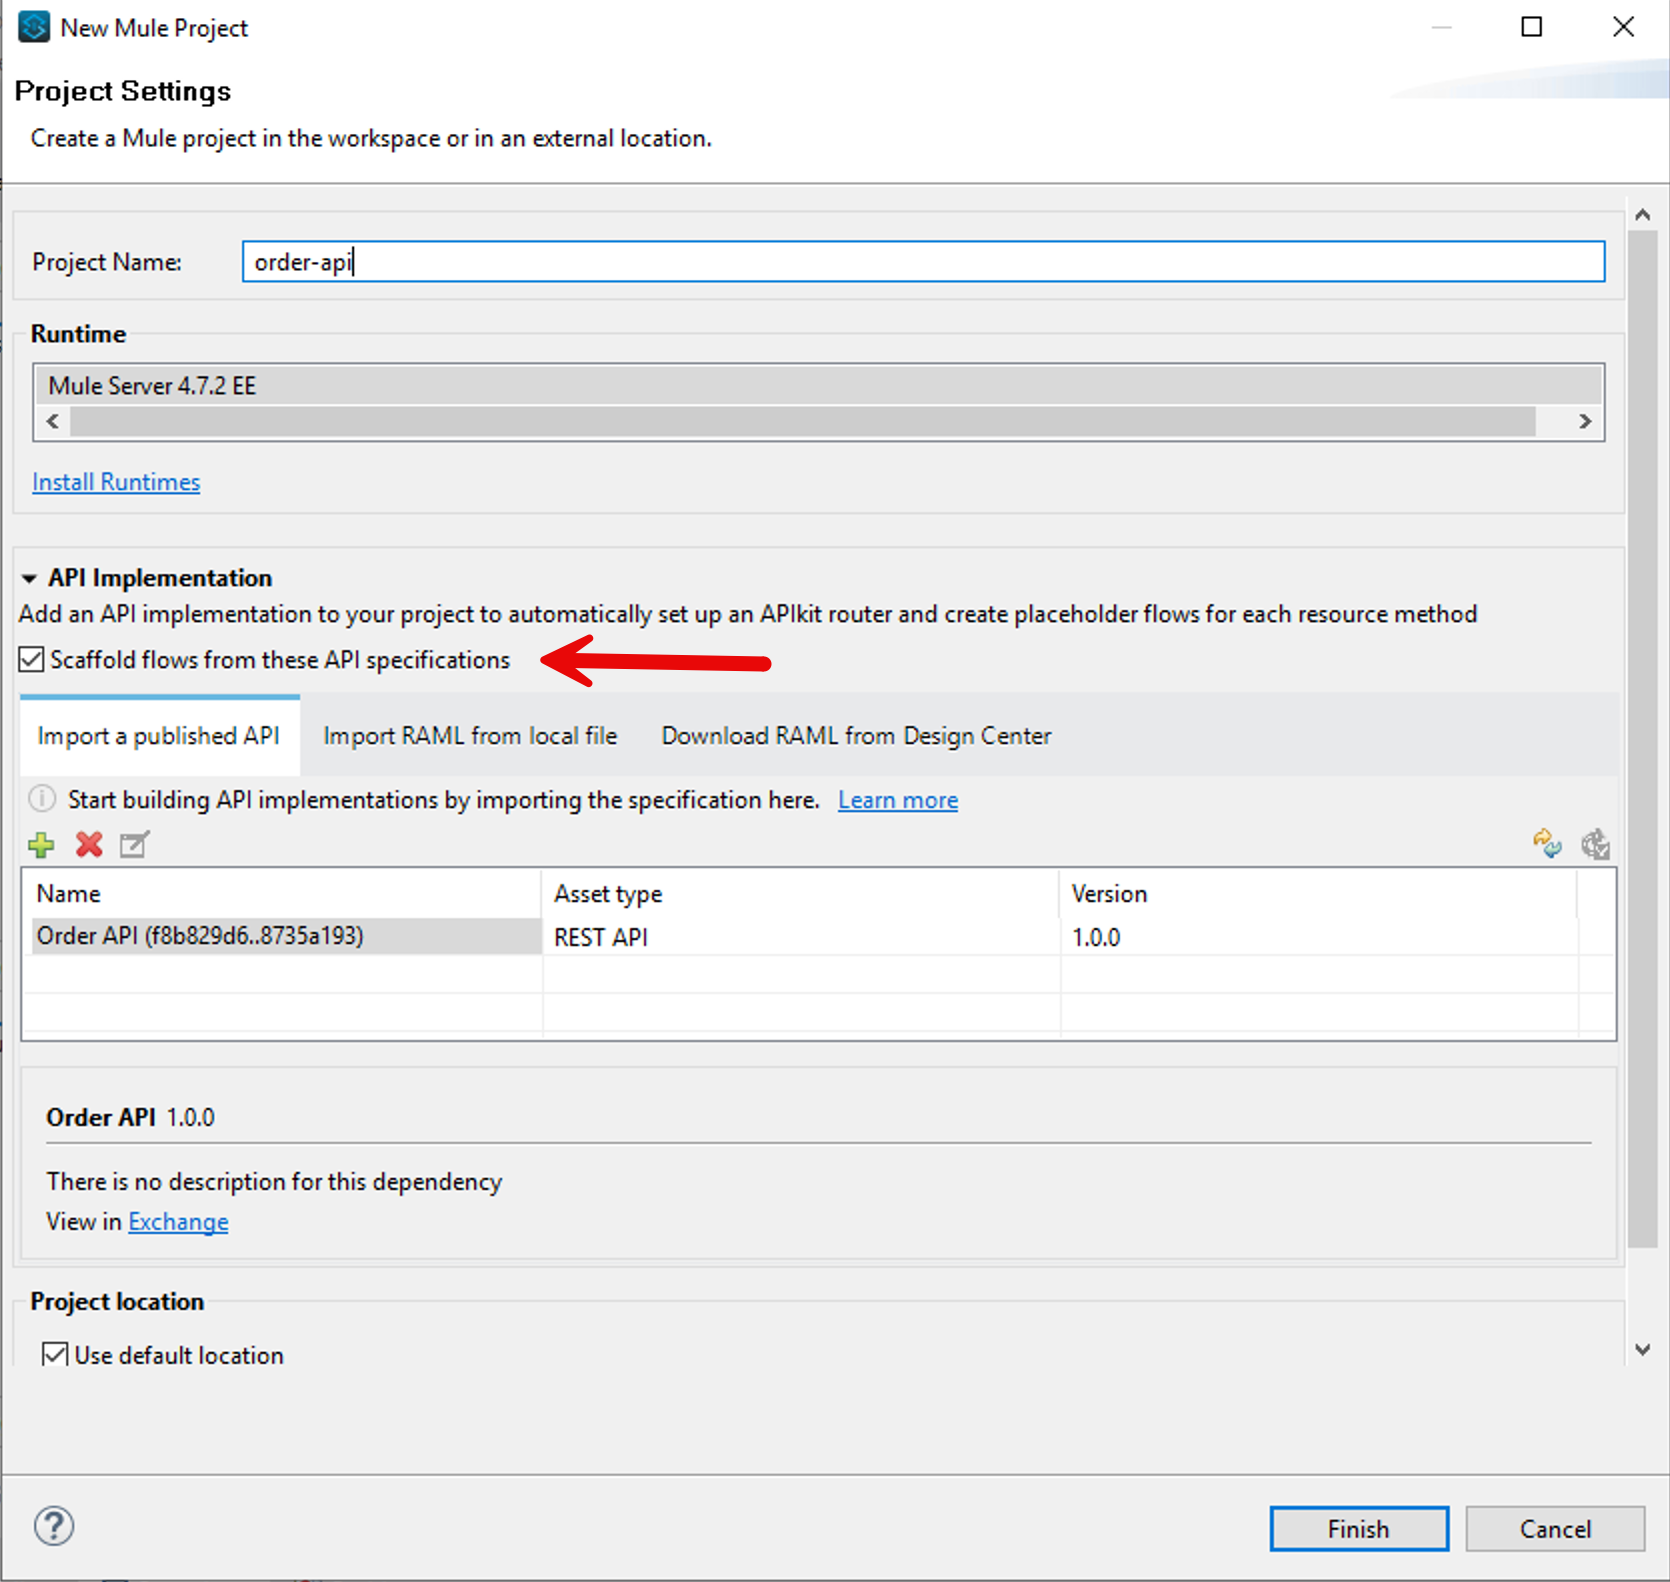
Under Import a published API we are going to import the RAML Spec from Exchange. Click on the “+” button and select from Exchange
Once you clicked there, you will see a new window. If you don’t see any username. You need to login to the Anypoint Platform. So click on the Add Account button and follow the instructions as done in Module 2.
This is the same thing you did in the last module. Search and select Order API

Be sure when you select the Order API. Validate that the Publisher has the name of the workshop business group.
Press Finish.
Check everything is fine. Be sure that the Scaffold flows from these API Specifications is checked and press on Finish
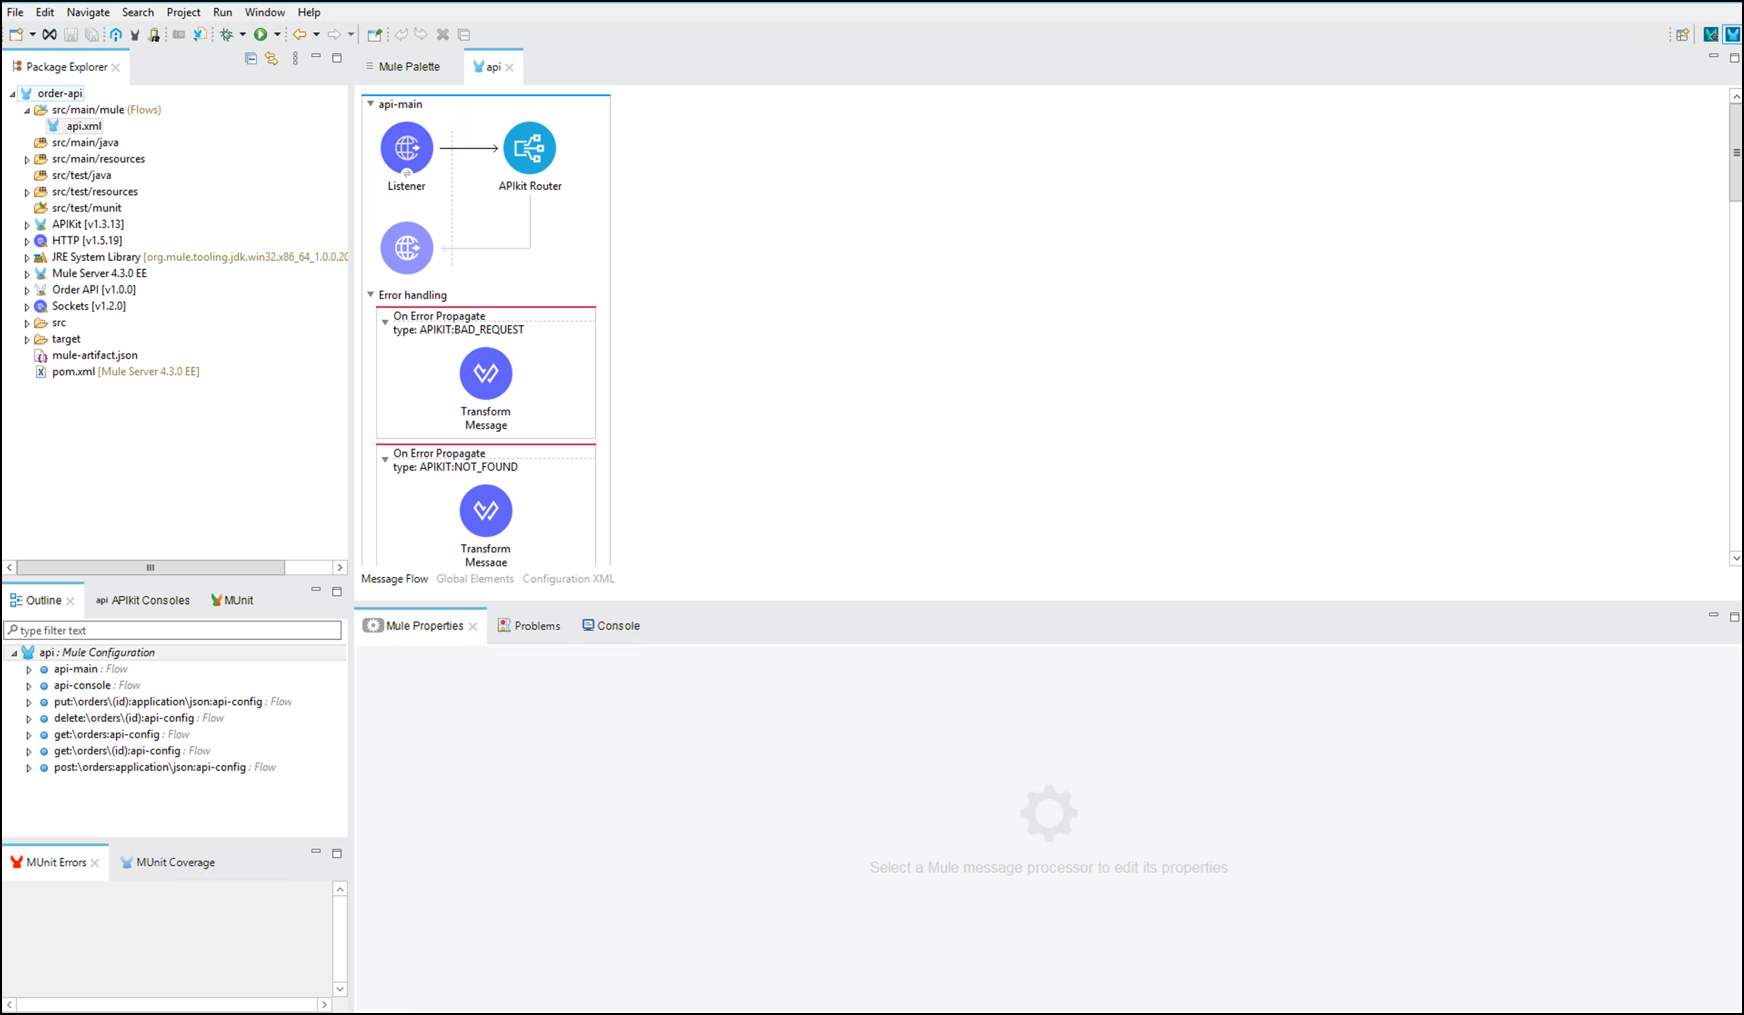
APIkit creates your new Anypoint Studio project with a generated implementation based on your API specification. The generated configuration implements the inbound HTTP listener, as well as, all the resources, request/response data type metadata, among other things.
Step 2: Run the API
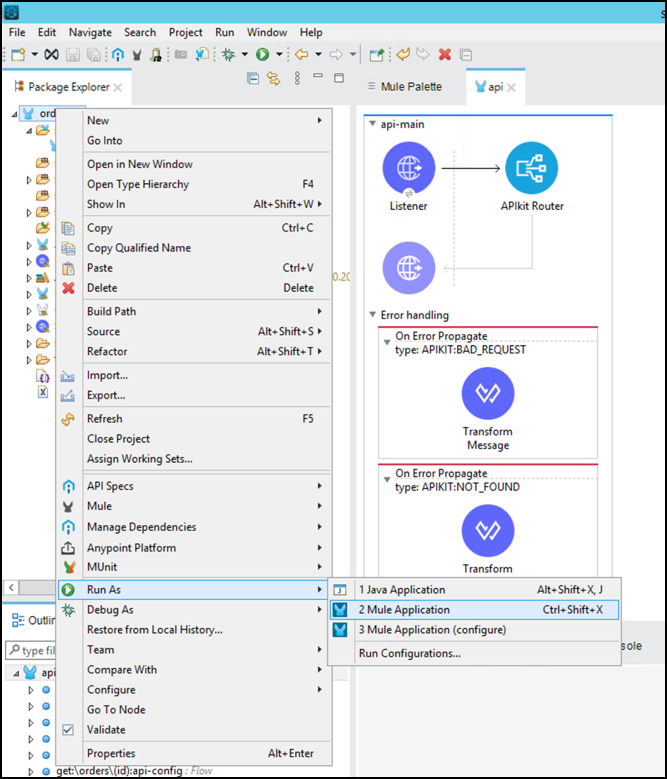
To test the API, let’s run it within Studio. Right click on the application in the Package Explorer view.
Select Run As > Mule Application. (Feel free to skip this if you’ve done this in the previous lab)
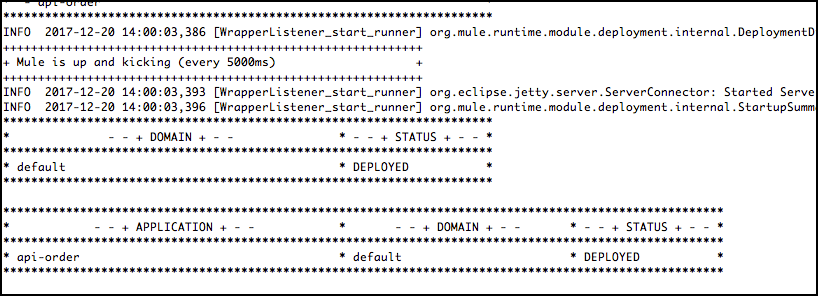
Anypoint Studio deployed this application to an embedded Mule run-time. There is no need to deploy to a separate Mule server environment. The developer will be able to develop and test the application locally until it’s ready to be deployed to a shared development or upper environments.
If the application is deployed successfully, you should see a message like the one in the picture below. If this is the case, continue.
Test the application using the APIkit Console. You will see a link to the console in a new tab. Click on the link to bring up the console in a browser.
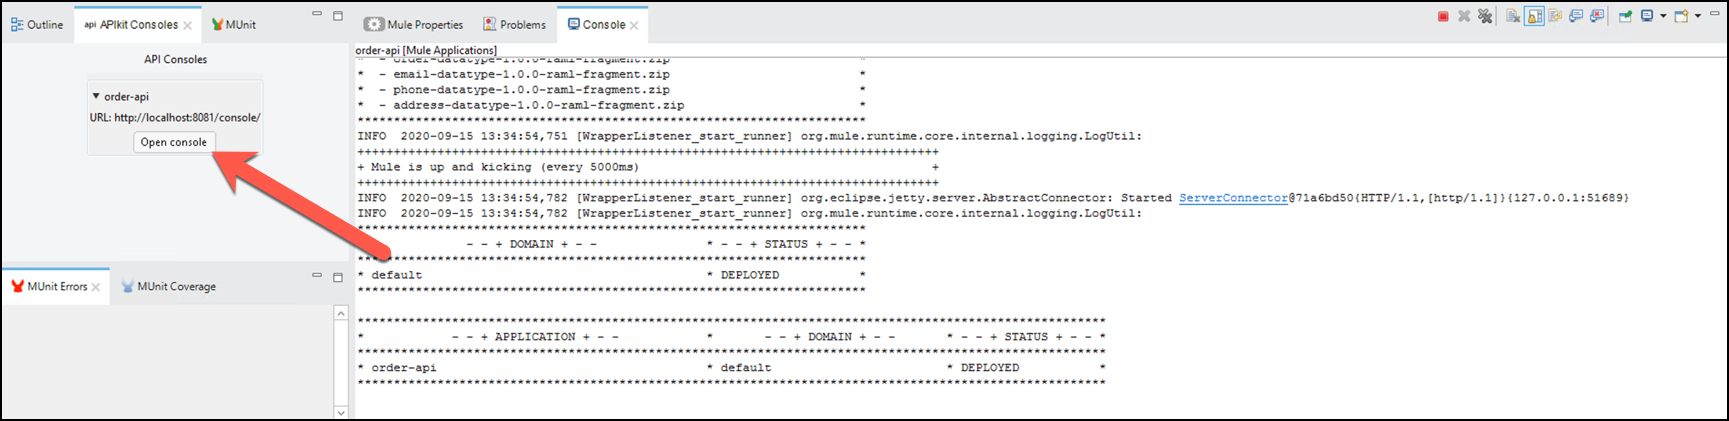
The console will look like this in the browser.
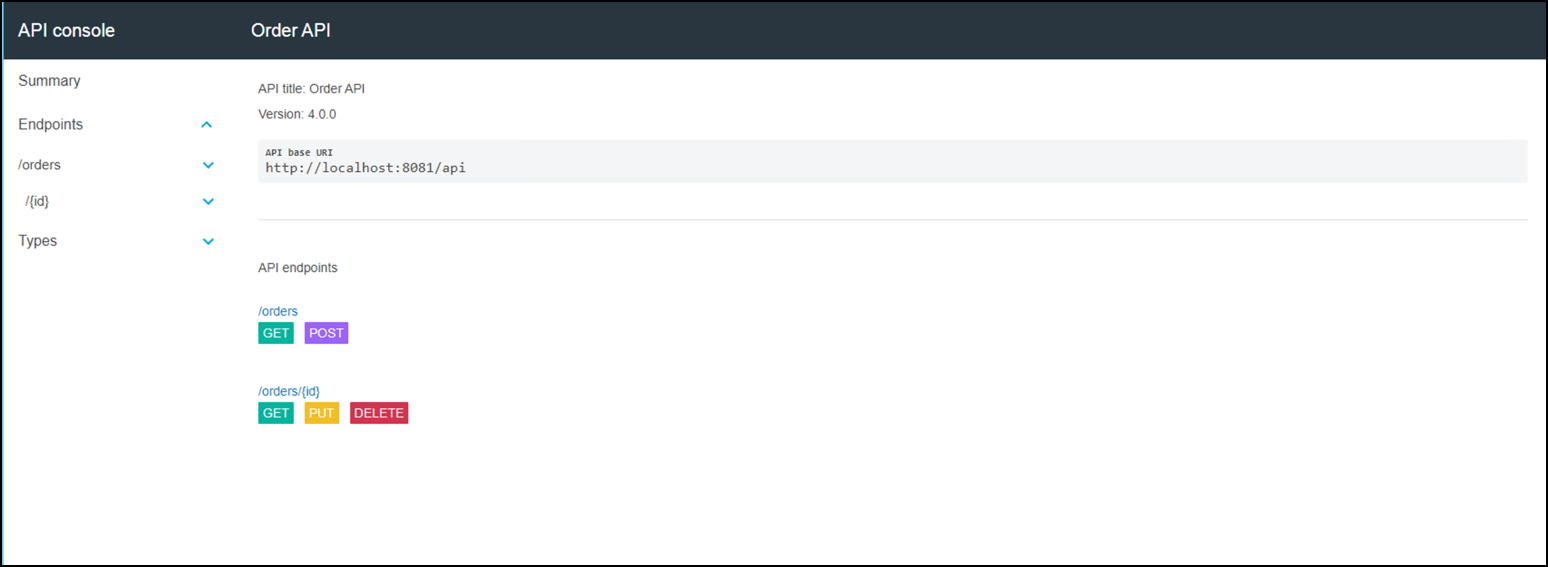
Click the POST tab and test the customer creation. This will allow you to test the Orders resource(
/orders)using the Create an Order(POST) method. Make sure you explore the Parameters, Headers, and Body tabs on this page to see its contents.In the Accept field complete with
application/json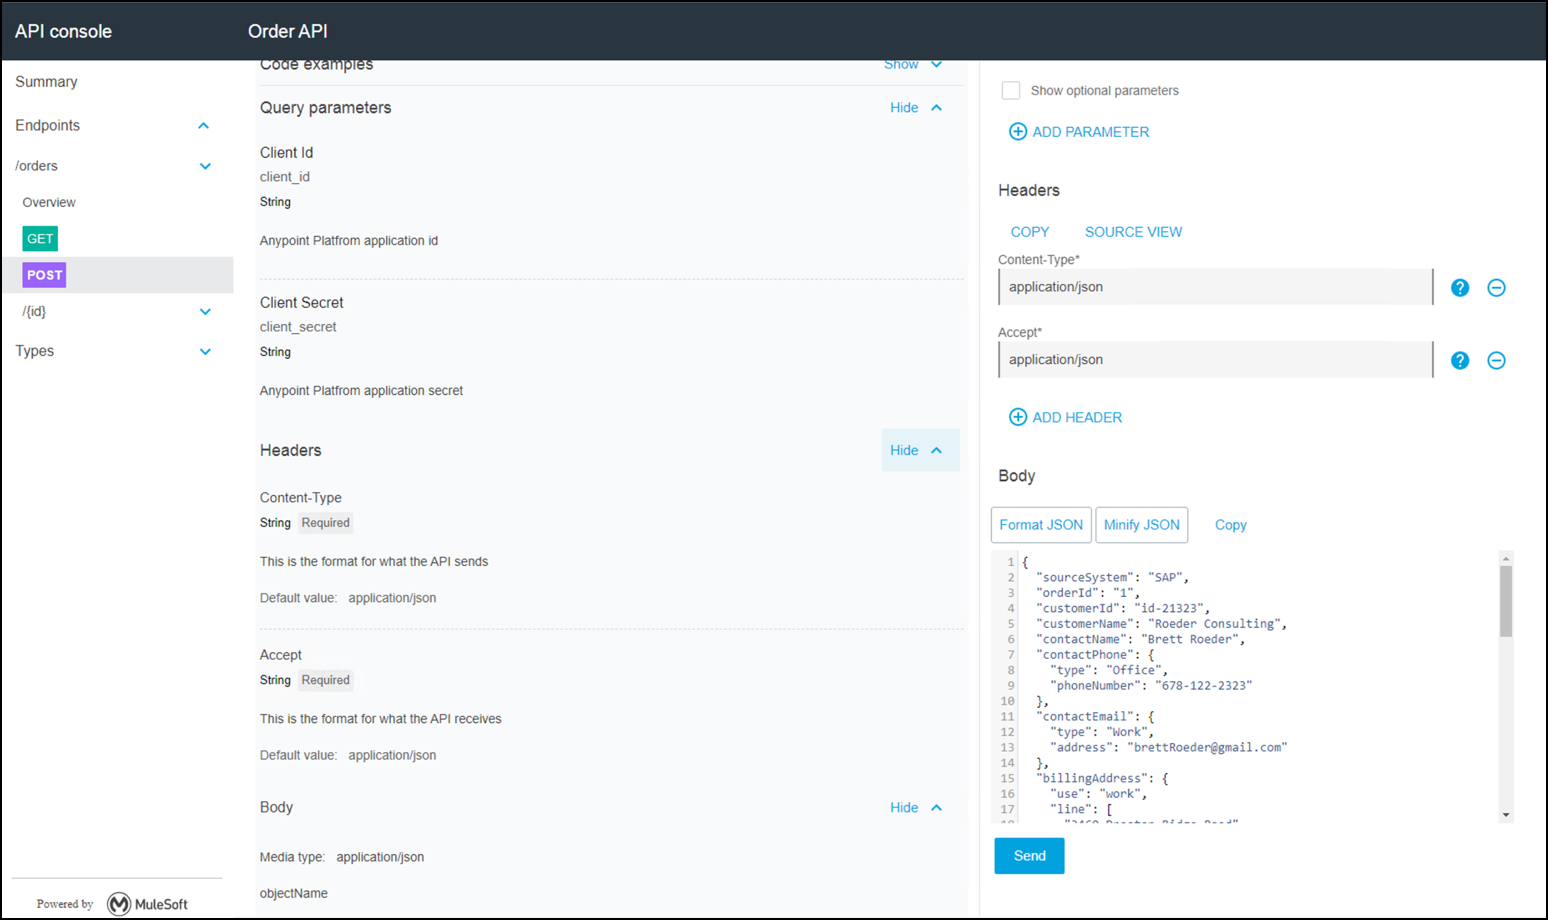
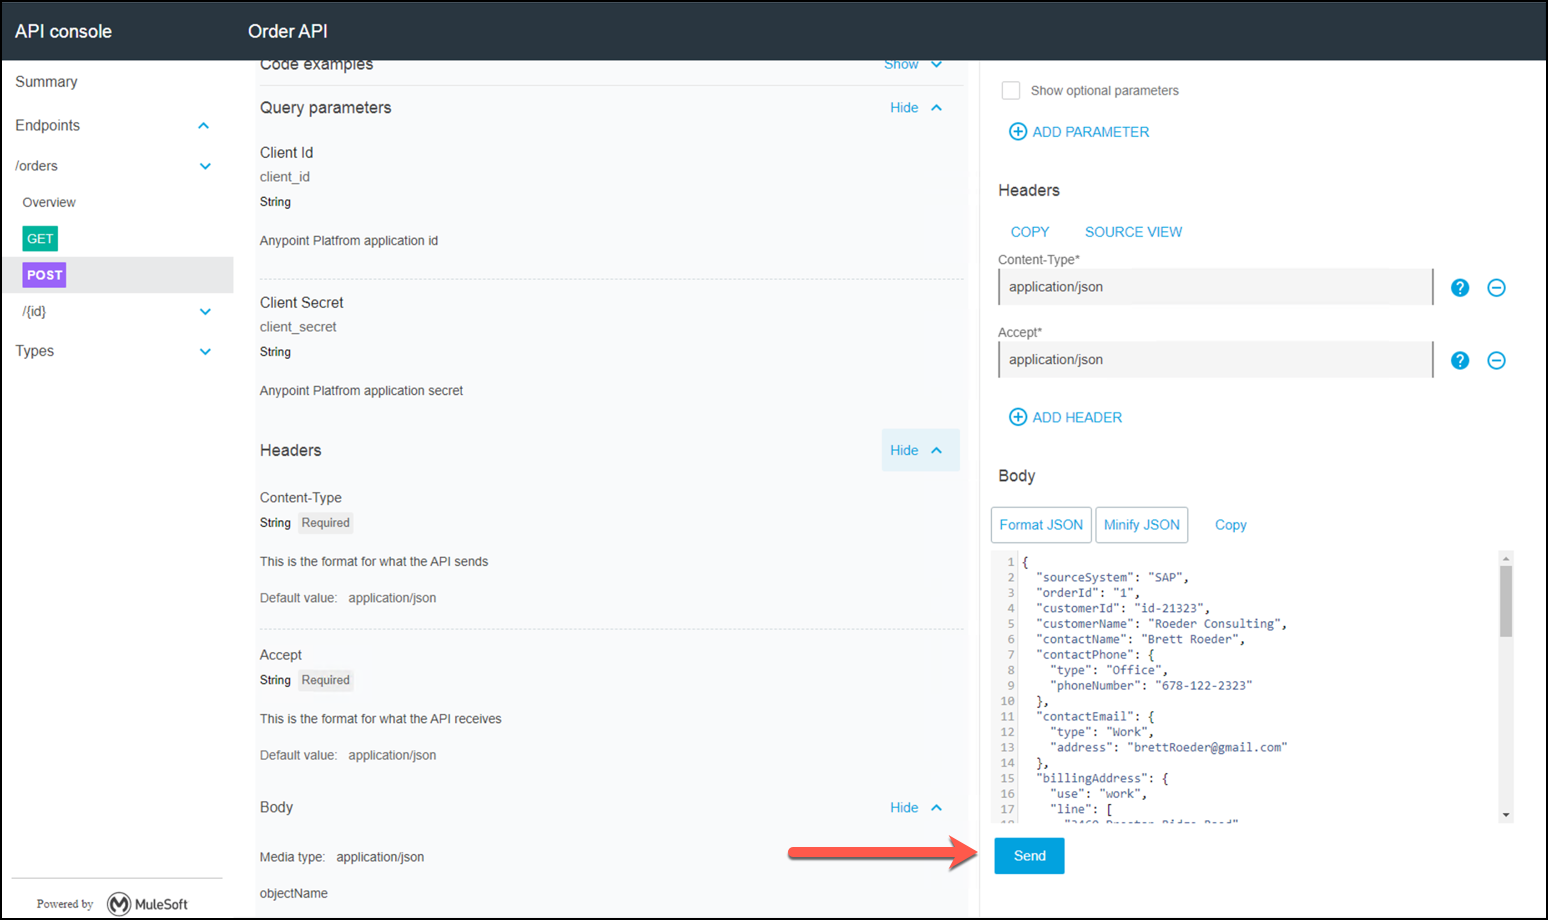
You will notice the request body is a pre-populated payload shown in the Body tab. Now Click on the SEND button.
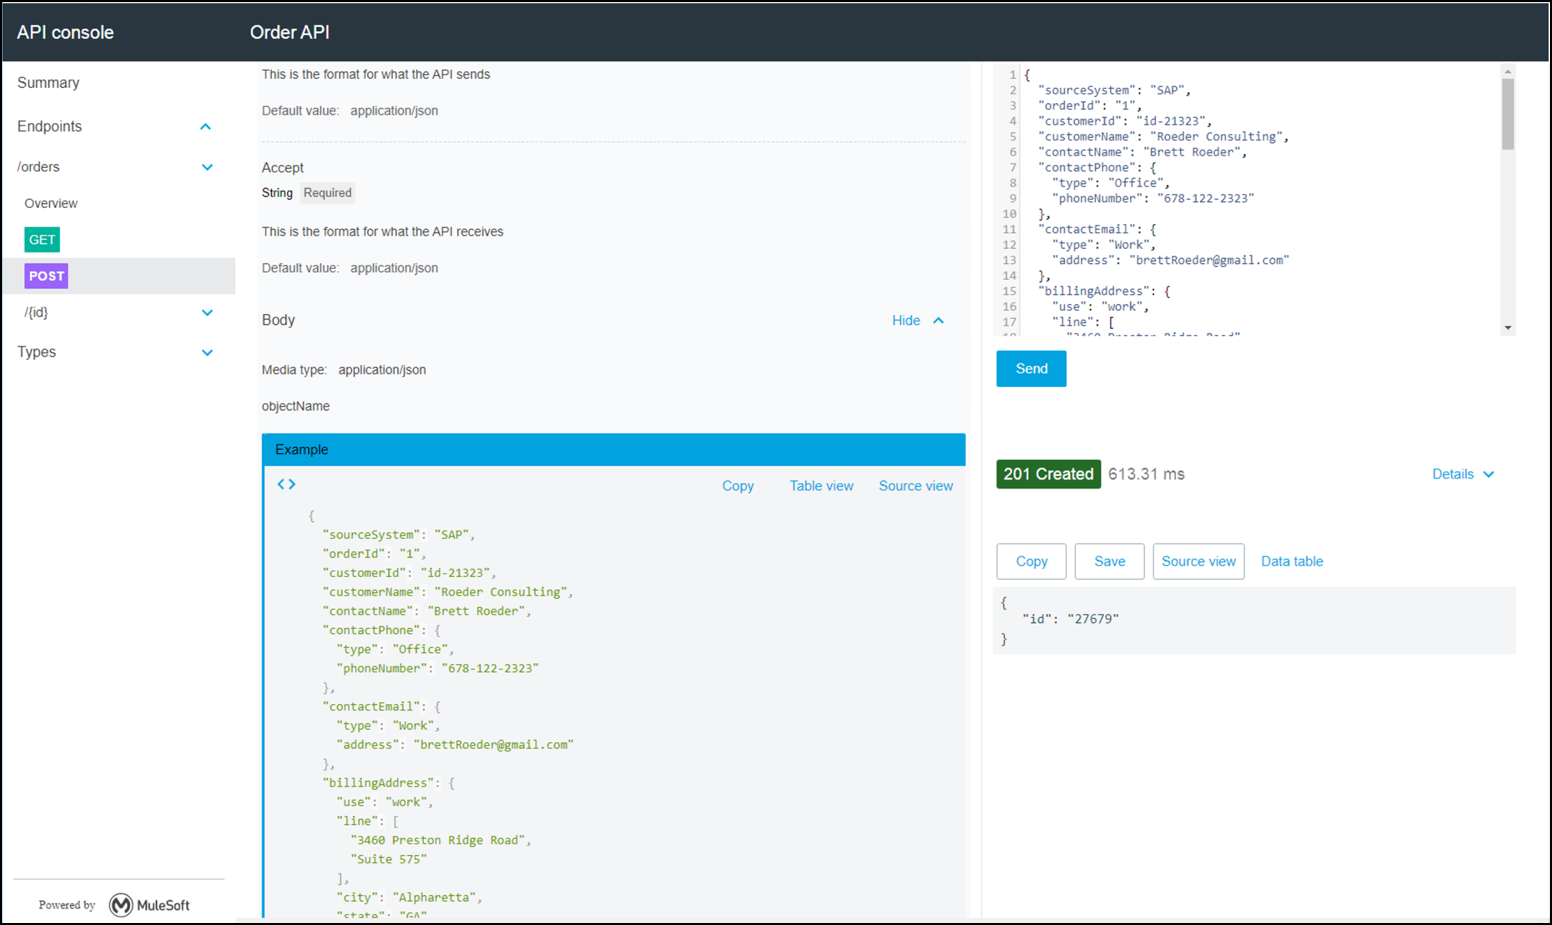
After hitting the SEND request of a POST method, you should see an “example” response below. Scroll down in the third panel and you will find it. Remember this is no longer a mocking service responding. It is a live application deployed to a local Mule run-time server. You just tested your end-to-end API running in your environment.
Go back to Anypoint Studio, under the Console tab and press the red button to stop the Mule run-time server.

Summary
In this lab, you completed the following steps:
We used the RAML specification to define our API and auto-generated a skeleton project to implement the API. This lab shows how APIkit quickly allows developers to import the API designed REST API (RAML and supporting artifacts) to enable MuleSoft flow development and testing. We also ran the Order API by using RAML specification designed to GET Orders info, POST (create) Order(s), GET Order by ID, PUT (update) Order by ID and DELETE Order by ID. We leveraged RAML for a design first approach. This significantly speeds up end to end development. Additionally, we tested the API from a browser to simulate a real client of the API. To learn more about RAML follow this tutorial.
See the APIkit doc for more information.
Congratulations! You have completed Lab 1.
Please proceed to Lab 2